Home Blog Page 31

Tips On How To Connect iphone To Pioneer Radio

0

Pioneer radio is a well-known car stereo with impressive features that make them a popular choice for many car owners. They combine advanced music features, excellent sound quality, and a sleek design to provide a pleasant listening experience.

To play music and perform routine functions like making and receiving calls, you can connect your iPhone to a Pioneer radio. This article will show you how. It will also offer troubleshooting tips to resolve connection issues with your car stereo.

How To Connect iPhone To Pioneer Radio

You can connect your iPhone to Pioneer radio in three ways: through Bluetooth, using a cable, and via the CarPlay app.

Connecting via Bluetooth:

Ensure your iPhone and Pioneer radio is in range. Then, turn on the Bluetooth on your iPhone and select “Pioneer” in the list of possible devices.

Select “iPhone” in the list of available devices on your Pioneer radio. If you’ve previously linked both devices, they’ll connect immediately. Otherwise, both devices will require a PIN, which you’ll find in the device’s manual or online.

Tip: Ensure your car is in park mode (for automatic transmission) before initiating a Bluetooth connection. Most times, if your vehicle isn’t in park mode, the Bluetooth icon on your Pioneer radio will appear faded.

Using a Cable:

This is perhaps the simplest way to connect an iPhone to Pioneer radio. You can connect your iPhone by inserting an appropriate data cable into the USB port of your car’s stereo.

The port usually situates behind the stereo system. But some radio models offer a front-panel USB port, which is a more convenient choice. If you connect a cable and nothing appears on the screen, the cord is either unsuitable for the connection or has a malfunction.

A successful data cable connection will display a synchronized window on the Pioneer radio. This feature even allows you to watch TV while driving.

Connecting via CarPlay:

CarPlay allows you to link your radio and smartphone. CarPlay is available on the most recent car stereos. To use CarPlay, connect your iPhone to your Pioneer radio by Bluetooth or WiFi.

CarPlay is available on Apple Store if you don’t have it installed on your phone. If you have installed it, go to ‘General’ in your iPhone’s settings and tap on the CarPlay option. It will open a window searching for compatible devices. 

Now, go to the home screen of your car stereo. Select the phone-like symbol to open a window searching for devices. Choose your iPhone’s name in the search window to generate a Bluetooth pairing password.

Finally, you’ll see a pop-up message asking you to allow the Pioneer car stereo to connect with your iPhone. Select ‘Yes’ or ‘Allow.’

Troubleshooting Your Pioneer Radio

You may encounter a few problems before and after connecting your iPhone to Pioneer radio. For example, your phone may not establish a connection or play sound after pairing with the stereo. This section offers troubleshooting hacks for some connectivity problems with iPhones and Pioneer radios.

Connection problems:

When trying to connect, you may see error messages like Network problem, Can’t connect, or iPhone halted. Consider the following tips.

  • Verify that your iPhone’s Bluetooth is on and working. The pioneer car stereo may require turning it off and back on.
  • Reboot your iPhone. That way, your phone’s software programs can restart.
  • Sometimes, you may need to disconnect the positive terminal of the automobile battery for a few minutes to restart your radio.
  • Check for software. Go Settings > General > Software Update. If there’s an update available, download and install it.
  • Clear the Bluetooth connection history and re-add the car stereo. Go to the Bluetooth options in the phone’s settings and information icon, which displays the car radio details. Select ‘Forget This Device,’ then search again and add it.
  • You may need to restart your iPhone. Hold down the sleep/wake and home buttons until the Apple logo appears.
  • Resetting your iPhone’s network settings may ultimately resolve the problem. Note that this will erase your WiFi history and password. To do this, go to Settings > General > Reset > Reset Network Settings.
  • If none of the above work, connect with another iPhone. If it works, contact Apple. Contact the car stereo manufacturer if another device doesn’t work.

Music not playing after connection:

Sometimes, your radio may not play any sound even after successfully connecting both devices. Try the following hacks to resolve the problem.

  • First, confirm that your speaker volume is not on mute. Turn it up if it’s low or on no sound.
  • Your car music may not play if your media audio setting is off. To turn it on, go to Settings > Sound when you’ve connected your phone to the stereo and look for the Play media option below the Media Volume Slider. You may also try disabling the HD Audio option to see if that helps.

About Pioneer Radio

Pioneer is one of the leading providers of car audio equipment in Japan. Pioneer is a Japanese multinational corporation specializing in researching, developing, and manufacturing electronic products.

They also provide home audio equipment and DJ gear. Pioneer is most well known for its high-quality speakers and amplifiers.

Founded by Masaru Ibuka and Akio Morita, Pioneer has been around since 1938, when they first started as an electrical business called Denki Tsushin Kenkyujo Ltd.

Some of the advantages of Pioneer radio are that it’s easy to use, has a lot of features, and it’s compatible with other apps on your phones, such as Spotify or Apple Music.

Pioneer’s latest product, the R-05HR, is a high-performance receiver compatible with an iPhone via a wireless connection. It has a built-in speaker and mic to function as a recorder and a music player.

Pioneer’s R-05HR is one of the most advanced receivers on the market today, providing high-quality sound for all of your listening needs.

The Pioneer AppRadio

AppRadio is Pioneer’s smartphone control app. AppRadio was released in 2011 and has had several revisions. The original release was solely compatible with iOS smartphones, but recent hardware and software versions also support Android devices.

AppRadio is another hands-free method to use your phone. It gives you the same access to your phone’s music and lets you select songs and control playback from the head unit’s touchscreen, much like an iPod.

AppRadio also allows you to access your phone’s address book, calendar, and other data on-screen. This capability is available on many OEM infotainment systems. However, AppRadio’s basic design significantly resembles iOS.

Depending on the head unit and smartphone model, you may connect through Bluetooth or a physical connector. The level of integration will vary depending on the head unit and phone, but generally, any iPhone 4 or 4S will operate with any AppRadio head unit.

Compatibility issues arise with the iPhone 5 and Android phones. First version AppRadio head units won’t operate with iPhone 5 or Android. Pioneer maintains a list of supported Android handsets.

These head units can run a range of additional infotainment-style apps apart from the AppRadio app, including free and paid options.

Features Of Pioneer Radio

The Pioneer car radio has some features that make it stand out from other in-car entertainment systems. It provides a range of customization options for your music, such as EQ presets and sound effects, and also allows you to listen to live FM radio stations from around the world.

Modern Pioneer car stereos also include the following features.

Touchscreen display:

Newer models feature an HD touchscreen display and tuning options. Depending on your needs, you can move the screen to the left, right, backward, or forward.

Connectivity: Pioneer radios provide Bluetooth, USB cable, and AUX connection options. With a Bluetooth connection, you can make hands-free calls stream podcasts and audiobooks from your stereo. Some radios come with remote control and are compatible with the iDataLink Maestro module.

Android Auto:

This feature allows you to connect your Android device to your stereo and use voice commands to access Google services such as Music, Maps, Weather, and other apps.

CarPlay:

As we’ve mentioned earlier, this feature helps you connect your iPhone to your stereo. Once connected, you can make and receive calls, send messages to play music, make phone calls, send messages, and access third-party apps on the car audio screen.

Amazon Alexa:

With Alexa, you can play music, check the weather, and control your home devices, among other things.

Audio formats:

Pioneer radios support WMA, DSD AAC, and high-resolution FLAC files. Some receivers include a 13-band equalization.

Built-in amplifier:

Some radios have a built-in MOSFET amplifier with three preamplifier outputs for connecting audio drivers. 

Cameras:

Some models feature two front and rear cameras and rearview parking lines that aid you in driving safely in congested areas.

Conclusion

Since the thirties, Pioneer radios have been here with a sizable market share in the car radio industry. Recent models include connectivity options for smartphones.

You can connect your iPhone to Pioneer radio using a data cable, Bluetooth, or the CarPlay app. Using a data cable is the simplest method and only requires a compatible cord.

Connection issues may with wireless connections like Bluetooth and CarPlay. Tips like restarting the phone, clearing Bluetooth history, or even updating your software might help solve the problem. 

Why Is One Speaker Louder Than The Other? Check Out The Reason

0

Speakers help convert audio signals to sound. The sounds produced by speakers include music but aren’t limited to music alone. 

Sometimes one of two speakers in your audio system may produce less sound than the other. This occurrence may leave you concerned because you expect both speakers to give you equal sound levels and quality. 

So, why does this happen? Let’s find out. 

Why Is One Speaker Louder Than The Other? 

Generally, two speakers connect to an audio system’s amplifier to get the best from an audio system. This connection allows the system to produce high-quality sound. 

Commonly, one of the two speakers connected may not function as well as the other when it comes to sound production. This occurrence may result from poor connections, faulty signals, or poor speaker quality. 

It could be any of the following reasons. So, you would need to run a quick check to find out what the issue is and if it is something you can quickly fix. It usually is something you can fix. 

Keep reading to learn more about this topic and other helpful additional information. 

What If One Speaker Is Louder Than The Other? 

As we said, there are different reasons why this may happen. The most important thing is knowing what to do when this happens. Here are things to do:

Examine the speakers:

You need to ensure that the speakers don’t have problems. If there is a slight chance that your speaker is of low quality, then you should check your speakers to be sure the fault isn’t from the speakers. 

Also, check your speakers if you have been using them for extended periods because, just like many electrical appliances, the quality of your speakers may drop from extended use. 

When you’re sure that the fault isn’t from your speaker, you can now proceed to examine other possible causes of concern. 

Exchange the speakers:

You can easily swap your speakers’ connections. Take speaker A to speaker B’s position. Then connect speaker A’s wire to speaker B and vice versa. 

Check your wire ends to ensure they are in good condition before the exchange. 

If the sounds improve and no one is louder than the other, it is likely a connection problem. If the sound remains the same, it might be a problem with the speaker or a signal problem. 

Examine your wires:

If one speaker is louder than the other, the fault may be from the wires connecting the speaker to the amplifier. This issue is one of the most common reasons why one speaker is louder than the other. 

Each speaker has at least a wire connected to the amplifier. Check if the wire is damaged or connecting loosely to the amplifier. A damaged wire may be why one speaker isn’t as loud as the other. 

When you have confirmed that the wired connection isn’t the issue, you can move on to carrying out other checks. 

Examine your connections:

Checking your wire connection is as important as checking your wires. So, don’t just check for wire damages. Look out for loose connections. The speaker cable may be connecting loosely to the amplifier, and that’s enough to reduce the sound produced by a speaker. 

Buy a new cable or replace the connector in the amplifier if it needs replacement. 

Check for faults in the signal source:

If you have examined everything that needs examining, especially the wires and the wire connections. You’ve exchanged the speakers and checked that they aren’t bad. The next thing is to ensure that the signal source is fully functional. 

The audio signal source enables the transfer of audio signals from source to output. The speakers get connected to the output to convert electrical signals to sound. 

So, to be loud enough, the speaker needs to receive adequate power from the output. 

Are Two Speakers Louder Than One? 

An additional speaker usually means more volume for home theatres and many other audio systems. So, there is a high chance of increased sound production for every quality speaker you introduce to the system. 

So, with every speaker, the sound intensity increases, and this automatically increases loudness by about 3 decibels. This increase happens when the speakers are similar and of high quality. 

Tips To Get The Best Sound From Your Speakers 

You don’t need too many speakers:

Resist the urge to splurge on too many speakers. You can opt for a 2.1 channel because two or three speakers are enough to give you a good sound experience. Two speakers for stereo sound, that’s the left and right speakers. You can skip the third, which could be a subwoofer for additional bass. 

You can listen to your music and enjoy it with just these three speakers. Many people opt for a full surround sound which consists of 5 speakers and a subwoofer. This choice isn’t bad, but a 2.1 channel can deliver on that at an affordable price if you need your speakers for the music alone. 

Use the equilateral triangle arrangement:

You must note that every space has a sweet spot where listeners can get the best experience from the speakers. For your living room experts, advise that you use the equilateral arrangement to get the best results from your sound system. 

So, place your left and right speakers at an equal distance from each other and your position. This arrangement gives free flow to sound waves and prevents them from overlapping. 

Use amplifiers:

Fundamentally, amplifiers are as their name implies. They amplify sounds, allowing extra speakers to produce additional volume. Amplifiers can work alone or with a more extensive audio system that consists of a pre-amp and other components. 

Close your curtains:

If you’re observant, you would’ve probably noticed that you would get the best sound experience from your system when you close your curtains or blinds. 

This difference usually stems from how sound interacts with glass. You would expect that the glass would absorb the sound and cause it to bounce off, but that’s not the case. 

Closing your curtains can reduce unnecessary reflections. Also, you can take it up a notch by reducing the number of glass surfaces in your living room area or where you set up your sound system. 

Let your speakers face you slightly:

Many of the speakers available now are directional, and you get the best sound experience when you angle them towards you. So, let the speakers (the right and the left) face where you would usually sit. 

If you’re using a 2.1 sound channel or any channel with a subwoofer, you don’t need to angle the subwoofer. This rule primarily applies to the right and left speaker alone. 

To figure out the best place for your subwoofer, you need to find what part of the room would get the best bass experience. As a result, you may have to move the subwoofer multiple times.

Use stands for your bookshelf speakers:

It is easy to believe that the best position for these speakers is on a bookshelf because of its name. Don’t be deceived! They are most likely called bookshelf speakers because they are usually on elevated surfaces. 

Placing it on a bookshelf with books can cause sound redirection. It can also cause unnecessary sound distortions. So, opt for a stand or get a standing speaker instead. 

What To Consider When Buying A Speaker

In setting up your audio system, you should know that your choice of speakers largely determines your sound experience. There are so many factors to consider when buying a speaker. Here are some of the most important:

The type of speakers:

There are different types of speakers. Each brand of speaker usually has a wide range of styles available. You must know what kind of speaker you need to meet your sound system needs. 

Some of the different speaker types available include a subwoofer, floor-standing, in-wall, bookshelf speakers, portable, satellite, soundbar, etc. Some are wireless, and others have wires. It all depends on what you want and what you want to get out of your sound system. 

Sound quality:

This factor, too, is dependent on your choices because surprisingly good quality is subjective. What you consider quality sound may differ from somebody else’s take. 

So, you should go to the store and try out different speakers with music you’re familiar with. Take your flash drive or mobile device so you can connect to different speakers and try them out. 

Listen over and over again with different songs before you make a choice. 

The chosen space:

The room and the items in the room can affect the distribution of sound waves. The size of the room, its content, and its dimension are essential factors to consider before purchasing your speakers. 

Conclusion

Speakers are significant components of your sound system, and they are responsible for converting audio signals to sound to give you a good listening experience. 

This post discusses some of the best ways to get the most of your speakers. It also answers the question, “why is one speaker louder than the other?” 

You May Like These Articles As Well:

What Is A Google Subscriber? A Mini Guide To Google Subscriber Number Usage

Why Does Steam Always Update: Everything You Need To Know About Steam Updates

How To Tell If A Wi-Fi Card Is Bad: All You Need To Know About A Defective Wi-Fi Card

Can Google Forms Detect Cheating? Ways To Prevent Cheating With Google Forms

0

Teachers and other users of Google forms can do many things with its unique features. Since students always come up with different ways of cheating to get better grades in tests and exams, teachers must also find ways to stop such. Many Google forms users often wonder if they have limited features in curtailing cheating in any form. Though the forms can allow you to create content and manage feedbacks, they still have their limitations.

So, Can Google Forms Detect Cheating?

No, Google forms don’t come with the capabilities to detect cheating, but they offer some features that can help fight to cheat.

How Do Students Try To Cheat On Google Forms?

Students have numerous ways through which they try to cheat on Google forms; for instance, they can quickly open a tab to look for answers to quizzes over the internet. Some students may preview the Google forms before a class and get feedback on selected answers. Some students may decide to send questions on Google forms to their friends who can provide answers. Once students get answers to questions on Google forms, they have a feature where they can share such with their friends.

Some students can take screenshots of Google forms questions and send them to friends; some may navigate to the HTML source page of such questions to view the answers to the questions- the tech-savvy students mainly use this particular cheating option. Sometimes, students may look at their friends’ screens to find answers to questions, and in some cases, they can right-click on some of the words of the questions to check the spellings and definitions.

Once they discover answers to questions on Google forms, cheating students decide to share answers with their classmates during their passing time.

Google Forms- Getting Started And Creating Your First Quiz

You may want to sign up for a Google account if you don’t have one already, then you can go to the G Drive, where you can create Google forms.

To create a new Google form, you need to click on the New image and then select More, and from there, you can pick your form format. You may click on the link for forms if you want more Google form template options.

You can go for the blank form or a pre-loaded form option which is even better for beginner users to get used to the form creation. The options you will see here include quizzes, assessments, and worksheets. If you have already signed up for a classroom, your user interface may look different because features like your school department may appear.

The quiz feature is one of the most straightforward ways of using the Google forms feature. All you have to do is create that new form and then choose the blank quiz option from the available templates. You can title your quiz and give it a short description for easy identity. From here, you can use the drop-down menu to choose the answer style; for instance, you can opt for the multiple-choice answer option.

Once you set up the answer style, the next step is to set up the question, and below the question style, you can set up the answer style, which could be a write-in option. You may also add the answer feedback, such as the one that marks answers immediately and give the correct answer.

Suggested Ways To Stop Cheating On Google Forms

There are some expert ways of stopping cheating on Google forms, and they include the following;

1. Shuffle the Google Forms Answer Choices to Block Students from Getting Answers on Screen

This strategy is perfect for multiple-choice questions. To use this technique and prevent cheating on Google forms, click on the Snowman feature located at the bottom-right corner of the screen, then click on the shuffle order option, and this feature will randomize the Google forms question orders. No two students will have the same question orders with this strategy, especially for multiple-choice questions.

Shuffling the answer choices will make it extremely difficult for screen onlookers to copy answers directly from other students on Google forms. Keep in mind that Google forms provide shuffle order features but using it often can lead to some issues; that is why shuffling answers is recommended more than shuffling questions.

2. Block Assessment Previews with Page Sections

Another way of preventing cheating on Google forms is to add sections to the questions. This may become a necessity, especially if you post the quiz on Google classroom and to all sections earlier in the day.

You may even add a password to make this process even much stronger. One of the easiest ways to handle this issue is to collect the students’ personal information, including names and sections. This information should be on the first page of the form and will require a password that will allow your students to access sections.

You can set up a password with the addition of short-answer posers before you use the data validation that allows you to add a number or phrase. This procedure should not be seen as 100% secure and must not be relied on to save sensitive data.

3. Create Alternative Assessment Paths by Using Page Breaks

There is no question bank feature on Google forms that can create quizzes for your students. Fortunately, you can use a branched form to create a question bank feature.

To activate this feature, you need to create multiple-choice questions that are ungraded. For instance, you can ask the student to pick a color or number. The next step is to set up three to five different sections to the quiz with the use section feature. You can also add as many questions as you can to each section.

The last step is to add a Go-to law that will direct students to another section based on the response they give to the un-graded questions you created earlier.

4. Prevent Cheating on Google Forms with Varying Questions

You can also prevent Google forms cheating by varying your questions style. You may want to consider adding video questions, sequence questions, matching questions, and passage reading.

This means you must not limit yourself with the multiple-choice questions that can leave your students guessing the answers always. When you broaden the types of questions you set, you will make it extremely difficult for the students to cheat. Varying your questions can also help you test the intelligence of your students.

Sequence questions are questions where checkbox grid quizzes type where students are asked to arrange or sequence items within a list. On the other hand, matching questions are multiple-choice questions with grid matching format; these are excellent options for testing vocabulary skills.

The reading passage question format is a type of format where you can use title and text elements or features to add some short essay questions to test students’ comprehension skills. Video questions allow you to test your students’ intelligence levels by asking them to watch a video and then asking them questions on the content they have watched. The video questions can be a great way to test students’ mathematics skills.

Image questions can be used to create questions that test students’ science, mathematics, and social interaction skills. The short answer or free-response question can be multiple-choice questions where students are allowed to provide short answers of two to three sentences to questions.

All these smart question formats will make it difficult for students to cheat because they will have a slightly different perspective, and copying the wrong answer will lead to wrong marks.

5. Use the Locked Quiz Option

The locked quiz mode is one of the features of Google forms you can use in preserving the integrity of your quiz. You can use this locked mode in conjunction with other features on Google forms that can prevent or reduce cheating to the minimum.

With the locked mode on, students will be prevented from getting answers to questions from external resources. The locked mode will disable the students’ tabs, chrome apps, extensions, and screenshots. This feature is available on the settings feature on the Google forms or when you assign a Google classroom.

A combination of two or more of the strategies highlighted below can help you maintain the high integrity of your Google form examinations.

Conclusion

Google forms may not be effective in detecting cheating; however, there are several features you can use here to minimize or stop cheating. You may want to explore all other avenues aside from the ones listed and explained and see which options you can combine to reduce the possibilities of cheating. From researches conducted on Google form features, it seems the locked quick feature has been the most effective way of stopping cheating with the use of Google forms. For other people, a combination of these features has become the most efficient way of stopping cheating.

You May Like These Articles As Well:

How To Find Out Who Sent You An Amazon Package

How To Make Steam Games Open On A Second Monitor: The Gaming World

How To Use A Coax Splitter

Best Am DX Radio For The Money

0

Are you seeking the best AM DX radio to detect and receive radio signals from distant places? Do you want an AM DX radio capable of working at home or while you’re on the go? You’re in the right place!

However, listening to distant stations on an inferior radio can be extremely frustrating. Fortunately, modern technology has made AM-DXing possible by using inexpensive and straightforward transistor radios.

This article provides you with the best AM DX radio list and its outstanding features. You’ll also get information on where and how to use an AM DX radio. 

Keep reading this article for more information on this AM DX radio. 

Best Am Dx Radio

Sangean PR-D7 BK AM Digital Radio

This model has two alarms, an HWS (Humane Wake System) buzzer, and music. 

You don’t have to set the same alarms every day because they will remain in place once you set your alarms. The Sangean radio’s buttons have a soft rubber texture that provides maximum comfort to the user.

In addition, the Sangean PR-D7 radio has a red LED light that most conventional radios on the market lack. The red LED light blinks while the battery is charging, and the light turns off once fully charged.

Features Of The Sangean PR-D7 BK AM Digital Radio

The radio has a telescoping rod that functions as an antenna.

The exterior front of the radio has a glossy black finish.

The Sangean PR-D7 BK radio has a fantastic sleep mode you can use at any time.

The digital tuning knob has excellent sensitivity. 

Retekess V115 Shortwave AM Radio

The Retekess V115 emits a high-quality sound that will make you think it’s a full-fledged sound system with stereo speakers. With this shortwave radio, you can detect even the faintest signals.

The radio displays all the radio frequencies while searching for distant stations worldwide. In addition, it has memory settings to save your preferred AM frequencies.

This ultramodern radio is small enough to fit into a typical breast pocket and directly record audio to a memory card.

A cell phone battery can power the Retkess V115 radio. As a result, you can use the battery to power both the radio and your cell phone. Many high-end radios have just LCD screens. However, this V115 radio has a complete matrix and LCD screens. 

Features Of Retekess V115 Shortwave AM Radio

The rRetekessradio has a 3.5mm aux input, three recording modes, TF card support, an earphone socket, and a USB charging port.

The radio can digitally read out all radio frequencies alongside the MP3 songs playing. 

The SD card has a fantastic playback, providing pleasant refreshment.

C Crane CC Skywave AM Shortwave Radio

C Crane CC Skywave AM Shortwave is the choice radio for emergencies and everyday use. The radio is known for producing high-quality radios for AM Dxing. 

The LED display light and LCD unit identify two waves of similar radio signals. The crane sky-wave radio has an excellent speaker. Overall, is a high-quality radio that includes weather data.

Features Of C Crane CC Skywave AM Shortwave Radio

It has a user-friendly design which provides excellent performance.

It can reduce signal interference while providing excellent service.

It comes with several bandwidths. The radio can cycle effortlessly through the broadest and shortest bandwidth by pressing the bandwidth button.

The crane CC sky-wave radio has an air-band that allows you to hear pilots, crews, and air traffic controllers.

It has a scanning feature that searches for SW broadcast bands, and an alarm clock wakes you up when you want.

The radio has a headphone output that provides excellent sound quality.

Sony ICF-SW7600GR World Band Receiver

 Although quite expensive, this Sony world band receiver radio has high-end features and functionalities, which justifies its price tag.

The manufacturer integrates Synchronous Detection Circuitry into the radio design, which aids in reducing interference and distortion of radio frequencies. Therefore, this radio is best for picking up even distant weak signals.

Furthermore, the Sony ICF-SW7600GR has a battery life of up to two days. This radio displays both UTC and local time, and you also have the luxury of setting alarms for two separate wake-up times matching two different stations. 

Overall, it’s a well-made, tiny, lightweight old radio.

Features Of The Sony ICF-SW7600GR World Band Receiver

The radio has a retractable antenna and an adjustable attenuator control with solid signals.

It has 100 station memory presets and automatic station scanning.

A built-in hold button allows you to tune in to your favorite stations with a single button press.

The radio’s lock-out mechanism prohibits illegal access and use of the buttons while the radio is in your backpack.

It has a lock slider that prevents adjustments and disables the wake-up timings. 

Tecsun PL880 Digital SSB Radio

The Tecsun PL-880 is a Chinese product proven one of the best AM dx radios because of its comprehensive feature set. The Tecsun PL-880 has a central and fine-tuning knob, making it simple to tune all bands. 

One of the best features of the radio antenna is that it comes with a stainless steel telescoping antenna and a wire-type antenna that is 20-ft long. 

This Tecsun radio amplifies weak signals, and a rechargeable battery powers it. Furthermore, it can cover most AM frequencies. Therefore, you’re unlikely to be cut off from specific bandwidths.

Features Of The Tecsun PL880 Digital SSB Radio

It has a 450 mW W audio amplifier and a 3-watt mylar speaker, resulting in crisp high frequencies and audible low radio frequencies. 

It comes with four distinct bandwidth settings, offering you various bandwidth options.

The radio has a 24-hour alarm clock, a sleep timer, a simple tone control, and an external antenna jack.

It has an AM antenna with an inbuilt ferrite bar. In addition, the radio has two tuning knobs: one for quick adjustment and one for fine-tuning.

The tecsun radio has SSB capability with a 10Hz tuning step, output power of 40 mW.

This radio has a charge indicator that shows whether your battery is charging or not. It also displays whether your battery level is full or empty.

Where’s The Best Place To Use AM Dx Radio?

Going to a beach or another large body of water is by far the best spot to DX with your AM radio. Bodies of water usually attract radio transmission signals. Therefore, going to the beach usually puts you at a safe distance from artificial noises. 

The next best option is to go somewhere far away from houses and electricity lines. While at home, plasma TVs can produce a loud buzzing noise in the AM band, distorting radio signals and reception.

Therefore, if you hear loud cracking noises all across the AM band, it may indicate that you have a failing power line insulator.

Many DXers indoors with AM radios use an indoor rotating loop antenna with a preamplifier. A loop antenna helps reduce interference by rejecting signals flowing from right angles toward its side.

Therefore, don’t let the fact that you have no choice but to DX from home discourage you. However, you may have to cope with radio interference sources.

How Can I Dx With My AM Radio?

Would you love to explore the world with your portable radio? Follow the steps below to get started. The first step is to obtain a good AM radio. Then, note the stable stations and the radios with easy-to-receive frequencies. 

Note any vacant areas or gaps between strong frequencies as well. Tune to the frequencies with a vacancy and explore them. The best time to explore these gaps is at night when the top stations usually turn off their transmitters.

Rotate your radio or move around the flat until you obtain a clear transmission signal. Radio stations will give you QSL cards when you inform them that you can connect to them from your location.

Therefore, it’s essential to write down the stations’ frequencies to demonstrate that you received a clear signal. You might also write down the station’s name and call signs. 

Criteria For Choosing A Good AM DX Radio

Frequency Range:

The frequency range of your next radio should be the first thing you check. You may be frustrated by the limited frequency range if you want to explore stations worldwide. 

If you want to travel far, you’ll need to purchase a radio that can cover that distance. So, before you buy a radio, double-check that it has the frequency range you need.

Battery:

A good quality radio battery is essential if you listen to the radio regularly. Usually, rechargeable AA batteries power most DX radios. 

For DXing, you’ll need a battery that can last a long time on a single charge. Therefore, make sure your future DX radio comes with a good battery.

Reception and sound quality:

DX users are constantly frustrated by the low sound quality and poor speakers. So, don’t ruin your DX experience by listening to a radio with inferior sound quality, a broken speaker, or sub-standard radio reception.

Conclusion

Modern technology has made it easy for AM dx radios to receive signals from distant locations. However, it’s becoming challenging to discriminate between good and terrible radios.

This article highlighted and explained the best Am dx radios, and any of the ones listed above could be your favorite.

Whatever radio you choose to buy from the list, you can be sure that it’ll last a long time and produce the expected results.

You May Like These Articles As Well:

Can You Use The Wi-Fi And Ethernet At The Same Time? What You Should Know About Your Wi-Fi And Ethernet

Why Is One Speaker Louder Than The Other? Check Out The Reason

Do You Need A Firestick For Each TV? Turning Your Standard TV Into A Smart TV

Can You Use The Wi-Fi And Ethernet At The Same Time? What You Should Know About Your Wi-Fi And Ethernet

0

In most homes and offices, you either use the Wi-Fi internet or the Ethernet to connect to the internet, but many people often wonder if the two can be combined to improve performance. The truth is that both Ethernet and Wi-Fi will rely on the same router, which means they come from the same source, and data will be transmitted from the same device, even if you have both ethernet and Wi-Fi connections. Most internet service providers will provide either the Wi-or the Ethernet service.

So, Can I Use both Wi-Fi and Ethernet at the Same Time?

Yes, but the connection wouldn’t be faster than using either connection type.

Differences Between Wi-Fi and Ethernet- Which Should I Use?

As the world embraces wireless technologies, we now have more convenience of connecting to the internet from anywhere. Wi-Fi has become the top choice for anyone who wants to connect to the internet. Advancements in information technology mean we will have more devices that will connect to the internet and work wirelessly in the future.

Ethernet is the traditional wired cable connection, and even though many people think their time is over, the trust is far from such belief. Simply put, Wi-Fi is a wireless technology that connects devices to the internet without the need for wired connectivity. It was launched in 1999, and it is more popular than Ethernet today.

The Ethernet, on the other hand is older as it was introduced in 1973, and it connects devices within a LAN (Local Area Network). Ethernet relies on components like a hub, router, and cross-over cable. The Ethernet allows devices to transmit data over the cable network.

Despite providing more convenience, wireless Wi-Fi is slightly slower than Ethernet. Wi-Fi can be compared to Ethernet in the following ways;

1. Speed

Wi-Fi was initially based on the standard 802.11g, while the maximum speed it attained was 54Mbps. Smart devices like laptops and mobile phones can be connected to this type of connection, but it cant be compared with Ethernet speed that can reach between 100 Mbps and 1Gbps. Wi-Fi has evolved over the years, and a new standard of 802.11ac can deliver up to 3.2Gbps making modern Wi-Fi faster than the traditional Ethernet.

2. How Reliable are They?

While speeds of Wi-Fi and Ethernet are theoretical comparisons, it is essential to know that Ethernet can deliver higher consistencies in speed. You can download heavier files faster and more stable over the Ethernet. For this reason, the Ethernet could be your better option in streaming and downloading 4k and HD videos.

Wi-Fi, on the other hand can be subjected to some interferences; hence the speed may occasionally drop or for a while. Most interferences that affect Wi-Fi speed are environmental in nature; this is the reason why you see sporadic changes in internet speeds as you move from one place to another.

Another issue that may arise is speed throttling from Wi-Fi service providers. This can also cause a sharp drop in the internet speed for Wi-Fi users. To deal with the environmental issues causing fluctuations in speed, you can strategically position your Wi-Fi router to avoid environmental issues.

3. Security of Internet

Your internet security is another major factor in differentiating between Wi-Fi and Ethernet. Files or data sent over Ethernet can be accessed by the devices connected only; hence the chances of data loss or external hacking can be extremely low. The Ethernet may use the firewall as its paramount security; most Wi-Fi internet services, on the other hand, can be accessed by your ISP, but data can be encrypted to secure your data from hackers.

The free public Wi-Fi internet is the most unsecure internet connectivity you can use. Since these public internet facilities are deployed for everyone to use, they may have little to no security and encryption.

4. Latency as a Factor

Security and connection speeds are not the only factors to consider when choosing between Wi-Fi and Ethernet. Latency can be described as the delay in traveling data traffic from a device to its destination. Gamers often refer to latency as ping, and it can be an essential issue when handling heavy applications like games.

The reaction times or speed of moving data from one end to the other is very important; Ethernet can be the ideal option to avoid lag or delay in data transmission over the internet. Wired connectivity like Ethernet offers lower latency when compared to Wi-Fi.

Which Connection Will Be More Suitable For You?

Both Ethernet and Wi-Fi come with their advantages and disadvantages. If you want an internet service for everyday use, perhaps a well-configured and well-secured Wi-Fi will be a great option. If you are a heavy gamer or video editor or any other activity that requires a more stable connection, you will require more stable ethernet connectivity.

Similarly, Wi-Fi does best when very few devices are connected to the router, but if you want to connect numerous devices to one router, Ethernet will be a better option. You can also configure your Ethernet ports separately for different devices connected, which means you can allocate more bandwidth to some devices and fewer bandwidths to others depending on your needs. Bandwidth allocations are not possible from your end, with Wi-Fi connectivity.

Answers To Common Wi-Fi And Ethernet Questions

There are certain questions you should ask yourself when it comes to combining Ethernet with Wi-Fi; these include the following;

1. Why Will a Combination of Ethernet with W-Fi Not Increase Your Internet Speed?

Combining Wi-Fi with Ethernet will not speed up your Wi-Fi, and the reason is that your internet speed will be limited by your router’s data speed alongside the upstream connectivity speed. For this reason, the flow rate of data from your router will remain the same irrespective of whether you choose one or both connectivity options.

Your router has a definite or maximum speed limit that it cannot exceed no matter the number of devices or type of internet connection you use. There is a maximum upstream and downstream data speeds.

2. How Can Your Connection to Both Wi-Fi and Ethernet Can Slow Down Your Data Speed?

While the connection to both Wi-Fi and Ethernet does not improve the speed of the internet, it can, however, slow it down. The reason for this possible speed-reduction is that the data packets being transported through the router can become mixed-up or become duplicated and then received in an incorrect order on your device such as the computer or smartphone.

Your computer may be unable to correctly process the information being set in the form of data packets from the router, leading to a significant decrease in internet speed.

To optimize your internet speed, you have to stay with either the Ethernet or the Wi-Fi connection. If you still rely on old computers with the old router or old W-Fi chip, you may be unable to send and receive data at the full network speed, unlike when you have a modern device with a modern router or Wi-Fi chip.

Getting the fastest internet connection involves plugging the ethernet cable because data is transferred at a much faster rate through ethernet cables than Wi-Fi connection.

3. Can You Use Some Software to Connect Both Wi-Fi and Ethernet?

It is possible to connect to both Wi-Fi and Ethernet at the same time while avoiding some of the issues associated with such connectivity. Unfortunately, software that allows you to connect both Ethernet and Wi-Fi will require that you use separate routers for the two connections. With different routers, you should be able to see a faster speed than when you use the same router for both connections.

This software works like a VPN and all your data must pass through it before they reach their destination. The passage of your data through the software may slightly slow your internet speed but it wouldn’t be as slow as using one router in place of one.

4. Can You Deploy Two Different Wi-Fi Networks to Boost Internet Speed?

Using two different Wi-Fi networks, especially from different ISPs, doesn’t make sense, and wouldn’t boost your internet speed in any way. If the different Wi-Fi networks operate at different speeds and different packages, your device will take up the speed of the faster Wi-Fi instead of the slower one, which is still an advantage.

Conclusion

It has been established that it is possible to use a Wi-Fi with Ethernet to connect to the internet, but it doesn’t make any logical sense to have this combination when you wouldn’t gain an increment in speed or get any other advantage. In most cases, you will have to switch between your Wi-Fi or ethernet and mobile data when going in and out of your home or office since cable ethernet and Wi-Fi also have limited coverage distance.

You May Like These Articles As Well:

Do I Need An Antenna For Each TV? The TV Antenna Reception

The Best Modular PC Case: Top 07

Can Google Forms Detect Cheating? Ways To Prevent Cheating With Google Forms

Do I Need An Antenna For Each TV? The TV Antenna Reception

0

Nowadays, most people are cutting the cord because of the expensive cable. Therefore, they end up replacing their expensive cables with free over-the-air broadcast TVs. All you will need is an antenna. When buying an antenna, you should ensure that you purchase the type that will suit your needs. You can either buy an indoor, outdoor, or Attic antenna.

In addition, if you want to have a strong TV antenna reception, you should ensure you position your antenna correctly. Most people wonder if they need extra antennas if they have more than one TV in their homes. The article below will take you through everything you need to know.

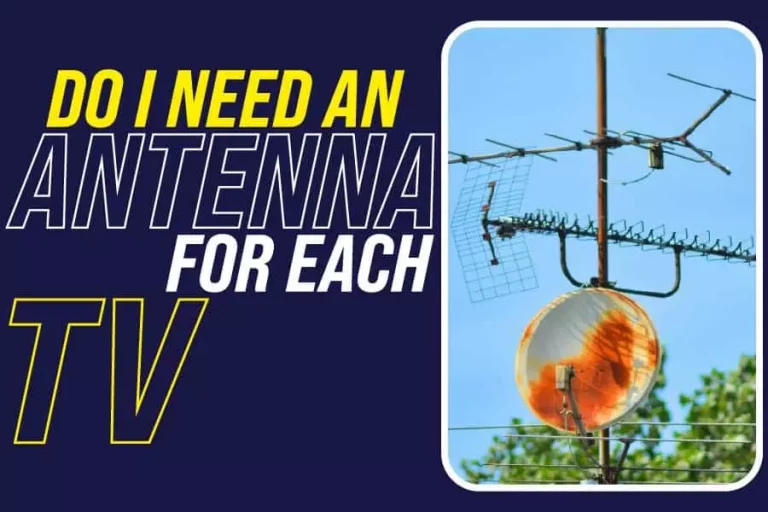
Do I Need An Antenna For Each TV?

No, you do not need a separate antenna for each of your TVs. However, having more than one antenna for your TVs does not bring any harm. Though, you will incur extra costs in buying antennas for each TV. Therefore, you should find ways to utilize your one antenna to serve all your TVs. Doing so will save on cost and headaches when setting up many antennas.

Ways You Can Use One Antenna For Each Of Your TV In Your Home

There are good options available if you want to use one antenna for all of your TVs in your home. These options come down to personal preference and your antenna scenario. Here are some ways you can use one antenna for each TV.

Splitting The Signal

The most apparent and most elegant option is splitting your signal. All you need to do is run many coaxial cables around your home. Naturally, you’ll begin with just one antenna and stick it somewhere outside. It would help remember that the higher you place your antenna, the better your antenna reception will get.

Afterward, you will connect your antenna to your TVs using a coaxial wire. Since you only have one coaxial cable and a lot of TVs to plug it into, you’ll need some splitters. Splitters can divide the signal into three, four, or any number you want. However, splitting the signal may reduce your signal power. Therefore you will need an amplifier or two to boost your signal power. The good thing is that finding amplifiers, splitters, and various coaxial wire lengths is not challenging.

Even though it isn’t the prettiest option, this is the most cost-effective one. Moreover, it’s not too difficult to manage your cables and arrange them in an orderly way. You should ensure you plan a route for your wires before starting the process. In addition, ensure you place your splitters where they’ll have the most impact on reducing the overall cable volume.

For instance, take a situation where your antenna is at one end of the hall. Whereas your two TVs are in different rooms at the other end. You should ensure that you don’t run two cables down the hall from the start. Instead, it would be best to run one cable down the hall and split it at the last second.

Furthermore, don’t forget to stock up on cable clips, the tiny plastic objects used to attach coaxial cables to walls. It will help your cable installation not to look like a big mess.

Using Your Home’s Unused Cable Or Satellite TV Wiring 

If you’ve ever had cable or satellite TV, your home has the wiring required for distributing free broadcast TV signals. What you should do is to locate where your home’s wiring connects to the cable company’s line.

Once you find it, you will detach the wiring and connect your antenna to that cable company’s line. You will then use it to distribute free TV throughout your home with one antenna. In terms of your antenna location, an upper level is perhaps the most excellent option.

Using Amazon Fire Tv Recast

You will use Amazon Fire TV Recast DVR similarly to Tablo since they all have the same principle. If you have an antenna, you will connect it to the Recast and watch it on all of your TVs. However, you should ensure you have Amazon Fire TV Sticks on all TV sets if you wish to use this method.

Steps For Connecting Your Antenna To Multiple TVs

The following are the procedures to help you connect your antenna to multiple TVs in your home using a splitter.

Install An Antenna

An HDTV antenna is a must-have piece of equipment. In addition, choosing between indoors or outdoors antennas will largely depend on your preference. An outdoor antenna can give you access to more channels. On the other hand, an indoor antenna should suffice unless you live a long way from any major broadcast towers.

Whatever antenna you choose, be sure to place it where it will provide the best reception. You should ensure you install the antenna high enough and close enough to the broadcast towers in your vicinity.

Connect Coaxial Splitter

Once you’ve connected your antenna, the next step is to install a splitter. You can use this device to split an antenna cable into several smaller cables. Therefore, it enables you to use one antenna for multiple televisions and watch your local channels on all of them.

The impedance of coax used by TV antennas is 75 ohms. Moreover, the inputs for TVs are the same. Therefore, RG6 coaxial cable best makes these connections, either directly or through a splitter. RG59 should also work fine, but its design cannot handle the high-bandwidth requirements of today’s HGTV programming.

Connect The Main TV

Do not connect the splitter to all of your devices at once, as this could cause problems. Instead, you should install one of the splitter’s outputs on your first television, the main one. Doing this will guarantee that your base system is working. In addition, it will also ensure that it would be easy to troubleshoot any problems that may arise.

You will then scan the channels on your TV once you connect your splitter. Doing this will tell you if you’re getting good reception from the media you prefer. Once you connect your main TV, you can plug in your secondary TVs.

Connect The Secondary TV (S)

Hook up your second TV once you have the first one working correctly. In addition, you should avoid physically separating the cables since it will lead to signal degradation. The two output signals will have half the input antenna signal power. As a result, the reception on your first television may get poor.

Once your second TV gets connected, you can do the same thing to your other TVs in your home. You will install amplifiers to boost your antenna signal in case of any issue like a poor signal.  

Mistakes That People Make When Connecting Their Antenna To Their TVs

Improperly Positioning The Antenna

Before attaching the antenna to several televisions, ensure that the signal strength on one television is adequate. You should ensure that no coaxial cable splitters are in the line. The only thing standing between your TV and the outdoor antenna should be a grounding block.

Most people fail to get a good signal because of poor antenna positioning. Therefore, you should ensure you place the antenna in the best possible location and position. You can use the FCC to help you know which stations are available in your area.

In addition, you should also choose an antenna that will suit your needs. You may utilize an omnidirectional antenna like the Mohu Sky if TV towers in your area are in multiple directions. On the other hand, if the TV towers are in a single location, the best antenna to use is the 43XG Yagi antenna.

Using RG-59 Coaxial Cables

Signal degradation can occur as a result of the cable’s length. If the coaxial cable length is too long, it will have a higher chance of having signal loss. Cable installers in the United States traditionally utilized RG-59. In addition, many homes in the United States still use this cable. However, the RG-6U standard is better than the older RG-59 coaxial wire.

Compared to the previous RG-59 standard, RG-6U cable can reduce signal loss by nearly half. The RG-6U coaxial cable has a significantly larger diameter than the RG-59 cable. Therefore, you should stop using RG-59 and start using RG-6U.

Using Incorrect Splitters For Your Antenna

It would be best to remember that each cable splitter output weakens the signal. A four-output splitter will reduce the original signal strength by 25%. Therefore, you should avoid using the incorrect splitter. You should ensure you use a splitter with outputs that exactly match the number of TVs you intend to connect.

Is It A Must To Have An Antenna Amplifier?

Having an amplifier or not depends on your antenna signal strength. When you split your signal, the signal strength will reduce depending on the connected TVs. Therefore, you will need an antenna amplifier to boost your signal and improve the antenna reception.

Conclusion

If you have more than one TV in your home, it is not a must that you have an antenna for each TV. You can find various ways to use your one antenna on all your TVs. One method you can use is splitting the signal. In addition, you can also use Amazon Fire TV Recast. When connecting your antenna to multiple TVs, you should avoid the above mistakes to ensure a successful process.  

You May Like These Articles As Well:

The Frustration Associated With MacBook Pro Freezing After Sleep

How To Find Adobe Serial Number On Mac

Why Does Steam Always Update: Everything You Need To Know About Steam Updates

Can You Watch Normal TV On Amazon Firestick? How To Watch Local Channels On Amazon Firestick

0

An Amazon Firestick is a device that allows you to make a smart TV out of a standard TV. It enables you to watch all your favorite shows over an internet connection. Over the years, millions of users worldwide have started using Firestick. Apart from viewing your TV shows, you can also use Firestick to control your thermostats, lights, and plugs.

Most people wonder if they can use an antenna on their Firestick to get local channels. Unfortunately, you cannot connect your antenna to your Firestick. Therefore, that leaves the question, can one watch normal TV on their Amazon Firestick? This article aims at answering your question and providing you with everything you need to know.

Can You Watch Normal TV On Amazon Firestick?

Yes, you can. In addition to all the benefits that amazon firestick provides you, you can also watch regular live TV. Even though it does not have a Freeview app, it has other apps you can use to watch normal TV. Furthermore, with a TV player, you can access over 50UK channels.

Moreover, you can find catch-up services like BBC iPlayer, ITV Hub, etc., if you want a specific TV channel. All these services have live-streaming capabilities to enable you to watch standard TV on Amazon Firestick.

An Overview Of The Amazon Fire Tv Stick

To put the Amazon Fire Stick into perspective, think of it as a miniature computer. In addition, you can also consider it to be like a mobile phone. It can run a variant of the OS found in android phones. Furthermore, You can set up an Amazon Fire Stick in a matter of minutes, even for non-technical users. In addition, you can use its remote control to speak commands.

Once you turn on your Fire Stick, you’ll automatically be able to stream video content from Amazon’s video-on-demand service. In addition, you may also use a wide variety of apps to access more material, such as Netflix, HBO, Disney+, etc. Moreover, you can access numerous channel-based apps, such as BBC iPlayer. You can also use the Amazon Fire Stick to view regular television shows. Many video-on-demand apps from ordinary TV channels feature an option to view “live.”

The good thing is that It’s completely free to use an Amazon Fire Stick. You buy it once, and it’s yours to keep. However, various services available on the Fire Stick require a subscription. Though, you can find many ways to get materials for free.

How To Get Local Channels On An Amazon Firestick And Watch Normal TV

If you want to watch normal TV on Amazon Firestick, you must first get local channels. Here are some ways you can get local channels on Amazon Firestick.

Using Skinny Bundles

A skinny bundle is a streaming service that provides live TV channels as cable providers do. However, a skinny bundle often offers more streamlined  TV channel lists. If you don’t have cable, you can use this service instead. FuboTV, Sling TV, YouTube TV, Hulu Live TV, and AT&T TV are the most popular skinny bundles.

The Amazon App Store features official apps for all of the skinny bundles. Therefore, you should ensure you subscribe to one of these services. Once you do, you will then type the name of the associated app into the search bar on your FireStick home screen. Afterward, the app will get installed. Moreover, you’ll need to sign in to the app to begin using the service. The following are the most popular skinny bundles you can use to get local channels on Amazon Firestick.

AT&T Tv

You can hardly describe AT&T TV as a skinny bundle due to the many channels it offers. Many of its competitors provide Cord-cutters with a limited number of channels to stream at a lesser price. However, AT&T TV provides users with a vast list of live news, sports, and entertainment channels. Therefore, it makes AT&T TV less budget-friendly than most of its competitors.

There are a variety of criteria that determine how many local channels you may watch on AT&T TV. One of the determining factors is your geographic region. Therefore, you should ensure that you enter your zip code on the AT&T TV website. By doing so, you will see what local channels and sports networks are available in your area. You can also use the zip code linked with your billing address to determine local and regional channels available.

Sling TV

Sling TV allows users to watch live TV channels on their FireSticks. Although it costs less than competitors like YouTube TV, it provides many channels. Moreover, it’s possible to watch various stations worldwide using Sling TV.

For $35 a month, you can subscribe to Sling Orange or Sling Blue. However, if you want both, the monthly fee is $50. The sling-orange package does not offer local channels. Therefore, you’ll need Sling Blue or the combination package to view local channels on your FireStick. In addition, you should know that Sling TV does not offer local ABC or CBS channels.

Sling Orange focuses on sports and family entertainment, featuring channels like ESPN and Disney. Whereas, Sling blue has channels like Fox News, Discovery, MSNBC, NBC, and FOX local channels. The Sling TV app is only available in the United States. However, you can utilize VPN to get around this restriction.

Fubo TV

Despite fuboTV not being so popular, it still delivers an impressive selection of live TV channels. In the past, fuboTV provided users with on-demand content and live TV but had few local channels. However, now, users can access a wide choice of national and local channels via the app. It covers a range of programming, including sports, news, and entertainment content. Moreover, you may have access to local channels like ABC, NBC, FOX, The CW, and CBS in your area.

When it comes to sports, fuboTV is the favorite. Initially, fuboTV got launched as a sports-centric streaming platform. However, the app has expanded and now includes several other categories, including local channels. It has a wide range of sports channels and regional sports networks like beIN Sports, NESN, MSG, FS1, etc.

With fuboTV’s built-in TV guide, FireStick users may see which local channels are accessible. Using the guide is like using a cable box since it allows you to browse, bookmark, and record channels.

Using Amazon Fire Tv Recast

If you’re new to Fire OS, using Amazon’s Fire TV Recast is your best option. Even though Recast works with Amazon’s TV platform, it also features a built-in antenna port on the back of the box. You will set the Recast gadget anywhere you wish to which the antenna can attach to it. Recast is costly but worth the investment over the standard’ Fire TV Stick 4K’ if you’re new to the platform. In addition, the device works with any Fire TV Sticks version and other Fire TV devices.

Using Live Net Tv

It is possible to watch Live Net TV on a wide range of Android and Firestick devices. In addition, you can access more than 700 channels using the app. Furthermore, Live Net TV arranges its channels according to the country and categories. Therefore, it makes it simple to find and watch your favorite shows.

Moreover, all users can benefit from the software’s high-quality services for free. VOD services are also available through the Live Net TV applications on different movies. In addition, users can pick an external video player from the app’s library to watch live TV channels.

Using Kodi

Media player Kodi is a free, open-source application that works on any device. However, you will need third-party software referred to as Kodi addons for Kodi to function. These Kodi addons all have a wide range of features and channels. However, before installing addons on a Kodi device, the user should ensure it is the best one available.

Kodi is the most significant legal media player for the Firestick and other devices. Using Kodi on your Firestick will allow you to watch live television.

Do You Need An Antenna To Watch Local Channels On Your Firestick?

No, you do not need an antenna. On other devices like the Amazon Recast, it is necessary to have an antenna to watch local channels. However, on Firestick, it is not. Instead, you can use other services like AT&T TV and Hulu + Live TV. In addition, you can also use Locast and third-party software like Live NetTV.

Does Firestick Require A Membership To Watch Local Channels?

The majority of live TV streaming providers charge a monthly fee for users to utilize them. However, some services, like Amazon’s News app and a third-party Live NetTV app, are free. Ads are the ones that support these free apps. In addition, Locast is another free service that asks for a $5 donation as a minor inconvenience.

Conclusion

Amazon Firestick has proved to be a valuable device that anyone should have. You can do more with it apart from streaming your favorite shows. You have seen that you can watch normal TV on Amazon Firestick. Moreover, you do need to have an antenna to do so. If you want to watch normal TV on Amazon Firestick, you will have to use Skinny bundles, Kodi, etc.

You May Like These Articles As Well:

The Laptop Only Charges When Turned Off— Understanding The Laptop

HP Spectre BIOS Update; Optimizing Your Computer’s Operation

How To Tell If A Wi-Fi Card Is Bad: All You Need To Know About A Defective Wi-Fi Card

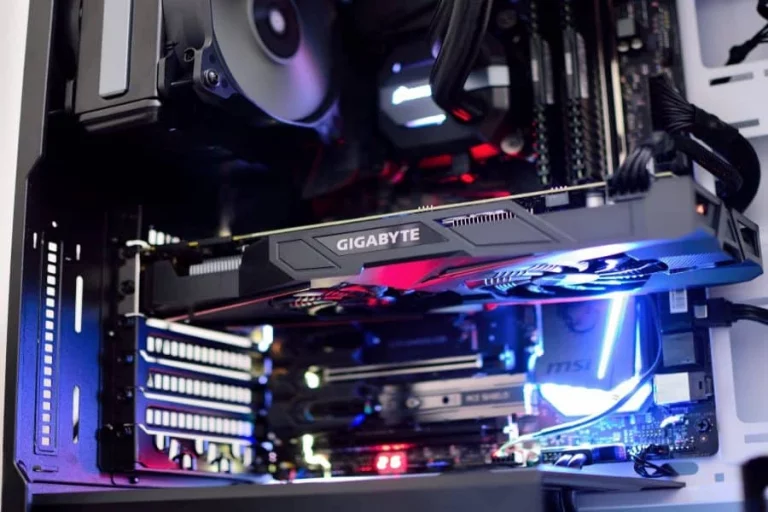
How Often Should You Change Liquid Cooling PC? Things You Should Know About Liquid Cooling PC

0

You may not need to change your PC’s liquid coolant if it is a completely sealed system, but you need to change it if your PC is not sealed. Liquid cooling can provide better heat dissipation within your computer system than air cooling, thus allowing higher device performance without you thinking about overheating. The issue here is that liquid can be more effective than air in heat dissipation, but water conducts electricity; hence a leak can lead to short circuits that can increase risks of electric shocks and fire outbreaks. The risks associated with water cooling increases each year, especially when you fail to change it.

So How Often Should I Change the Cooling Liquid in my PC?

Computer experts recommend changing your PC cooling liquid every 6 to 12 months.

What Are The Different Kinds Of PC Eater Cooling Systems

While the experts recommend changing liquid cooling in your PC every 6 to 12 months, it is even better if you change it earlier than that. There are two basic types of liquid cooling options in PC, these are;

  • Custom Loop, and
  • Closed-loop

1. Custom Loop

The custom loop is the more expensive option for cooling your PC, and it is also the better performing option of the two. This type of cooling allows each PC component to have its dedicated cooling radiator, which allows more extensive heat transfer than the other design where components have to share a single radiator. With this design, each component will also require a dedicated pump and reservoir; hence it can be expensive to install this option even though it is the best.

2. The Closed Loop

This is a liquid PC cooling system whereby a sealed system is deployed, and no maintenance is required here. Instead of a dedicated radiator for each part, this system relies on a small radiator of low-performance rating. While the liquid coolant is efficient in dissipating heat from your computer’s component, your device may be susceptible to over-heating under heavier loads.

For instance, if you overclock your computer, the heat generated may be too much for this liquid cooling system to handle. It is also important to remember that maintenance-free closed loops also stand the same risks of a custom loop liquid cooling system.

What Are The Types Of Problems Associated With Liquid Cooling Systems For PC?

All liquid cooling systems operate by dissipating heat from computer components into a radiator where the fans can then blow air across to cause an evaporation of that liquid dissipating heat from your computer components. You may have to think about specific issues that may arise, especially when you don’t maintain the liquid cooling system properly;

1. Faulty Radiators

The radiator of all liquid cooling systems for the PC is the most critical component. The radiator determines how well your computer components cool off, especially under continuous heavy load. Keep in mind that radiator qualities can be different between manufacturers and suppliers; hence some radiators can be more efficient in dissipating heat than others, and that can force you to overclock your device beyond its maximum capacity. Poor radiators can also lead to the heat exchangers performing so severely; hence you must pay attention to these components.

2. Faulty Pumps

The quality of the pump will also determine how often you will have to replace the liquid cooling system. The pump is the component that moves liquid around the cooling system. If the pump in the system is not generating sufficient pressure, this will lead to multiple components using the same radiator instead of each having its dedicated radiator. This will lead to the liquid cooling loop heating up quickly, especially under more load, and that means you may have to replace the PC cooling liquid sooner than planned.

3. Problems with the Coolant

One more factor that may determine how soon you change your PC cooling liquid is the coolant itself. Most liquid coolants are made from propylene glycol or ethylene glycol as the base, then the manufacturers add some dyes and some anti-corrosion additives to keep the integrity of computer metals intact and prevent corrosion within the system.

Since water is a substance that remains unregulated, it is quite common to see manufacturers creating different forms of coolants and promoting them in the market; this has led to higher risks of coolant failures, especially if you are unsure of the source of the cooling liquid you are buying.

Other Things You Should Know About Liquid Cooling For Your PC

The following are some other things you should know about liquid cooling for your PC;

1. How Long will Your Liquid Coolant Last?

In most cases, liquid coolants often last for between 3 and 5 years. Fortunately, you can prolong the lifespan of the coolant by changing it every 6-12 months, depending on its effectiveness. It would be best to consider cleaning the system’s radiator monthly.

2. Is There a Better Way of Cooling the Liquid Cleaning System?

Mineral deposits will eventually block the cooling channels inside the PC cooling loop, leading to a decrease in performance over time. There are recommended bleach substances for cleaning the cooling system. To create the bleaching cleaner, you have to mix two cups of bleach with a cup of vinegar and let the mix sit in the system for about 5 minutes before rinsing with clean water.

3. How Easy or Difficult is it to Maintain Liquid Cooling for PC?

Liquid cooling can be more challenging to maintain than air cooling for PC, though both still require some monitoring of the same level. Perhaps the most challenging aspect of maintaining the liquid cooling system is draining it, especially after removing your components, so they don’t rust on their own. You may want to avoid tap water or any other type of prepared or standing water to prevent the system from being contaminated by external sources. Water contaminants may also destroy or render some internal PC components less efficient after exposure.

4. What are the Maintenance Requirements for Liquid Cooling for PC?

When it comes to maintenance cleaning of the PC cooling system, you must avoid the use of tap water, and you must also clean the system’s radiator monthly.

Due to the minerals found in tap water, it is advisable to avoid them completely. You may want to use distilled water or water obtained from reversed osmosis filtered, and both of these can be purchased at low prices at your local grocery store.

It would be best if you considered cleaning your cooling system monthly unless you discover a sharp decline in its performance, then you may want to take it to a technician for a thorough check. In most cases, you may have to drain the coolant and refill it with a new one if the system’s performance drops significantly.

Other Reasons To Use Liquid Cooling Instead Of Air Cooling For Your PC

In addition to providing higher levels of efficiency and improvement in overclocking potential, there are many other reasons why liquid cooling is more acceptable than 1air cooling;

1. Liquid Cooling Sustains Cooler Temperature Longer

Your PC has the tendency to get hot quickly, especially as it ages or when the outside weather is hot. While the air coolant relies on the ambient air around it to push cool air through the system, it is more suitable only when your computer is moderately used and is not under heavy load. While air cooling fans only respond when heat is generated, liquid cooling sustains lower temperatures all the time.

2. Liquid Cooling will Take Less Space

Air cooling fans take more space than liquid cooling systems, and that means they create bulkier cases for computers. Though liquid cooling takes less space than an air cooling system, their design can be more complex because of numerous components like pumps, radiators, and hoses.

3. Liquid Cooling System is Great for Both Warmer and Cooler Climates

If you live in a region of higher ambient weather conditions, you will know how quickly your computer heats up, especially when you add heavy games to your activity. In most cases, air-cooled PCs still shut down frequently despite the continuous working of the fans, but this is not the case with liquid-cooled computers. Since liquid cooling systems work continuously, there is no need to worry about a system shut down due to over-heating.

Conclusion

Changing your liquid cooling for your PC should depend on the PC’s performance; this means that even if the PC is performing optimally, you should consider changing the coolant at least once a year. There are many other benefits of liquid coolants you should consider; for instance, it creates less noise in PCs that work too hard. Since the liquid coolant takes care of most of the heat, the fan will rotate at lower speeds; hence you hear less noise. Heavy GPUs and other components that generate more heat also perform better with liquid coolants than air coolants.

You May Like These Articles As Well:

Can You Hook Up An Ethernet Cable In A Phone Jack? The Ethernet Connection

Why Does Sony Vegas Keep Crashing? Reasons And Solutions

What Is A Google Subscriber? A Mini Guide To Google Subscriber Number Usage

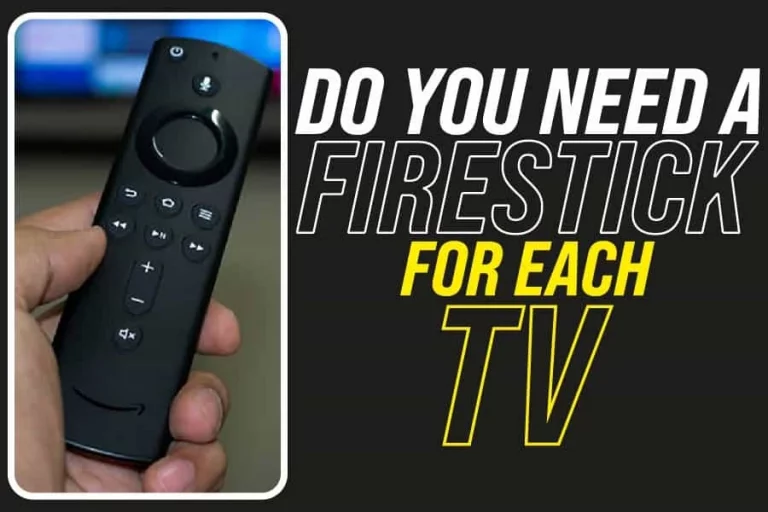
Do You Need A Firestick For Each TV? Turning Your Standard TV Into A Smart TV

0

Advanced technology has enabled people to enjoy the smart TV experience in their standard TVs. The invention of Firestick has made things more accessible and more convenient. Its portability, pocket-friendliness, and convenience make it the best option for streaming your favorite apps on your TV. However, you should ensure you have a strong WiFi connection to use the device.

Despite its many benefits, it also has some limitations. One limitation is that you cannot use it without a stable WiFi connection. In addition, you cannot use one Firestick on several TVs simultaneously. Therefore, that brings the question do you need a firestick for each TV?

Do You Need A Firestick For Each TV?

Yes, you do. It is impossible to use one Firestick on several TVs simultaneously. It is because the firestick device has to get plugged into the HDMI port of your TV. Therefore, you cannot plug it on multiple TVs simultaneously. However, it is possible to use the Firestick on your current TV on a different TV. You should ensure you have a strong WiFi connection to make this work.

How To Move Your Firestick To Another TV

Moving a Fire TV Stick from one TV to another is easy for anyone. Because it is connected via the HDMI port, there is no permanent physical connection between it and your TV. Using this device with any other TV is a simple matter of plugging it in. It is a lot of fun because you can take it with you everywhere you go due to its small size.

The best thing is that your data will not get lost no matter how many times you unplug it. Once you download any app, it will remain on your Firestick even when you use it with other TVs. Moreover, you do not need to set it up each time. You will only set it up once. This feature has made most people prefer using Firestick instead of Google Chromecast.

All you have to do is download and install the best free streaming apps for Firestick to get started. Once you’ve plugged it in and are ready to go, you can start streaming your preferred material. Even though moving the Firestick to another TV is simple, many individuals are unfamiliar with it. You can follow the following steps to ensure you successfully switch your Firestick to another TV.

  • The first step is disconnecting your current TV from the Firestick and removing the power adapter.
  • Once you do that, next, you will plug the Firestick into the HDMI port on another TV. Moreover, connect the Firestick with Micro USB and insert the adapter into the power source.
  • After that, turn the TV and FireTV Adapter on and wait for them to both come up to speed.
  • When it completes, it will show Firestick on your TV screen.

In some instances, the Firestick may fail to show even after following the above steps. You will follow the following steps to ensure your Firestick gets displayed on your TV screen.

  • First, you will take your remote, press the “Source Button, ” and select HDMI.
  • On the HDMI option, you will notice the Amazon Boot Screen. You will have to wait until the booting process is over.
  • As soon as the booting process is complete, you will ensure that you connect the Firestick to the WiFi network. Internet connection is necessary because the Firestick cannot work without WiFi.
  • After connecting it to WiFi, you will see the Home Screen with all of your installed apps. You will open any of the Apps, and you’ll be able to watch free stuff.

It is essential to keep in mind that if you are using the Firestick in public places, you must use VPN. If you use public WIFI without protection, your data may get stolen. Therefore, VPN will protect you against such insecurities.

Problems That You May Face After Moving Your Firestick To Another TV

There is usually no problem switching Amazon Fire TV Stick to a new TV. However, after moving the Firestick, you may encounter some usual issues. It is essential you know these issues to find solutions to them. The following are the most common problems you may face and how you can solve them.

The Remote May Stop Working

You may notice that your remote keys don’t work after relocating your Firestick to a new TV. It is not working because there is no connection between your Firestick and your new device. The remote automatically gets unpaired when you move your Firestick to a new TV. Therefore you must pair the remote with the new device to resolve this issue. Here are the steps you can follow to pair your remote.

  • The first step is unplugging your Firestick and TV.
  • You will then wait for a few seconds and connect both devices.
  • Next, you will boot your device and wait for the home screen to appear.
  • Once the home screen appears, you will press the home button for about 20 seconds.
  • Afterward, you will see a message saying your remote has paired successfully.

The WIFI May stop Connecting.

After switching the TV, the second common problem is that the WiFi may no longer connect to the TV. You can use your smartphone’s tethering or hotspot feature to address the issue. You may accomplish it in a very straightforward manner. You can follow these steps if you find yourself in this situation:

  • The first step is to turn on your smartphone and go to the Settings menu.
  • You will then navigate to the WiFi Sharing or Tethering menu.
  • You will select a WiFi hotspot to connect to the Internet on the WIFI menu.
  • Afterward, change the WiFi hotspot’s username and password. You should ensure that you set it up to be the same as your current WiFi network at home.
  • You will then unplug your Fire TV stick for a few seconds after turning on WiFi Hotspot and re-plug it.
  • Next, you will boot your Fire TV stick and enable the WiFi hotspot on your smartphone.
  • Once you finish the process, the Firestick will automatically connect to your WiFi without requiring a password. 

Versions Of The Firestick TV

You can find different Firestick versions. In addition, these versions each have a slightly different set of specifications. Here are the four versions of Firestick.

  • The Fire TV stick: It is the base model, and it allows you to stream all your favorite apps in HD.
  • The Fire TV stick lite: Like the Fire TV stick, it also allows users to stream their favorite apps in HD. However, you cannot use its remote to change the volume or turn your TV on or off.
  • The Fire TV stick 4K: Unlike the other two, Fire TV stick 4K allows users to stream content in 4K resolution. The 4K resolution offers better picture quality than HD. However, to use the Fire TV stick 4K, you must have a 4K TV.
  • The Fire TV stick 4K max: Like the Fire TV stick 4K, it also supports 4K resolution, and you must have a 4K TV to use it. The difference is that this version supports WiFi 6, which is the fastest internet connection.

Reasons Why You Should Have A Firestick Even If You Have A Smart TV

Most people who have smart TVs do not see the need to have a Firestick. However, a Firestick has its benefits even if you have a smart TV. Here are the reasons you should have a Firestick even if you have a smart TV.

  • Televisions can currently connect to the Internet, but they have limited capabilities compared to the advantages provided by a Firestick. The Firestick can turn a standard TV into a smart TV. Moreover, people can now use smart TVs to their maximum capacity thanks to the Firestick technology. It ensures that it expands the smart TVs’ functionality and range.
  • Firesticks have improved harmonic interface, better processor, more content, and access to various platforms on the network. Therefore, they can run a wide range of programs that aren’t possible on smart TVs because of their processor’s limitations.
  • It speeds up data transmission, resulting in better image quality and faster access to the content.

How Many Firesticks Can You Have Per Account?

There are no restrictions on how many Firesticks can get linked to a single account. However, people get limited to the number of Firesticks you can simultaneously use to watch TV. You can stream content using up to three Firesticks with a single account. You will not need to create other accounts for the devices.

Conclusion

You have seen how essential a Firestick is even if you have a smart TV. The Firestick will enable you to use your Smart TV to its full capabilities. The bad news is that you cannot use one Firestick for multiple TVs simultaneously. Therefore, you will have to buy a Firestick for each TV to use all the TV at once.

You can also use the same Firestick on different TVs by switching it from your current TV to a new one. After changing the Firestick to another TV, you may face problems like remote not working or WIFI not connecting. The above article has provided you with the solutions to this problem.

You May Like These Articles As Well:

HDMI STB Vs. HDMI DVI: The Different Types Of HDMI Ports

How To Use A Coax Splitter

How To Make PS4 Headset Louder Explained In Detail

Why Can’t I Upload Videos To Instagram? The Reasons And How To Fix Them 

0

Video posting is one of the reasons why Instagram has grown so popular over the years. You can upload videos as a post or do a live feed for your audience on Instagram.

Keeping your followers engaged by posting interesting video content is important when seeking to grow an Instagram account.

So, it can be frustrating when you suddenly can’t upload videos on Instagram. And the worst part is you may not know why you’re having this difficulty. Unfortunately, the error message won’t display the reason.

If you have challenges uploading videos on Instagram, you’re not alone. So many people are experiencing similar problems with their accounts.

The good news is we have taken out time to explain why you may be having this problem and possible solutions. Read on!

Why Can’t I Upload Videos To Instagram?

Instagram is a breeze to use. You can open an Instagram account within a few minutes and upload videos almost immediately.

You can even upload videos the second you create your account. So, you shouldn’t have problems uploading videos on the platform.

But if such happens, it would be best to understand what’s causing it and fix it. So now, let’s see why you can’t upload videos on Instagram.   

1. The video is below Instagram’s Standards: 

Like any other platform, Instagram has guidelines for content published. Any video you upload on the platform must meet size, technical criteria, and format specifications.

Instagram’s video codecs are compatible with the video formats used by most mobile devices.

Unfortunately, some devices may not record in a format that meets Instagram’s specifications. As a result, you may experience difficulties uploading videos to Instagram if you have such a device.

2. Your Internet Connection is Poor:

Poor internet connection is another common reason some users have trouble uploading videos on Instagram. Note that the internet is not a switch that you can turn on and off. Although you can turn on your mobile data to access the internet, it also has a mind of its own.

So, no matter how good your internet connection might be, it could fluctuate occasionally. Although mobile internet connection has improved through the years, several factors can affect connectivity.

  • If the network fluctuates when uploading a video to Instagram, the process will likely fail.
  • If you’re moving and unsettled, you may experience problems with your network.
  • You may be unable to upload a video to Instagram if you move between various hotspots.

Finally, posting a video to Instagram will fail if you connect to a public Wi-Fi network that restricts Instagram.

3. Instagram had your video blocked:

Sometimes, your video didn’t upload because Instagram flagged it. And most times, you may not be notified to that effect.

Instagram runs an automated system. There’s no one at the other end monitoring what you post. So, when the Instagram system blocks a video, the system may not explain why. However, Instagram prohibits specific videos on its platform. Pornographic or violent videos will not upload on Instagram.

What Other Content Does Instagram Prohibit?

It’s common knowledge that Instagram doesn’t allow pornographic and violent content on its site. But that’s not all. There’s a lot more.

  • Instagram doesn’t permit spam – creating or submitting unwanted emails, comments, likes, or other commercial or harassing communications.
  • Instagram doesn’t allow support or admiration for terrorism, organized crime, or hate groups. Additionally, selling guns and drugs, as well as providing sexual services, are illegal.
  • Instagram prohibits hate speech and personal attacks.
  • Instagram doesn’t tolerate abuse based on race, ethnicity, national origin, sex, gender, gender identity, sexual orientation, religion, handicap, or disease.
  • Instagram doesn’t condone or encourage self-injury, including eating disorders.

Instagram May Have Suspended Your Account

If Instagram prohibits your account from posting videos, you’ll not be in the dark. Instead, you’ll receive an email explaining the reasons for the suspension.

That’s not all, though. Banning doesn’t happen overnight. Many banned users know that their conduct may result in their ban.

Mass following and unfollowing are two activities that could result in a ban on Instagram. Instagram may also ban your account if you post too frequently over a long period. Although this may sound funny, it does make Instagram more user-friendly. You’ll therefore have to get used to it.

What Else Can Get You Banned?

Instagram can ban you for the following reasons:

  • Using offensive language
  • Buying followers
  • Selling your accounts
  • Using banned or broken hashtags
  • Using an automation tool for liking or commenting on materials aggressively or following/unfollowing users
  • Selling or promoting illegal goods or services.
  • Sending the same messages or making the same comments over and over again
  • You can also get banned if someone reports your account.

What To Do When You Can’t Upload Videos To Instagram

The first step for anyone having trouble uploading videos to Instagram is to figure out why they cannot do so.

So, we’ve established why you might be unable to upload a video to Instagram. If you’re trying to resolve this, you won’t have to look far because we’ve provided solutions.

Check your connection:

Because a poor network is one of the numerous reasons why you might be unable to upload a video to Instagram, ensure you’re using a solid connection.

Wi-Fi connections frequently overshadow your phone’s internet connection. If your Wi-Fi is connected to a hotspot that isn’t very strong, you may need to turn off your Wi-Fi and use your phone’s internet connection to access Instagram.

If you’re using your phone’s internet connection to access Instagram, you could try turning off and on your mobile data. Your internet connection may decline with time, and resetting will help.

If you’re in a terrible network area, changing positions can improve the situation. Additionally, if you’re using a hotspot connection, remove anything in the way of your internet connection.

Ensure your video format is compatible with Instagram:

Ensure your video’s frame rate is at least 30 frames per second. Because Instagram can handle videos with 30 frames per second (fps), if your video is longer than 30 fps, it will not upload.

We also recommend uploading a video with a bitrate of 3500 kbps. While there are no restrictions on encoding at a lower bitrate, if the bitrate is less than 3500 kbps, you may not get the best out of a video. Unfortunately, Instagram does not support videos with higher bitrates.

If you’re not using IGTV or stories, your video shouldn’t be longer than 60 seconds and shorter than 3 seconds.

Your videos must be 1080 pixels and have a resolution of 4.5. Because Instagram will scale the video down if it is larger, the quality may suffer.

Make sure your video isn’t more than 50 megabytes in size. Although a video of 50 megabytes is the industry standard, a video of fewer than 20 megabytes will be much easier to upload.

About Frame Rates

You’ll often hear this term with computer graphics, video cameras, and motion capture devices. What does it mean? Frame rate represents the rate at which a device displays consecutive images (or frames)

Frames per second or fps is the number of frames recorded by your camera in a single second of video. Frame rate, which is commonly expressed in frames per second, is measured in Hertz.

About Bitrates

The term bitrate is standard in video streaming. It represents the number of bits sent or processed in a particular unit of time. Bitrate is expressed in bits per second (bit/s) and usually involves a prefix such as a kilo(one thousand), mega (one million), or Giga (one billion).

One thousand bits per second is one kilobit per second (kbit/s). 1000 kbit/s equals 1 megabit per second (mbit/s).

A higher bitrate in video output allows for higher image quality. HD video, for example, has a bitrate of 5 to 20 megabits per second.

Standard-definition video usually is 1-6 megabits per second, whereas HD video is typically 2 megabits per second. Therefore, kilobits per second (kbps) are a unit of measurement for mobile video.

Dealing With A Blocked Account

If Instagram decides to block your account, you’ll see something like “Your account has been disabled for violating our rules” when you log in. When you receive this notice, click the Learn More button to know why you were banned.

You can also use this information to file an appeal. It’s risky to be blocked. However, if your request is successful, Instagram will reinstate you.

Can An Instagram Ban Be Permanent?

Instagram can block or shadow ban you. You can still use your account but with restrictions. A permanent ban is also possible. And when it happens, you can no longer have access to the account.

If you like content or follow and unfollow persons frequently, Instagram may restrict your actions for a set amount of time. Because such repetitive activity could be coming from a spam account, the platform gives a warning and blocks the action.

Instagram may shadow-ban your account if you use banned tags or post often. Your account will still work, but your posts will not appear in the Explore area or hashtag sites.

Instagram may permanently ban your account if you break the rules again or repeat the behavior that led to your suspension. In addition, you can no longer use the same username, email address, or even IP address in this instance.

Conclusion

Having trouble uploading a video to Instagram can be frustrating, but it’s nothing to worry about unless it was due to being banned from the platform.

Remember to upload videos of at least 30 fps, 3500 kbps, and not more than 50 MB. Again, ensure you have a strong connection, some public Wi-Fi block Instagram. Also, keep in mind that Instagram prohibits videos with pornographic or violent content.

If Instagram banned you from using their platform, you’ve probably seen several warnings, in which case you shouldn’t be surprised. However, you can appeal your ban, and if your appeal is successful, you’ll return to the platform.