Home Blog Page 33

Why Does Sony Vegas Keep Crashing? Reasons and solutions

0

Sony Vegas, now called Vegas pro, is cutting–edge video editing software for both professional and casual editors. 

The software is packed with all the tools you need to perform video editing with advanced HDR color correction, sound design, and live streaming.

Most video editing software tends to crash from time to time, and Sony Vegas is no exception. Several users have complained and reported that Vegas keeps crashing while editing. In many cases, this has led to the loss of work.

As you might assume, the software is not flawless; while executing its many features and functions, it may suffer some errors. And you may want to know,

Why does Sony Vegas Keep Crashing?

The main reason could be because the software is CPU- intensive and its primary setting allows it to use all the cores to process. Insufficient RAM, buggy drivers, and incompatible video drives could also cause the software to crash. 

The numerous features that come with this software might be too much for your PC to handle, so an additional video file causes the app to crash since your system cannot support it.

Features Of Vegas Pro

Are you a content creator looking to create videos that will amaze your audience, Sony Vegas is a good option.

Let us get into the details of this software’s operations to give you’re their best features so you can see if it is the one for you;

1. Video and image editing

This software comes with all the video editing tools you could need when making a video. You can work with any video format, and it is very flexible in use while offering user-friendliness. 

You can crop videos, add cut-ins, remove pieces from them, add music, extract audio, and so much more. There are tools here that will suit anyone’s needs, from a newbie to a professional video editor.

You can add images to it to make the videos more appealing and give a better output. You can also edit photos to change the backgrounds, color, sizes, shades, and anything else you need.

2. Visual effects support

This application allows you to add visual effects to your videos to make them more appealing. You have a lot of freedom regarding what you want to add, and any changes are easily reversible.

If you want to generate videos that look professional, Sony Vegas is the choice for you. With their open and easy-to-use control panel, even a beginner will get the hang of it in a few hours. They have a fantastic compositing feature you can use.

3. Superior workflow

Organization and how you connect with your work are important in video editing. This is an aspect that is well integrated into the Sony Vegas user window and in the settings.

The app’s layout gives you easy control over all aspects of your work. The commands and settings are well categorized to make it easy for you to maneuver your workspace. You will have all the tools in one place, ready for you to use.

How To Fix All Crashes And Freezes

Vegas Pro could become a bit of a problem for your PC to handle with all its features, and you will experience some crashes. These can be a significant concern, especially when dealing with a large project, so you need to fix it. 

If you have this issue, there are some settings in the app that you can change to stop it from crashing. 

Sony Vegas is not provided with the best operational settings by default, so you have to get these settings in the app.

You can first hold the Shift key then select the option; this will bring you a special hidden menu. In the new menu, go down and select the internal option to access all the settings in the app.

There are sensitive settings here, so you must be very careful. In the search box, type OpenCL/, and it will leave you with two options.

These two are hardware acceleration codes that are outdated, and they aren’t used, so they cause a lot of glitches.

Click on the fields marked value and type in False for both of the settings. Click apply at the bottom of the Settings window, and it will tell you the change was successful. You will need to restart Sony Vegas for these changes to take effect.

Another change you should make is in the preferences. Go to options without pressing any keys, then select preferences. In the new window, click on the File IO tab, which will give you three options.

Make sure the settings to enable legacy decoding with AVC and HEVC are enabled. If they are not checked, Vegas will use an SO4 compound reader DLL code which boosts its performance, but it causes crashes.

You will not be able to edit 10-bit footage with these settings enabled, but you will also avoid crashes. 

Whenever you need to edit high-end SLR footage, you should uncheck these boxes to decode those videos then enable it once you are done.

How To Prevent Sony Vegas from Crashing

Sony Vegas is a great app, and it can be advantageous to you as a video editor with its limitless tools and editing options. Most users experience crashes and random malfunctions, especially in low-powered computers. 

Crashes can be frustrating because they cause data loss and will distract your creative process. You need to figure out ways to make sure your Sony Vegas does not crash so that you can work better. Here are some tips you can use to ensure this works;

  • The first matter you need to deal with is updates. You need to install the newest version of Sony Vegas; you can find and install it on an Updated PC. If you are using Windows, make sure all the drivers and OS itself are updated. 

Updated systems will work more efficiently together, and the Sony Vegas will sync with them to give you better performance. If you install the software on an old system, you might experience compatibility issues, and the Sony Vegas will crash.

  • You need to enable compatibility mode on your Vegas to make it work better. To do this, right-click on the Sony Vegas app, then go to properties. You will see a series of tabs; choose the compatibility tab. 

In the next window, you should see an option for compatibility mode. Enable this option, then enter the operating system your PC is running. This simple fix will help your Sony Vegas and PC work better together and reduce crashes.

  • Clear the task manager before you run Sony Vegas. Sony Vegas is pretty demanding in processing power, so you need to keep the computer as accessible as possible when running this program. 

If you have another app running in the background, you will take a lot of toll on your PC, and the running app will suffer. This will cause more lags in your videos, and if you don’t resolve the problem, the app will crash. 

  • Import the video into your timeline the right way. This is a matter that depends on your PC’s specs, but it can work as a general precaution. Most people drag a video file from its folder and drop it into their timeline. 

If your CPU is not powerful, this could crash Sony Vegas. Instead, go to file and import the video from the file you want through the Sony Vegas import window. This will allow the app to comfortably take in work and reduce the chances of a crash.

  • You can also make it work better by increasing your processor’s power. Your processor is not always working at 100%, and most of the time, because of power conservation, it will be at 60% or 70%, and your Vegas might need more than this.

Go to the advanced power settings and select processor power management settings. Select the option for maximum processor state and reduce it to 10% from the default that is 100%. This will help how your processor deals with power, and your Vegas will work better.

  • Ensure you have QuickTime installed on your PC before you run Sony Vegas. If you don’t deal with this, you will have many issues uploading videos onto Sony Vegas. 

Conclusion

Sony Vegas is great software, and it has a lot of features for you. These features will become a problem when running the software since it becomes demanding on your PC.  These high processing requirements might cause it to crash from time to time.

You can change some settings in the app and on your PC to increase the performance and reduce crashes. 

Once you get rid of these issues, it will be an amazing tool to provide high-quality videos for you.

You May Like These Articles As Well:

Do You Need A Firestick For Each TV? Turning Your Standard TV Into A Smart TV

15 Inch Laptop Dimensions; All Your Monitor Requirements

How To Make Steam Games Open On A Second Monitor: The Gaming World

Can You Hook Up An Ethernet Cable In A Phone Jack? The Ethernet Connection

0

Ethernet is a set of standards in the computer network technology facilitating accessible communication between diverse equipment. To conveniently add a device to expand an existing network, it should comply with these sets of standards.  A computer network has both the software and the hardware.

The software part of it, the Ethernet standard, defines protocols governing how connected machines in the network will communicate. On the other hand, the hardware part functions as the pathway for electronic signals.

The Ethernet cable is the most used cable for home network connectivity. the Ethernet cables have rating categories, and the most common ones are Cat5e, Cat6, and Cat6a. Ethernet and phone connections have similarities. Most people wonder how they can connect their phone to the Ethernet connection. Therefore it leads to the question, can one hook up an Ethernet cable in a phone jack?

Can You Connect Your Ethernet Cable Directly To A Phone Jack

The direct answer to this question is no. the size of the Ethernet cable is more extensive than the phone jack. Therefore it cannot fit. However, you can connect it to your phone when you first connect your phone to a modem. Both Ethernet and phone cables require jacks with the correct number of wires. Otherwise, you cannot use the same jacks.

How To Connect A Phone To The Internet Using An Ethernet Cable

Do you struggle to connect your phone to Wi-Fi? Is your Wi-Fi too slow? If you have these issues, then there is another alternative. It might sound like an old solution, but it is the best solution you have. If you have the correct adapter and an Ethernet cable, you will quickly solve your problems. Using these two, you can connect your phone to an Ethernet port on your router or modem for a fast connection.

You may have a weak Wi-Fi connection but find that you have a strong Ethernet connection. The main flaw of using Ethernet is that you have a limitation of going too far with your device. However, you can use a longer Ethernet cable that is 300 feet long. The following are what you can do to connect your phone to the internet using an Ethernet cable.

Purchase The Suitable Adapter

the first thing you will do is look for and buy the correct adapter that best suits your phone. The good thing is that the cost of purchasing these adapters is low in most of the retail stores. You can find one for less than $20.

Most of the android devices and iPad Pro will have to use the USB-C- Ethernet adapter. The adapter will provide you with a fast and simple Ethernet connection. Moreover, it will also give you access to speeds of up to 1Gbps. USB-C-Ethernet adapter is also super compact. It weighs almost nothing, and it is smaller than your fingers (2.3*1*0.1 inches), thus making it instantly portable.

If you have an iPhone, then you will have to use the Lightning-to-Ethernet adapter. The adapter is a brand of Apple, and it is also compatible with iMac, MacBook Mini, and MacBook Air. The apple thunderbolt to Gigabit Ethernet Adapter will allow you to connect to a high-performance Gigabit Ethernet network. Your iPhone will have to meet the system requirement of OS× v 10.7.4 or later.

You should know that not all adapters will be compatible with your phone. Therefore ensure you research before deciding which adapter you will buy. Moreover, ensure you first read other customers’ reviews to know the place you are buying from is a good place.

Get An Ethernet Cable

if you do not have an Ethernet cable at your home, ensure that you buy one. The Ethernet cable is a must-have because it will help in the connection. You can purchase an Ethernet cable from Amazon. The prices of the Ethernet cable vary depending on the length and quality. You can find the basic line on Amazon that are cheap. If you want lengthier and tougher cable, you can get nylon cables.

Set Up Your Android Device

to connect your Android device to connect using Ethernet, it must be running Android 6.0 or higher. You should also disconnect your device from Wi-Fi and cell service. To disconnect your device from Wi-Fi, you will go to settings and select the network and internet option and disable Wi-Fi. You can press the Airplane mode to turn it off, and it will automatically turn off your Wi-Fi.

Connect Your Device To The Ethernet

The first thing to do is to load a website page in your browser. A message saying  ‘’no internet connection” will pop up on your screen. You will then connect your Ethernet cable to your modem and connect the Ethernet adapter to the Ethernet cable. You will later attach the adapter to your phone.

When the connection is successful, you will see the light flash from your adapter. You will then refresh the current page you opened, and it will load.

Reasons For Connecting Your Phone To The Ethernet Connection

The maximum speed of your Ethernet connection depends on the type of Ethernet cable you use. If you use the correct Ethernet cables, the internet speed of Ethernet will be faster than Wi-Fi. Therefore you would want to connect your phone to the Ethernet other than using the Wi-Fi. Here are some of the circumstances that might make you want to connect your phone to the Ethernet.

Transferring Large Files

You will not notice the difference between the Wi-Fi internet speed and Ethernet when moving small files. When you start transferring files that are about 1GB, that is when you will begin to know the exact speed of your Wi-Fi. It will begin to be slow and even sometimes fail to transfer the files.

Therefore the solution you will have is to connect your phone to an Ethernet connection. The Ethernet speed is much faster than that of Wi-Fi. Thus transferring large files will not be a problem for it.

Gaming

Another reason why people connect their phones to the Ethernet is because of gaming. Gaming fanatics cannot allow having poor internet. A Wi-Fi internet may support some games that require less internet. However, games demanding high internet speed will become a problem to pay them without having internet issues.

It happens especially when playing multiplayer games that you need to connect with someone else. You may have connection laggings making you not perform well in the game. The best way to play these games is to connect your phone to the Ethernet because its internet speed is faster.

Watching Movies

Some of the sources of video entertainment include Netflix, Hulu Plus, and many more. The Wi-Fi internet can support watching movies on Netflix but not in HD. When you start watching HD content, it might choke you’re a lot of the Wi-Fi connection.

Therefore it might cause your movie to buffer for a long time before becoming watchable again. Moreover, your picture will also be less than stellar. The worst thing you can do with a Wi-Fi connection is to download movies from iTunes. It can take an eternity to download one movie. It is inconvenient if you want to watch it right away.

The best solution to this problem is to use an Ethernet connection instead. Most people have connected their phones to an Ethernet connection because their internet speed and strength are suitable for watching HD movies. Moreover, you can download as many movies as you can without any problems.

The DSL Modems

Do you want to connect your phone to Ethernet connection? If you do, DSL modems are a must-have. Since you cannot hook up the Ethernet cable directly to your phone jack, you will need DSL modems to acts as the medium. 

You will first plug your DSL model into your phone jack using a phone cable. You will then connect the Ethernet cable to our DSL modem and not your phone jack. Once you do that, your phone will have an Ethernet connection.

You can find some companies providing devices that can serve the functions of both the DSL modem and the Ethernet. The equipment is like the DSL modem, but it is more extensive since it houses two devices in one. You will use your phone cable to plug the modem into your phone jack.  Since the device already has Ethernet inside, your phone will automatically connect to the Ethernet connection.

What Is The Difference Between Ethernet Cables And Phone Cables?

Despite the Ethernet and phone cable looking alike, they differ in some ways. The ethernet cable is wider than the phone cables. Moreover, Ethernet cables contain eight wires, whereas the phone cable uses four wires.

How Do You Check If An Ethernet Jack Is Working?

To test if an Ethernet jack is working, you will need a snifter. Therefore insert the snifter into the jack. Once you have inserted it, it will detect the internet connection. It will also display light if your Ethernet jack is in good condition.

Conclusion

Ethernet connection is the way to go if you want fast and robust internet. The Ethernet cable and the phone cable differ in size. Since the phone jack is smaller than the Ethernet cable, you cannot hook the Ethernet cable directly to the phone jack. However, you can use the DSL modem to be the medium.

You May Like These Articles As Well:

Why Does My Charger Get Hot? Understanding Your Electrical Equipment

Toshiba Laptop Won’t Turn On; Quick Laptop Fixes

Disable WMM Support; The Best Wi-Fi Configurations

Is 60 Mbps Fast Enough For Your Home And Business Needs?

0

The megabits per second (Mbps), measures a network’s bandwidth which is essentially its data transmission capacity within a given time.

Many people confuse bandwidth with speed. And this misunderstanding could be partly attributable to ads by internet service providers (ISPs) that mix both by alluding to higher internet speeds when they imply bandwidth.

While speed and bandwidth are not synonymous, you need more bandwidth to maintain acceptable speed across numerous devices. So, internet speed becomes a question of the number of connected devices and usage.

Now, let’s look at the question. 

60 Mbps Fast?

For most people, a 60 Mbps internet connection is sufficient. In terms of download speed, the FCC considers anything above 25 Mbps as high-speed internet.

Web surfing and social media activities should occur seamlessly on your computer or mobile device at this bandwidth. You can also stream videos and play online games.

However, you may want to consider upgrading to a higher bandwidth if you have many devices using your network simultaneously.

Mbps In Terms Of Broadband Speed

We measure broadband speeds in megabits per second (Mbps). Megabits are equal to millions of bits. The greater the number of Mbps you have the faster your internet would be. In the United States, the average internet speed available is roughly 100 Mbps. 

The speed will be higher in locations having fibre lines. Because rural areas rely on satellites, 25 Mbps is the standard speed.

However, your level of internet usage and the number of people using the same network in your home are the two most significant factors that affect internet speed.

Let us consider the broadband requirements of the most common activities of most Internet users and see whether 60 Mbps is fast enough or not.

60 Mbps And Gaming

In recent years, online gaming has progressed to newer versions of games that demand a constant internet connection to provide a satisfying gaming experience. In general, a 60 Mbps internet connection is sufficient for any single-player game. 

We’ve provided specific examples of game genres as well as the required minimum internet speed, so you can get a better idea of what you’ll need.

First-person shooter (FPS) games:

This is one of the most popular game genres on the internet. FPS games, unlike any other genre, demand the shooters to provide consistent input. 

First-person shooters require relatively high download speeds to enjoy a satisfying gaming experience. However, you can play FPS games smoothly with a connection speed of 60 Mbps.

Generally, FPS games do not require more than average download speeds of 20 Mbps and upload speeds of 1 Mbps.

Real-time strategy (RTS) games:

Playing RTS games is a lot of fun. Few things are more fulfilling than assembling vast armies and just wiping out your opponents with a single mouse click. 

Although a PC can play a real-time strategy game with a continually changing game state, an Xbox 360 can help you make the most of slower internet speeds and latency rates. As you can see, 60 Mbps is more than plenty for a game like Warcraft 3 to run well.

You would need at least a download speed of 3 Mbps and an upload speed of 1 Mbps to play an RTS game like Warcraft.

Role-playing games (RPG):

RPGs first emerged in the 1970s, when developers first created the game for mainframe computers, popular in colleges. Since then, the genre has progressed, and in recent years, countless outstanding RPG games have emerged from monster-slaying, remakes of popular titles, and other worlds that are explorable through diverse ideas.

With a 60 Mbps connection, you have enough to enjoy a great RPG experience. A game like Mass Effect requires a tiny average download speed of 2 Mbps and upload speed of 1 Mbps. 

Massive Multiplayer Online (MMO) games:

Hundreds, if not thousands, of gamers, can be online simultaneously in a single MMO game. Players can work together or fight in large groups in this type of game. 

In contrast to an FPS game, this type of game does not require a high level of download speed. For this game, a 60 Mbps internet connection would be excessive. 

Game designers have done an excellent job of making these games more efficient, to the point where you can play them rather well, even with a dial-up connection.  However, you will need a faster internet speed for a large team fight, as 1 Mbps may be too slow.

On average, an MMO game requires 3–5 Mbps of download speed and 1 Mbps of upload speed. With 60 Mbps, you have more than enough.

60 Mbps And Internet Streaming

The expansion of online streaming services has contributed to the demand for faster internet connections. Watching a TV episode or movie while listening to music can be data-intensive for your internet connection.

We cannot stress enough how the number of devices using your network simultaneously also affects how fast your connection will be.

The number of devices or individuals connected to the internet in your home also affects how enjoyable Netflix binge-watching might be. Netflix recommends a minimum connection speed of 5 Mbps for standard definition videos.

Hulu’s streaming service has minimum internet speed requirements that are identical to Netflix’s. A 3Mbps connection is required to watch any HD shows from the Hulu streaming repertoire. For live streaming, a minimum of 8Mbps is adequate. You’ll have more than enough bandwidth for this service with 60Mbps.

You’ll need an internet connection speed of 1.5Mbps for standard definition and 3.0Mbps for a high-definition to stream movies or shows on Roku, both of which are comfortably under the 50Mbps speed limit.

You’ll need 900Kbps for standard definition and 3.5Mbps for a high-definition to stream content on Amazon Prime. 

The standards for YouTube TV are more complicated. You’ll need at least 3Mbps to broadcast a standard definition video. If you are the only user on the network, HD streaming requires a minimum of 7Mbps, and 13Mbps if other devices are connected.

These recommendations ignore the fact that you may be streaming content while engaging in other online activities. You might want to acquire a higher Mbps package if you prefer to watch TV while doing other things like uploading files or playing games.

Can 60 Mbps Stream 4K Videos?

The term “4K” or ultra-high-definition (UHD) refers to a screen with 8 million pixels. The implication is that the quality of what you see on the screen should be four times greater or crisper than standard HD resolution. 

You’ll notice the sharp details of an actor’s facial features like colour and eye. Streaming services recommend between 16 – 25 Mbps internet for this level of quality.

Hulu, for instance, requires 16 Mbps to stream content in UHD, while Netflix requires a minimum of 25 Mbps. There’s no officially stated minimum requirement for Amazon Prime, but the general perception is that it has similar broadband needs with Netflix.

How Many Devices Can 60 Mbps Internet Speed Support?

The number of devices or simultaneous users has a significant impact on the speed of your internet connection. 

A 60 Mbps internet connection will feel fast if you are alone in your home, but if you have ten members of your family sharing the connection simultaneously, you will have a problem.

It depends entirely on what the devices are doing. It’s unlikely that ten devices streaming YouTube videos at the same time would be successful. However, you should be alright if you have a few phones, a laptop or two, and a smart TV that all use Wi-Fi at different times. 

Keep in mind that 4K videos will consume a significant amount of bandwidth. And while gaming does not consume a considerable amount of bandwidth, it does benefit from reduced latency.

So, six to eight devices cannot for simple tasks like web surfing, playing games and streaming online content in SD or HD. However, if you’re streaming 4K videos, you’ll need to either reduce the number of connected devices or upgrade your package. 

Where You Need More Than 60 Mbps

If you want to stream more than 4k on multiple devices, then you’ll need more than a 60 Mbps connection. For most streaming services, 4k streaming requires a minimum speed of 25Mbps and is one the most data-intensive activity for a broadband connection.

If you run a gaming server, 60 Mbps may be enough for a few players. Hosting many friends on a gaming server requires more than a faster connection.

An office typically uses the internet to send emails, pay bills and hold video conferencing. With four employees, 60 Mbps will be sufficient. 

However, If you run a large office with more than ten employees, you will also require more than a 60 Mbps connection to have a seamless operation.

Conclusion

A 60 Mbps internet connection will provide you with fast connection speed, especially if you are the only one connected to your network.

With this, you can meet the recommended minimum download speed needed for online activities like gaming and streaming TV content.  However, this connection will be noticeably slow to perform several online tasks like large file uploads.

If you have numerous people in your house trying to access the internet simultaneously, you will need the additional speed if you notice lag. In this case, consider upgrading to a higher plan.

You May Like These Articles As Well:

How To Connect Matricom Controller To PC: Better Gaming

How To Find Out Who Sent You An Amazon Packag

How To Use A Coax Splitter

How To Adjust Vacuum Advance On HEI Distributor: Everything You Need To Know About Vacuum Advance On HEI Distributor

0

The vacuum advance is a separate system, and it uses a small diaphragm assembly connected to the distributor side. At part throttle, the diaphragm gets moved in the vacuum advance canister on the distributor by a high manifold vacuum. As a result, more timing gets added. However, at WOT, the vacuum drops to near zero. Therefore, the vacuum advanced gets removed, and the initial plus the mechanical advance establishes the total timing.

Vacuum advance is entirely independent of mechanical advance. The vacuum advance is described as load-based timing because timing is added when the engine has a light load.  Conversely, the timing will reduce when there is more load in the machine.

More people are starting to use HEI distributors in their engines. Having an excess vacuum advance can lead to engine knock. Therefore to prevent this from happening, you will have to reduce your vacuum advance. Adjusting your vacuum advance is a simple task, and it will take you a little time to finish the process. The following is all you will have to know about the vacuum advance and HEI installation.

How To Adjust Vacuum Advance On HEI Distributor

The vacuum advance adjustment is necessary when spark knock occurs under part throttle. You can adjust your vacuum advance by inserting the 3/32 inch Allen wrench into the vacuum advance canister port. Once you have inserted the Allen wrench, you will then turn it two turns counter-clockwise. After the adjustments, you will test-drive the car.

The HEI Distributor Installation

Most people nowadays use the High Energy Ignition distributor on their General Motors. You should ensure that before you start the installation, you read all the instructions first. To install the HEI distributor, you will have to remove your original distributor.

Before removing your original distributor, ensure you check the base timing and note the position of the vacuum advance canister. Moreover, you should also note the rotor position and have new HEI-style spark plug wires.

How do you check the base timing? The first thing you will do is bringing the car engine to its usual temperatures. You will then disconnect and connect the vacuum hose connected to the vacuum advance canister. Once you have connected it tightly, you will start the car engine and check the base timing.

Distributor Removal

before you install your HEI  distributor, you first need to remove your original distributor. Here are the steps you can follow to remove your original distributor successfully.

  • The first thing is to disconnect the negative battery cable. Once the negative battery cable gets disconnected, you will disconnect the vehicle wiring harness. You will also disconnect the distributor wiring harness from the distributor cap.
  • You will then remove the distributor cap while ensuring you leave the spark plug wires attached. Once you do that, set the distributor cap and the wires out of the way.
  • You will then observe and memorize the distributor rotor position. Moreover, ensure you label the wires connected to the coil terminals and then disconnect them.
  • Once you have disconnected the wires attached to the coil terminals, remove the oil and coil bracket from the engine.
  • The next task is removing the vacuum hose from the vacuum canister. Once you have removed the vacuum hose, you can now remove the distributor.
  • You should ensure you carefully lift the distributor on the distributor housing while slightly turning the rotor.
  • After removing the distributor, check the distributor gear for any potential problems.

Distributor Installation

Once you have withdrawn your original distributor, you can now install your HEI distributor. You can follow the following procedures to ensure you have a successful installation.

  • The first step is disconnecting the wire harness from the distributor cap and removing it from the distributor housing.
  • What will follow is installing the distributor gasket over the gear and up to the distributor collar. Ensure that you lubricate the distributor gear.
  • The next thing is to ensure the distributor shaft gets turned until the rotor is in the same position before removing the original distributor.
  • You will then place the distributor into the engine. When putting the distributor, the rotor will start turning as it engages with the camshaft gear. As it is rotating, make adjustments to the rotations by turning the rotor a few degrees before gear engagement. You should ensure that the distributor collar gets placed entirely flat on the intake manifold.
  • Turn the distributor housing until the vacuum advance canister is in the exact direction before removing the original distributor.
  • The next task is installing the distributor hold down and tightening the hold-down bolt slightly. You will then tighten the hold-down bolt thoroughly after the ignition timing adjustment and install the new distributor cap.
  • You will then move the spark plug wires one by one from the original distributor cap to the new one. Once you have done that, connect the wire harness and vehicle wiring into the distributor cap.
  • If converting from a point-type ignition, ensure you remove resistance wires or ballast resistors previously used in the original distributor.
  • The next thing is reconnecting the battery and plugging the vacuum hose attaching to the vacuum advance canister. Ensure you confirm that all spark plug wires are secure and in their correct positions.
  • You will then start the engine and check the base timing. You will ensure you adjust your timing until you achieve the required timing.
  • After achieving the correct timing, switch off the ignition and tighten the distributor hold down.
  • The last thing is to re-attach the vacuum hose to the vacuum advance canister. Once you follow these steps to the latter, you can be sure to install your distributor successfully.

How To Adjust Your Vacuum Advance On The HEI Distributor

You will know that you have too much vacuum advance when running lean while cruising and not accelerating. The maximum amount of vacuum advance should be 14 degrees. If it is past that, then you will have excess vacuum advance.

Too much vacuum advance will cause the engine to knock or ping. Therefore when you notice there is too much vacuum advance, you will need to adjust it. Here are the steps you can follow to change your vacuum advance.

  • The first thing is assembling the tools to perform the adjustments. The device you will need is the Allen key. It would be best to consider using the Allen key that has T-handles. The reason for this is that it offers better control and provides more comfort while using it.
  • You will then disconnect the vacuum line from the canister. You do not have to run your engine when making the adjustments. Therefore, you will not have to worry about plugging the line after removal.
  • Enter the Allen key into the vacuum nipple and change the amount of vacuum advance. The vacuum advance system works by clockwise and anti-clockwise rotations. When you rotate the Allen key clockwise, you will be reducing the vacuum advance. If you turn it anti-clockwise, you will be increasing the vacuum advance.
  • Therefore, in this case, you will rotate the Allen key clockwise to reduce the excess vacuum advance.
  • The last thing you will do is to test and repeat. The process involves taking the car for a test drive. If you find that the engine is still knocking, you will repeat the same process until it stops.

How To Monitor Your Vacuum Advance Adjustments

Once you have made the adjustments,  you will have to keep reading them and monitoring them to ensure they are in order. The tools you will need for your monitoring are a timing light and a timing tab with some paint or timing tape. You will connect your timing light to the battery and the number one cylinder’s sparkplug.

Once they get hooked, you will point the timing light on the harmonic balancer to take your reading. The timing mark on your harmonic balancer will line up with the timing tab to let you know when the spark plugs are firing. When the engine speed increases, ensure that you watch that timing mark with the tab to determine your ignition timing level.

When Should Vacuum Advance Start?

You can start the process of vacuum advance when your engine idles at ten inches HG or less. You will begin by setting the initial timing to at least 15 degrees BTDC. You may pull the manifold vacuum down even further by placing your car equipped with automatic transmission in gear.

How Do You Know that Your Vacuum Advance Is Bad?

There are signs to show your vacuum advance is terrible. Poor gas mileage and poor throttle response are some of the signals to let you know that your vacuum advance is defective. Therefore ensure you are keen to not these signs.                    

Conclusion

Having a curve in the distributor together with a vacuum advance is a good thing. It helps in reducing low-speed timing where the engine might detonate with too much timing. The vacuum advance is better than the mechanical advance because it offers more excellent fuel economy and engine performance.

You can adjust the vacuum advance with an Allan key by either rotating it clockwise or anti-clockwise. The clockwise rotation will reduce the excess vacuum advance, while the anti-clockwise turning will increase the vacuum advance.

You May Like These Articles As Well:

How Many Microns Is A Good Vacuum? The Vacuum Micron Levels

Why Does My Bluetooth Speaker Keep Beeping? The Bluetooth Technology

How Often Should You Change Liquid Cooling PC? Things You Should Know About Liquid Cooling PC

How To Stop Windows Media Player From Updating Library: The Window Media Player

0

There are a lot of things that you can do on the windows media player library. Some of the activities you can do on the Windows media player library include creating playlists, organizing files, and burning CDs. Moreover, the windows media player library is where you can choose what you want to play.

When you first load the windows media player, your music folder contents will get displayed. The window media player holds various libraries apart from your music folders. It can also showcase your photos, videos, and even recorded TV shows.

Along the windows left edge, in the navigation pane, is where you will see all your playable items. You will find your libraries on the pane’s bottom half. You can use your libraries to search for other people’s collections with accounts on your PC.

In some cases, people experience issues with their windows media player. Their window media player might start to update their library constantly. The problem with this is that the media player uses heavy resources, thus making it slow down. Most of the people who have faced this challenge wonder how they can stop this problem.

How To Stop Windows Media Player From Updating The Library

The first thing you can do is close all running apps on your PC and open your windows media player. On the upper part of your media player, select the tools option. Once you find the library option on the tool option, open it. Once you open the library option, you will see another option of retrieving data from the internet. Once you disable it, you would have solved your problem.

Delete And Repair Windows Media Player Library

have you moved your music around your Hard drives? If you have, you might notice some issues with your windows media player. Your window media player may start to add new entries into the library instead of modifying the existing ones.

Therefore, you will end up having several entries for the same song. The worst thing is that half of these entries will not work because of moving the files to a new location. In case it happens, you will need to delete the existing library and build a new one. Here is what to do if you want to delete and create a new library.

First, you will have to close the windows media player and wait for a few seconds for the database to close. You will then click on my computer and navigate your way through to the media index folder. on the media index folder, you will delete the file that reads” wmplibrary….db.” The file is a database that windows medial player uses as a listing.

After deleting that file, you will start your windows media player. When the windows media player opens, press “F3” and put the location where you moved your music. If you moved your music to multiple files, you would click on “Check All Drives” and wait until it finishes the process. Once the process ends, you would have deleted and repaired your windows media player library.

Concerning Symptoms That You May Experience When Using Windows Medial Player 11

When you use the windows media player 11, you might experience particular symptoms that should draw your attention. One of the causes of experiencing such signs might be unintentional alterations in the database of your windows media player library. Here are some of the sign your might experience.

  • Unable to view, add or delete items on the library.
  • There are no changes applied when you use the “Apply media information changes” option.
  • You see an error message stating that “the library database has become corrupted.”
  • You have an empty list of your player’s Monitored Folders.
  • When you add folders to your Monitored Folders list, they do not get saved.

When you see these symptoms, you should try and look for the solutions. One of the solutions is to clear your window Media Player database. Here are the steps you can follow to ensure you clear your windows media player database.

  • First, you need to exit the windows media player.
  • You will then select all the files in the folder, go to the File menu, and click delete.
  • Once you delete the files, restart your windows media player. The windows media player will automatically rebuild its database.

In some cases, you can delete your windows media player database and still experience the same symptoms. If the symptoms persist after clearing your Windows media player database, try clearing the cache files of your windows media player database.

To clear the cache files, you will follow the same procedures for removing the windows media player database. However, instead of deleting all the files in the folder, you will delete the Media Player folder. Once your restart your windows media player after finishing the process, the symptoms will start disappearing.

Managing Libraries In Windows Media Player 12

You can have a better windows media player experience if you manage its library. Media player 12 automatically sorts everything through your libraries and builds its library. If you want to gain access and change how the media player makes its library, you can do the following.

  • You will first open your windows media player 12 by clicking on its icon in the taskbar.
  • Once it is open, you will click on the organize button and select “Manage Libraries.” On the manage libraries option, you will see a listing of four types of media, namely music, videos, pictures, and recorded Tv.
  • The next task is clicking the type of media that is missing files. After clicking it, a window will appear listing the monitored folders for that type of media.
  • You will then select the folder with your files, tap the include folder button and click ok.
  • The last thing to do is click on the folders you do not want to get monitored and click the remove button.  

Ways That The Windows Media Player Collects Media For Your Selected Folders

The windows media player 12 will continue monitoring the selected folders for new media. Moreover, it will also collect media for those folders. Here are the ways they will collect media for your folders.

  • Adding played items: Windows media player will add your music files to the Media Center library whenever you play it on your PC or the internet.
  • Ripped music from CD: Do you rip music from your CD? If you do, the windows media player will notice where you will put it and then add it to the library.
  • Downloaded music and video from online stores: when you use the windows media player to buy music and videos from online stores, it will add them to the library.

Categories That The Windows Media Player Organizes Your Media

The following are some of the categories your media will get organized to by the windows media player.

Playlists

One way that the media player can categorize your media is by playlist. The windows media player can arrange your music in an album to play in a particular order. You can do this by clicking on the Save List button atop your songs list and saving it as a playlist.

Music

music is another category that the window media player can arrange your media to. All your songs on your PC will go to the Music category. The media player will recognize most major music formats like MP3, WMA, and WAV. Therefore it will arrange your songs in their correct formats.

Videos

The windows media player can also categorize your media to the video category. The media player will look for videos on your camcorder, digital camera, or those you have downloaded. It will then arrange all of them in the video category. Moreover, it will organize your videos in their correct formats, such as AVI, MPG, WMV, ASF, and MOV.

Pictures

The windows media player will ensure it collects all your images on your PC and categorize them in the picture category. It can display your photos individually or in a slide show. However, it is better to use your picture folder since it handles images better.

How Do You Manually Update The Windows Media Player?

The first thing is to open your setting app and go to apps and features. You will then click on the “Manage optional features” and select “add a feature.” the last thing is scrolling down to the windows media player and click install. If you have a fast internet connection, the process will take a few minutes.

How Do You Backup Your Windows Media Player Library?

You will first open the windows media player. In the media player, you click on the tool menu. You will then look for Licence Management and click on it. The next thing is to select the folder where you want to back up the license information and click backup now.

Conclusion

You can do a lot of things on your windows media player library. Sometimes, your windows media player may have issues and starts updating your library constantly. Constant library updates may slow down your windows media player. Luckily, there are ways you can stop your windows media player from continually updating your library. Moreover, there are also ways you can manage your library.

You May Like These Articles As Well:

How To Unlock Devices On Netgear Router: The Guide

How Do Routers Forward Packets? Understanding Routers’ Working

Is 60 Mbps Fast Enough For Your Home And Business Needs?

Why Does My Bluetooth Speaker Keep Beeping? The Bluetooth Technology

0

In the late 1900, Bluetooth technology got introduced. Since then, it has rapidly grown to become one of the most versatile wireless communication technology. Its superb technology has made people adopt its technology in doing many applications and services. In recent years many speaker manufactures have implemented Bluetooth technology to develop Bluetooth speakers.

Due to the Bluetooth speaker’s portability, convenience, and superior sound quality, people have shifted to using them. Most of the Bluetooth speakers come with a status alert system. You may find that others have both an LED indicator and a beeping sound.

Does your Bluetooth device keep beeping? If it does, you do not have to panic and think that your device has gotten damaged. It might be an alert about something. Here is what you should know about the beeping of a Bluetooth speaker.

Why Does My Bluetooth Device Speaker Keep Beeping?

It would be best if you did not immediately worry when your speaker starts beeping. The reason for its beeping might not indicate that your speaker is faulty. One of the reasons why your speaker might be beeping is because of low battery. It also signals that your speaker has fully charged. The beeping sound may vary based on frequency, tone, and intensity.

Reasons Behind The Bluetooth Speaker Producing A Beeping Sound

In most cases, the Bluetooth device will beep to try and alert you about something. Therefore, you should be able to tell what every beep signals. Here are some of the reasons why your Bluetooth speaker might be beeping.

Low Battery

low battery is among the most common cause of your Bluetooth speaker beeping. Therefore when you hear your Bluetooth speaker beeping ensure that you check its battery level. The beeping tone and intensity will vary depending on the manufacturer from which you bought your speaker. In some speakers, you will hear that the beeping frequency will increase with the battery decreasing to a critical point.

In other instances, the beeping sound may get accompanied by LED indicators if the battery is critically low. Therefore ensure that you check the LED indicators while at the same time carefully listening to the beeping sound. By doing so, you will be able to know your Bluetooth speaker’s battery levels.

Connection To A Device

Most speakers have a design that removes a beeping sound when it gets connected to a device. The beeping sound is an alert sound indicating that your connection has been successful. Moreover, your Bluetooth speaker will produce the beeping sound when it gets disconnected from a connected device. However, the two beepings will be slightly different from each other.

Therefore when you successfully connect your computer,  tablet, or smartphone to your Bluetooth speaker, expect a beeping sound. You should know that not all Bluetooth speakers will produce the beeping sound during connection. Some will use a voice command instead of the beeping sound.

To Carry Out A Diagnostic Test

Another reason your Bluetooth speaker might produce a beeping sound may be to carry out a diagnostic test. Most of the Bluetooth speakers come with a self-diagnostic feature. The self-diagnostic test is to check the status of your Bluetooth speaker.

In some Bluetooth speakers, it may produce an up-beep sound and a down-beep sound. The up-beep sound will get produced when the speaker is connected successfully to a device. On the other hand, the down-beep will get heard when disconnected. The action of up-beep and down-beep will signify that the Bluetooth speaker is working fine.

Some Bluetooth speakers also have wake-up beeps to signal that the speaker is ready for pairing. To fully grasp the meaning of these beeps, it is best to read the manual that comes with your Bluetooth speaker.

A Loose-Fitting Power Cable

Have you ever heard your Bluetooth speaker beeping when your plug your speaker into charge? If your Bluetooth speaker does that, it might be because of your loose power cable. Moreover, it might also mean that your cable is faulty.

Most people use cables not recommended by the manufacturers to charge their Bluetooth speakers. Moreover, they also use cables and charging ports that do not match their Bluetooth speaker rating. Therefore, your Bluetooth device will produce a beeping sound when you do any of those things.

Presence Of Dust Or Debris On Your Charging Cable Or Power Port

Most people ignore the beeping sounds when their electronic devices produce them. However, it is a mistake that you should try to avoid because the beeping sound may be passing you’re a vital message. The beeping sound might be a form of debugging in your speaker.

When you plug in your Bluetooth device to charge it, you may sometimes hear a beeping sound. The beeping sound may be a sign that your Bluetooth speaker is not charging as it should. It might be a problem with the cables or power port.

The cause of the cable or power port not charging your Bluetooth correctly might be the presence of dust. The charging cable and the USB ports are usually open. Therefore it might attract dust, and they will gather inside.

Low Or High Voltage

The voltage of your power source is crucial when charging your Bluetooth speaker. Both high and low voltages are not suitable for your Bluetooth device. Therefore, the Bluetooth speaker will produce a beeping sound when the voltage is too high or low.

You should ensure that the rating of your power source matches your Bluetooth speaker rating. Therefore be keen to listen if your speaker produces a beep sound when you plug it in your power source. Reacting to the beeping sound by unplugging your Bluetooth speaker from the power source will prevent it from getting damaged.

How To Make Your Bluetooth Speaker Stop Producing The Beeping Sound

When you hear a beeping sound from your Bluetooth device, you should ensure that you do not ignore it. The beeping sound always comes with a message. Therefore you should be keen and try and figure out the reason behind the beeping sound. 

To make the beeping sound stop, you should ensure that you fix what causes the beeping sound. Here are the things you can try to make the beeping sound from your Bluetooth speaker stop.

Use A Plugin Port Rather Than A Computer Port

Now you know that low or high voltage is not suitable for your Bluetooth speaker. Therefore you should ensure you do not charge your speaker with a computer USB port. The primary role of a USB port is to transfer data. Consequently, it might lack enough voltage to charge your Bluetooth speaker.

Some people do not use the computer USB port but use those USB ports built into the wall outlet. What they do not know is that these USB ports have a low power rating. Therefore if you charge your USB port using that USB port, it will produce a being sound. The beeping sound is to tell you the charging voltage is low.

Therefore you should avoid charging your speaker with a USB port. Instead, charge it directly to your power source using its original charger. When the Bluetooth receives the right amount of voltage, it will not produce the beeping sound.

Ensure You Charge Your Speaker Entirely Before Using The Speaker Again.

One of the reasons your Bluetooth speaker may produce a beeping sound is that its battery is running low. Therefore you should ensure you first charge your Bluetooth speaker up to 100% before using it. You will know if the Bluetooth speaker is 100% charged by the colour it will display. When it shows a green colour, it indicates that the battery is full.

When it is red, your Bluetooth speaker will start beeping because your battery is running low. Moreover, Bluetooth with fewer battery levels will have problems with connections. Therefore your Bluetooth speaker may beep due to poo connections.

Reset The Bluetooth Speaker

When most devices produce a beeping sound, it might be alerting you of a particular problem. The Bluetooth speaker will also do the same. However, there are times that system incompatibility of the Bluetooth speaker may cause continuous beeping. When this happens, the solution you will have is to reset your Bluetooth speaker. Luckily resetting your Bluetooth speaker is a simple task.

How Do You Reset Your Bluetooth Speaker To Stop The Beeping Sound?

You will first hole down the mute button for about ten seconds. Once you do that, you will see light flashes, and the device will turn off. You will then turn the speaker back on and listen if there is any beeping sound.

Does It Always Mean That There Is An Error When The Bluetooth Speaker Beeps?

No, it is not. Some beeping sound on your Bluetooth speaker may be a sign of a diagnostic test. In some cases, your Bluetooth speaker might produce an up-beep sound when plugged in. The beeping sound means that you have plugged in your speaker correctly.

Conclusion

Most people have made Bluetooth speakers and must-have appliances in their households. It is worth buying a Bluetooth speaker because it is portable and produces high-quality sound. When you buy a Bluetooth speaker, you should understand the beeping sound that it might make sometimes. You should ensure you never ignore the beeping sound.  It might indicate something critical going on with your speaker.

How Many Microns Is A Good Vacuum? The Vacuum Micron Levels

0

Have you installed your air conditioning system? If you have, then it is most likely that its system has air and moisture. The atmosphere and humidity will make your AC not function well. Therefore you must have proper evacuation. The evacuation will help remove the air and water from your system.

Proper evacuation depends on the correct practices and assembling of tools. You will need a high-quality pump, large diameter hoses, and a vacuum gauge to have a successful evacuation process. The problem comes when you want to choose the best vacuum pump to use.

How good a vacuum pump is, depends on its micron levels. A vacuum with a lower amount of microns is better than those with a high amount of microns. Therefore how many microns should your vacuum be for it to be good?

How Many Microns Is A Good Vacuum?

How good a vacuum is, depends on many factors. The micron levels of a vacuum can tell if it is good or not. A good vacuum should have at least 500 microns and below. However, it is best if it reaches 50-100 microns.

To ensure you get the accurate micron levels, you need to use the correct hose. The hose’s conductivity determines how well the micron levels get measured. Therefore ensure you use a large diameter hose with high conductivity.

Testing Your Vacuum Pump

Testing your vacuum pump will determine the vacuum in your pump, thus knowing your vacuum pump’s micron levels. To test your vacuum pump, you will first attach the micron gauge to the vacuum pump using a ¼” connection. You will then confirm if your pump can achieve a micron level of 100 or less. A high-quality vacuum pump can achieve even below 50 microns with ease.

To minimize the chances of gas permeation through the hoses, ensure you isolate the pump and the hose using core tools. If your pump fails to reach 100 microns or below, you should consider changing your oil. You should ensure you use high-quality, low vapor pressure oil like Appion Tezom.

The purpose of changing your oil is to remove a significant amount of moisture from a wet pump. If your vacuum pump still does not reach a deep vacuum, you should consider a replacement. If you want your vacuum pump to have lower microns, you can follow the following steps.

1st Standing Test

The first step involves the 1st standing test. What do you do in the 1st standing test? The first thing is to pull the vacuum until it reaches the micron level of 1000. You can achieve this level faster if you use a hose with a larger diameter. It might take you fifteen minutes or less.

You will then isolate the vacuum with the core tools while the pump is still running. After five minutes of stabilization, you will record the leak rate on the vacuum gauge. Leak rate is the rate derived from the drop of vacuum over a unit of time. If the pressure rises after the five-minute stabilization period, moisture is still present in the system. It can also be that there is a small system leak.

2nd Standing Test

The 2nd standing test is the next step you will follow. You will open the core tools and continue the evacuation process until the vacuum level is 500 microns or less. You will then determine if there is any decrease in the leak rate. When the second leak rate is less than the first one, the dehydration job is progressing.

Finishing Vacuum

The last step is the finishing vacuum. Once you finish the 2nd standing test, you will let your vacuum pump run until it is below 200 microns. A good pump can attain 50-100 microns without any problems. Once your pump achieves the required microns, you will isolate the vacuum rig with the core tools.

You will then let the system stand for fifteen to thirty minutes. When you notice that the micron levels do not rise above the 500 microns, it indicates that the evacuation is complete. However, if there is a rise of micron levels above the 500 microns, open the core tools and let evacuation continue.

After the evacuation completion, keep the pump isolated and crack the suction line open. When you open the suction line, allow a small refrigerant amount into the system. The refrigerant will bring the system slowly into a positive pressure. It would be best to be cautious that you do not break the micron gauge by over-pressurization.

You will then open the liquid service valve to reinstall the valve cored and removing the vacuum gauge and core tools. After doing this, you will purge your manifold hoses and install gauges to complete the system commissioning.

The Evacuation Process Using A Vacuum Pump

AC and Refrigeration systems have a design that operates with oil and refrigerant flowing through them. Therefore, air and moisture and detrimental to the system operation. When a typical system gets installed and serviced, air and humidity will enter the system. Therefore you will need to remove the air, other non-condensable, and moistures in a process called evacuation. The method of removing air and non-condensable materials is degassing, while that of water is dehydration.

The evacuation process starts by removing the valve cores and connecting large diameter vacuum hoses. You will join the hoses to the back of the core tool at both of the system’s high and low sides. By doing this, you will ensure that both sides get pulled down at the same time.

The recommended diameter of your hose should be ½” and not ¼”. The reason is that the ½” hose will reduce the required time for evacuation by 16 times over the ¼” diameter hose. Therefore, a larger diameter hose will save on time and cost.

You will then connect the hose to the vacuum pump with a vacuum-rated manifold with o-ring seals. You should ensure that you keep the connection to a minimum point while the point of access is at the maximum. Next is to install a high-quality vacuum gauge directly to the core installed on the suction line using a copper line.  It will allow complete isolation of the evacuation rigs from the system during the “standing pressure test.” the vacuum quality will get measured during the “standing pressure test.”

The Gas Ballast Equipped In Some Vacuum Pump

Opening the ballast introduces free air into the pump during the discharge stroke, thus keeping the moisture in equilibrium. On the other hand, when it is closed, the water vapor will get condensed, and the humidity will drop ot in the oil. What will cause this to happen is the pressure created in the discharge stroke.

It would be best to leave the ballast open during the initial pull-down of a wet system. It is because the open ballast will help prevent condensation within the pump. You should ensure you keep it open until you are at 15000-10000 microns.

After reaching 15000-10000 microns, ensure you close the ballast since it prevents the pump from getting its ultimate micron level. It would be best only to use the ballast during the roughing period and when the system has moisture.

The ballast is only adequate when there is a small amount of moisture in the system. Therefore, if the system is very wet, try using the alternative option of frequent oil changes.

How Does A Hose Affect The Micron Level?

There are many factors you should look at when determining how good a vacuum is. One of the factors is the micron level. Most people consider a good vacuum to have low microns; the lower the microns, the better.

Hoses affect the micron levels by the time it will take to reach a certain micron level. The evacuation process can either be slow or fast, depending on the size of the hose. A large diameter will reduce friction and thus increasing the conductance speed. Therefore the micron levels will get reached faster.

What Is A Micron?

When measuring a vacuum of a vacuum pump, it gets measured in microns. In the micron vacuum scale, the starting point is at 760,000 microns at sea-level atmospheric pressure. It then works down towards a perfect vacuum of zero microns. It is the reason why a vacuum pump with lower microns gets considered to be a better pump.

Are 500 Microns Enough For Your Vacuum Pump?

The pump capacitance is responsible for determining the vacuum effectiveness. When selecting the vacuum pump to use, you should ensure you measure its micron levels. The pump that can calculate a low amount of microns is the better choice. Most high-quality pumps have microns of 500 and below.

If you are using your vacuum pump for general purposes, the 500 microns is good enough. However, it might not be enough for an intense worker vacuum.

Conclusion

Now that you know the need for the evacuation process ensure you do it every time you install your AC/refrigerator system. to have a successful evacuation process ou will need a good vacuum pump. To know the best vacuum to use, you will calculate its micron levels. If the vacuum has lower microns, then the vacuum is suitable for use. The vacuum with 50-100 microns is the best.

You May Like These Articles As Well:

Can You Use The Wi-Fi And Ethernet At The Same Time? What You Should Know About Your Wi-Fi And Ethernet

Can You Watch Normal TV On Amazon Firestick? How To Watch Local Channels On Amazon Firestick

The PDF File Viewer Tool: Preview Not Responding

Check Out How Fast Is 30 Mbps? Everything Explained

0

It’s tough to imagine life without the internet.  From home to the office, we now depend on the internet for almost everything. In pursuit of our many endeavors, fast-speed internet has become a necessity.

When it comes to choosing a fast internet connection, users have wondered what indices define a fast or slow connection – speed, bandwidth, connectivity, and many more.

We measure broadband speeds in megabits per second (Mbps), where the bit represents the smallest data unit.

Now, here is a common question.

How Fast Is 30 Mbps?

30 Mbps is enough to download movies and music, watch videos, chat online, play online games, and carry out other family-friendly activities. In essence, 30 Mbps is sufficient for a family’s everyday needs.

However, 30 Mbps is not so fast for business meetings, conference calls, business mail, and anything related to business. Let us consider the usual routine activities we would typically engage in and their internet speed.

Streaming: A 30 Mbps internet connection is more than adequate if you want to stream high-resolution videos. If you also stream live content, this speed may also be sufficient.

However, the video quality may deteriorate as a result. A minimum of 50 Mbps speed is fair if you want to stream videos with improved quality.

Gaming: If you want to play games online, even a 5Mbps connection will suffice. The download speed is sufficient to download games up to 30GB. However, if there are multiple connections, this speed may cause lag.

The latency of online gaming – measured in Ping – is something that should concern you. The higher the ping, the less responsive the game will be, ruining the overall experience. You can reduce latency by finding faster methods of connecting to the internet.

4K video: A single user can stream movies and videos in 4K resolution with a download speed of 30 Mbps. You may also watch films and movies in clear and decent quality with less buffering problems if the connection is around 5 Mbps.

30 Mbps is sufficient to watch any HD or 4K video without buffering. Buffering occurs at low speeds, preventing us from thoroughly enjoying the movie or video.

Download: A 30 Mbps internet speed is more than enough to download movies, series, and videos. Watching high-quality movies or videos online requires a speed of 2-3 Mbps while downloading movies or games up to 30 GB involves a rate of 5-10 Mbps.

Is 30 Mbps Sufficient For You?

A 30 Mbps connection is sufficient for a single user’s basic requirements. If you want to stream live, play online games, or participate in video conferences for business meetings, 30 Mbps is more than enough. You can also watch movies or live streams in high definition without buffering.

In addition, a family of three to four persons with similar needs can also get by with 30 Mbps. If you have more than four members, you may need a higher speed of 50-60 Mbps, although 30 Mbps may still be sufficient if their internet activities are not too much.

How Many Devices Can Use 30 Mbps?

If you limit internet activity to live streaming, viewing and downloading HD videos, and executing basic tasks, a 30 Mbps internet connection can conveniently accommodate up to 4 people without buffering.

How Does Mbps Work?

We measure broadband speeds in megabits per second (Mbps), commonly abbreviated as Mb Mbits p/s or Mbps. A megabit is a million bits. A bit is the smallest unit of data. Your internet activity should be faster if your Mbps (megabits per second) are higher.

A higher Mbps should indicate that downloads complete faster, web pages load faster, music or video streaming is more seamless, and any video calls or online games render smoothly.

Your device can only receive a certain amount of data per second. As such, content upload and download take time. The greater the Mbps, the more the amount of data sent to your device at a given time.

Filling up your car’s gas tank is a good analogy. To fill a tank takes time because the pump can only dispense a specific amount of gas at once.

Other factors, such as the diameter of the connected tube, can affect the time it takes to fill your pump. We can liken a narrow fuel tube to low bandwidth.

The type of connection you’re using can also affect your network speed. With a cable and fiber connection, you’re sure to experience a faster rate than using a satellite or DSL connection. You may also experience slow internet speeds when you pay for cheaper internet bundles.

What Is Broadband Internet In Terms Of Mbps?

Can you remember the dial-up of the 1990s? You would be surprised to find out that it is still a popular mode of internet access for many rural homes and businesses.

Dial-up would take you hours to download data at 56 kilobits per second (Kbps), which is too sluggish to qualify as broadband.

So, what exactly is broadband internet? The FCC now defines it as any high-speed internet connection with a minimum download speed of 25 Mbps and an upload speed of 3 Mbps.

What Are The High-Speed Internet Technologies Available Today?

Satellite technology: In rural places, satellite technology is one option for broadband internet connection. Despite being slow in the past, technical advancements have improved speeds in recent years. Some satellite services now offer broadband internet speeds.

Real-time activities such as online gaming, on the other hand, may become more challenging if lag and latency issues develop.

Digital Subscriber Lines (DSL): DSL is a broadband connection that uses existing coaxial copper technology and a modem to access the internet. The ISP, the equipment used, and the quality of the phone lines connected to your house or company all influence internet speed.

Cable connections: Cable also provides high-speed internet with incredible download speeds, although upload speeds may not match fiber-optic connections. Cable connections can suffer increased lag time when playing online games and slower photo and video uploads.

Fiber: Fiber is a high-speed internet connection with very little lag time, capable of up to 940 Megabits per second (Mbps).

This technology uses fiber-optic cables, which can transfer data at speeds up to 70% of the speed of light. Fiber-optic cables are less susceptible to severe weather than traditional cables, resulting in fewer outages. It can also easily withstand electrical interference.

Fiber-optic internet speeds are the fastest available today, surpassing satellite, DSL, and cable. Fios Gigabit Connection, for example, offers up to 940/880 Mbps of ultra-fast, ultra-reliable service.

Some services combine fiber and DSL technologies to offer a hybrid internet connection. An example of a service that employs a 100 percent fiber-optic network is the Verizon Fios.

5G Internet And Mbps

The advent of 5G networks, without question, is the biggest news in the high-speed internet industry these days. It is faster than today’s 4G networks by more than 25 times.

5G is revolutionizing how consumers connect at home and on the go, thanks to its unprecedented speeds and bandwidth. Some wireless internet providers like Verizon already offer ultra-fast rates of 300 Mbps and maximum speeds of up to 1 Gbps, depending on location.

How Many Mbps Do You Need?

Deciding the best speed for you and your household depends on how many people or devices will use the connection, including how they will use it.

Most people consider anything with more than 100 Mbps to be “fast” internet because it can connect numerous devices at once.

If the people in your home want to stream movies, you frequently send hug files for work via email, or you’re an avid online gamer, then you may need an internet speed package with 100-200 Mbps or more.

On the other hand, if you’re a single user who needs to check email and browse the web, 10 Mbps might suffice. 

How Can You Test Your Current Mbps?

There are numerous apps and websites available to evaluate the speed of your internet connection. The most popular speed testing services include CloudFare, Speedtest.net, and Fast.com.

Whether you use an app or a website, it’s a good idea to run the test a few times to get a sense of how fast your connection is. Each test takes less than a minute, provides download, and upload speeds.

You can easily upgrade to a new plan if your current internet plan is no longer fast enough to accommodate your usage and linked devices.

What To Do If You Experience Slower Internet Under Your Current Mbps Plan?

Under regular usage, your internet speed may slow down. Switch off your modem and wireless router for roughly 30 seconds, then turn them on again.

Doing this usually resolves any speed issues. However, if your internet speed does not improve, consider contacting your ISP.

Conclusion

We measure broadband speeds in megabits per second (Mbps), where the bit represents the smallest data unit. A 30 Mbps connection may be enough to handle family-friendly activities such as downloading movies and music, watching videos, and chatting online.

However, you may need a higher broadband speed for business-related activities such as video meetings, conference calls, and data-intensive business mails.

You can easily upgrade to a new plan if your current package is no longer fast enough to accommodate your usage and linked devices.

Sometimes, your internet speed may slow down. Try switching your modem off and on to resolve the issue.

You May Like These Articles As Well:

How To Play Two Players On GTA 5: The GTA 5 Review

The Frustration Associated With MacBook Pro Freezing After Sleep

Why Does Steam Always Update: Everything You Need To Know About Steam Updates

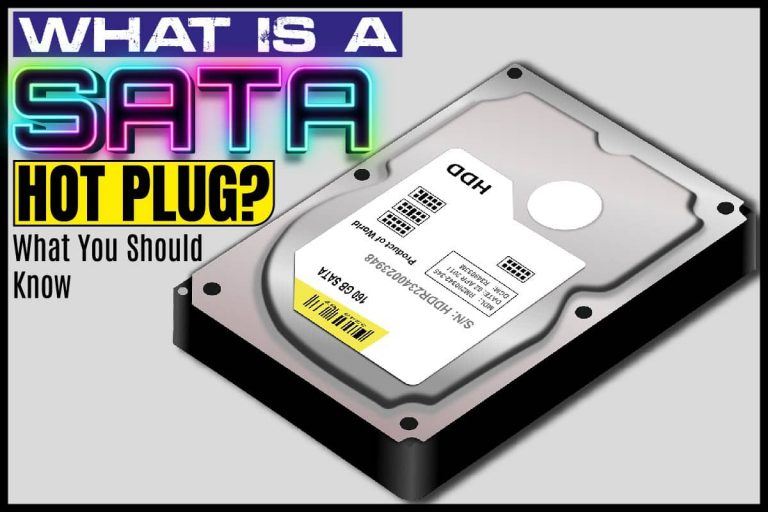
What Is A SATA Hot Plug? What You Should Know

0

When using your computer, you are likely to add one or even remove a component to process information or add functionality. For some devices, you don’t need to restart your system to either add or remove them. 

Any device or component that you can add to your computer without disrupting its operation is a hot plug. The opposite is a cold plug, which requires restarting the system. Hot plugs make for more convenient computer usage. They are available in different forms for different purposes.

What Is A SATA Hot Plug?

A SATA hot plug refers to any hot plugging device connecting to storage devices like optical disks and hard drives with SATA-certified interfaces.

SATA drives themselves are hot-pluggable because you can remove them and replace them without turning off your computer. They can also connect to other SATA-compatible external devices like external drives and adaptors for added functionality.

Compatible external hard drives (also called eSATA) connect to the computer via the eSATA port at the rear of the computer near the USB, monitor, and network cables ports.

A wide range of adapters is available for different purposes. You can use them to modify connections between SATA devices. You can also use them to wipe, explore or back up information on SATA drives, in the case of USB adapters.

You can also use Molex adapters if your power source lacks the 15-pin cable connection required by your internal SATA hard drive.

The SATA interface has two types of connectors, the data, and the power connectors.  The data connector is responsible for data transmission between the drives and the motherboard, while the power connectors provide the required power for the drives to function.

SATA cables are flat and slender 7-pin cables. The one end connects to a SATA port on the motherboard, and the other to the back of a storage device such as a SATA-certified hard drive.

Explaining The SATA Concept 

Serial Advanced Technology Attachment (SATA) is a data transfer interface that connects a computer’s motherboard to storage devices. 

Every computer system has a motherboard – a printed circuit board that connects all other components, allowing them to communicate.

Storage devices like solid-state drives, hard disk drives, or random-access memory communicate with the CPU and other components through the motherboard. The motherboard also enables peripherals like the mouse and keyboard to communicate with the monitor.

For this communication to occur, these drives or peripherals must first transmit data to the motherboard. The data transmission occurs via interfaces in the form of high-speed cables. The technical name for the interface is Advanced Technology Attachment (ATA).

Two kinds of interfaces transmit these data – serial or parallel. The terms serial and parallel describe the flow of information. A parallel interface uses multiple wire strands to move numerous pieces of data simultaneously.

However, a serial interface or the Serial Advanced Technology Attachment (SATA) uses one cable to transfer information bit by bit. Rather than transmitting data in multiple concurrent streams, serial communication sends data one bit at a time. 

As a result, serial communication is less prone to interference, allowing SATA to run significantly faster than PATA (Parallel ATA)

SATA cables are smaller than PATA ribbon cables. Therefore, they’re easier to manage because they take up less room, allowing greater airflow inside the computer casing. Serial ATA replaced Parallel ATA in 2001 to become the standard storage interface.

Advantages Of SATA

Serial ATA is far superior to the older IDE and Parallel ATA connections due to the following factors:

Improved speed:

The SATA bus interface outperforms the PATA bus interface in terms of speed. The 600MB/s maximum speed of the SATA interface greatly exceeds the PATA interface’s 133MB/s maximum speed.

Improved bandwidth: Improved bandwidth allows for more speed, which is the case with the SATA interface, which offers more bandwidth than its PATA counterpart.

Compact connections:

The SATA has a less complicated interface since it requires thinner wires. It also uses fewer wires, allowing for even more airflow within the cabinet.

Flexibility:

SATA uses longer wires than PATA, allowing for more flexibility.

Hot-pluggable:

SATA drives allow users to remove drives from a computer without having to turn it off, offering an overall smooth experience. 

Multiple drives support:

Because a motherboard has several SATA ports, you can use many drives simultaneously.

Reliability:

SATA connections have separate cables for each drive. Since these drivers do not share the same connections, there are no speed issues.

Power efficiency:

SATA drives are less power-consuming than PATA. This property makes them popular in portable devices like laptops.

Disadvantages of SATA

Require multiple cables:

Because each SATA drive has its wire, connecting several drives will require more cables. This situation creates a problem for workstations and users who need to use many storage devices on their PC.

Lack compatibility with older computers:

Most of the older computers support PATA connections. However, only modern systems support SATA.

History And Evolution Of SATA Drives

There have been several revisions to the first SATA released in 2001. SATA 1.0 revision emerged in 2003, while SATA 2.0 launched a year later in 2004. 

It took another five years for the 3.0 release to come in May 2009. Version 3.2 came in 2011, while the current version is 3.3, released in 2016.

Here’s a timeline of the evolution of SATA hard drives, with their features and improvements.

SATA Revision 1.0

The first revision of SATA came in 2003. Its devices were capable of transmitting data at a rate of 1.5 gigabits per second. SATA 1.0 devices, consisting of two PATA drives coupled in a master/slave configuration, were prominent in home and business computers.

SATA Revision 2.0

SATA 2.0 came in 2004 with the introduction of the Native Command Queuing (NCQ). The NCQ feature enables the drive to send write/read commands at random intervals, ensuring the optimal movement of the reading head.

Transfer speeds improved in SATA Revision 2.0 devices. With the inclusion of better queuing, port multipliers, and pickers, transfer speeds could now reach 3.2 gigabits per second (400MB/s).

SATA Revision 3.0

SATA revision 3.0 release came in 2009, supporting drive transfer rates of up to 6 gigabits per second. SATA Revision 3 drives are backward compatible with previous revisions, although data transmission occurs relatively slower.

SATA Revision 3.1

Revision 3.1 is a transitional revision that emerged in 2011. It introduced final design requirements for SATA Universal Storage Module for consumer-based portage storage applications. 

The following features highlighted the important changes in the 3.1 revision.

mSATA:This refers to the serial communication interface for solid-state drives in mobile devices. It is a PCI Express Mini Card-like connector, which is electrically SATA. An mSATA SSD is a smaller version of the regular SSD and is prominent in portable devices such as tablets, netbooks, and laptops.

Queued TRIM command:  The trim command feature allows an operating system to inform a solid-state drive (SSD) of the data blocks that are no longer in use so they can erase them internally. With the queued TRIM command, the performance of solid-state drives improved significantly. 

Required link power management: This feature reduced the overall system power request of several SATA devices.

Hardware control features:  Hardware controls refer to regulating and communicating between various parts of a computer system. Revision 3.1 enables host identification of device capabilities.

Universal Storage Module (USM): This is a new type of cable-less plug-in (slot) powered storage for any consumer electronics device. The USM enables developers to incorporate slots into computers, including other devices.

SATA Revision 3.2

Released in August 2013, this revision presented the SATA Express (SATAe). It supports the real-time use of SATA ports and PCI Express (PCIe) lanes, making it possible for legacy SATA and PCI Express storage devices to function together.

SATA Revision 3.3

Released in February 2016, this revision introduced the following features:

Shingled magnetic recording (SMR) support: Shingled magnetic recording is a storage data technology that uses magnetic force in hard disk drives to enhance storage density and storage capacity.

This feature provides a 25 percent or more increase in hard disk drive capacity using overlapping tracks on the media.

Power disabling feature: Remote power cycling of SATA drives is possible with this functionality. Also included is a Rebuild Assist feature that aids in the rebuilding process to reduce data center maintenance.

Transmitter emphasis specification: In data transmission, emphasis has different applications. Pre-emphasis and de-emphasis are the two ways in which a system regulates data input and output. 

Pre-emphasis increases refer to the boosting of the input data range. The reverse occurs in de-emphasis. In serial data transmission, de-emphasis reduces the level of all bits except the first one after a transition.

The 3.3 revision improves data transmission and reliability between hosts and devices in electrically difficult environments.

Conclusion

SATA hot plugs refer to data transmission components that allow removal and replacement without disrupting your computer’s operation.

Serial Advanced Technology Attachment (SATA) is a data transfer interface that allows storage components to communicate with the motherboard.

SATA drives are hot-pluggable themselves as you can remove and replace them without turning off your computer. They can also link to other SATA-compatible external devices like external drives and adaptors for added functionality.

SATA is the predecessor to PATA (Parallel ATA). Serial ATA replaced Parallel ATA in 2001 to become the standard storage interface.

You May Like These Articles As Well:

The Laptop Makes A Rattling Noise When Tilted. All You Need To Know

Why Does My Bluetooth Speaker Keep Beeping? The Bluetooth Technology

The Laptop Only Charges When Turned Off— Understanding The Laptop

What Is A Class 2 Power Supply? Understanding Power Supply

0

From homes to offices, people use electrical devices for one reason or the other. Electrical devices essentially use electric power to function. 

At the heart of an electric system is a power supply. The power supply is a sort of intermediary between an electric power source and an electric load. By load, we mean the task we want to perform. An example is the turning of the blades of an electric blender.

In this article, we look at what a class 2 power supply is, including other related information. Now, let’s answer the question.

What Is A Class 2 Power Supply?

Class 2 refers to power supply devices that meet National Electric Code (NEC) regulations for wiring specifications and power restrictions to minimize the risk of shock or fire.

Generally, class 2 circuits’ power devices require low energy and voltage like intercoms; security systems, low-voltage lighting, and public address systems (PAS).

Class 2 circuits can prevent shocks and fires by limiting power and voltage to the load. Class 2 power supplies usually have the words “Class 2 Power Supply” on their labels.

Specifically, a class 2 power supply limits 30V circuits to 100VA to prevent electrical accidents. What does this mean for you?

When it comes to electricity, safety concerns remain paramount across the world. Therefore, using and installing devices like power supply in a particular location must comply with safety standards peculiar to that region.

The National Electric Code (NEC) defines these standards for the safe installation of electric wiring, relevant for class 2 power supplies. 

Before we look at the specific requirements for a class 2 power supply, let us first learn about the power supply. What is a power supply?

About Power Supply

A power supply is an electric device that provides electrical energy to a load. The basic role of a power supply is to convert electric power from an electric source to the right current, voltage, and frequency parameters for the load. 

Some power supplies are independent units, while others are integral to the load appliances they support. Examples of integrated power supplies are those found in consumer electronics and desktop computers.

Now that we have defined the power supply, let us look at the NEC’s requirements for a class 2 power supply unit. 

Class 2 Power Supply Requirements 

Power supplies usually offer protection from short circuits or overload as these could destroy the supply unit or cause a fire. 

The National Electric Code (NEC) provides safety wiring and power requirements for a class 2 power supply. Let us examine them in more detail.

Wiring:

A Class 2 power supply must come with In-Wall Rated wire for permanent installation inside walls or floors where insulation may be present.

These wiring specifications serve to keep the wire from splitting or melting. The power source could become a potential fire hazard if manufacturers do not meet these conditions.

Power:

The power limitation is the essential aspect of the NEC Class 2 standard. These restrictions function to protect you from electric shock or to overheat from high currents.

A power supply is class 2 compliant if the 12V drivers draw less than 60W and the 24V drivers draw less than 96W. For instance, LED power supplies can convert 120V power into low-voltage 12V or 24V power.

However, larger projects, such as house renovations or commercial building construction, require more power to operate multiple lightning. In this case, you can use large wattage multi-tap power supplies such as a 12V 240W power supply for these projects. 

High-wattage multi-tap power supplies have distinct power outputs. Because each output has its circuit breaker, a power surge in one will not affect the others.

Using a single large power source instead of many power supplies for a large project is more convenient and cost-effective.

Functions Of  A Power Supply 

Electricity supplies may need to adjust voltage, convert power to direct current, or control power for a more consistent output voltage.

These parameters will help you figure out the kind of electrical supply you need. Buying a gadget with too many features may cost you more money than necessary, but you risk damaging the devices you need to power if you don’t get what you require.

Voltage Change:

The main purpose of a power supply is to alter voltage. The power source has a constant output regardless of the type of equipment that must utilize it. Power supply units adjust the voltage to the device’s requirements to avoid overload.

Too much power from a power source can harm a device.  However, if the power supply does not deliver sufficient voltage, the device will not perform properly. The transformer that adjusts the voltage up or down as needed is the main power supply component.

Power Conversion:

The power supply converts incoming electric power into a usable format for the device. 

Power Regulation:

The majority of electrical equipment requires regulated electricity. Because the voltage and type of electricity vary, the output of a power source is not always constant. 

The incoming voltage swings erratically, even though it does not switch on and off. Such uncontrolled power sources can produce more energy than required.

A jolt like this delivered to sensitive equipment like computers and televisions could damage the components permanently or irreversibly.

This power regulation functionality increases the cost of the device. You get to save more money in the long run because you won’t have to replace your devices due to damage from potential power surges.  

How Does A Power Supply Work? 

The most basic power supply converts voltage to DC power and back. If you need controlled power, these devices function to adjust the voltage to smooth out waves.

Read on to learn about a typical power supply component and its functions to understand better how a power supply unit works.

Components Of  A Power Supply 

Various components make up a basic power supply. These components aid the unit in stepping up or down voltage, converting power, and decreasing ripple voltages, which waste energy and cause overheating due to residual voltage variations. 

Transformer: 

The transformer transforms the input voltage into the desired output voltage. By stepping up or down, these devices can modify the voltage. The needed DC voltage is typically much lower than the incoming AC voltage from the primary power source.

Rectifier: 

The rectifier’s job is to facilitate converting the incoming AC power to DC electricity. Half-wave, full-wave, and bridge rectifiers are the three types of rectifiers.

Filter: 

Power conversion from AC to DC does not necessarily eliminate waves. The filter becomes useful in this regard. The filter doesn’t smoothen the ripples entirely, but it does significantly lessen them.

Regulator: 

A voltage regulator minimizes the ripples left by the filter, eliminating any voltage spikes or drops that could damage devices linked into the power supply.

The specialized function of the power supply unit necessitates the use of power supply components. As a result, supply components may vary from one unit to another.

Some Specifications Associated With Power Supply

In studying power supply units, you will most likely come across certain specifications. While all power supply characteristics are important, some are more so. Here are a few specifications to keep in mind:

Output Current:

This refers to the maximum current that the load can receive. A power supply unit cannot supply more current than its rated output current unless there is a malfunction, such as a short circuit at the load.

Even when transient power spikes are in the load, operating below the maximum rating permits the power supply to offer enough energy. Also, working at lower levels reduces component strain and heat loss.

Load Regulation: 

We measure the load regulation in millivolts (mV) or maximum output voltage.

The power supply’s load regulation guarantees that the circuit or system receives the required and stable voltage. The ideal load regulation is zero, which means that the supply’s output voltage remains constant regardless of the load.

Noise & Ripple: 

Noise refers to any undesired electrical interference, while ripple refers to the slight voltage variation following AC conversion to DC. Engineers usually define both concepts in single mathematical expressions. 

Overvoltage Protection: 

In some cases, output voltages can exceed their nominal values, causing damage to the load. The overvoltage safety circuit turns down the power supply when the voltage exceeds these limits.

Overload Protection:

In a short circuit or an overcurrent, overload protection is a safety mechanism that prevents damage. Like a circuit breaker in a house, Overload protection interrupts the power supply to protect the load.

Efficiency:

Efficiency refers to the percentage of grid electricity converted to DC power. A good power supply will have at least 80% efficiency and even higher with a proper system design. An efficient system saves energy and reduces heat.

Conclusion

The basic role of a power supply is to convert electric power from an electric source to the right current, voltage, and frequency parameters for the load. 

Power supplies usually offer protection from short circuits or overload. An overload could destroy the supply unit or cause a fire. 

Class 2 refers to power supply devices that meet National Electric Code (NEC) regulations for wiring specifications and power restrictions to reduce the risk of shock or fire. Class 2 circuits can prevent shocks and fires by limiting power and voltage to the load.

You May Like These Articles As Well:

HP Spectre BIOS Update; Optimizing Your Computer’s Operation

15 Inch Laptop Dimensions; All Your Monitor Requirements

The PDF File Viewer Tool: Preview Not Responding