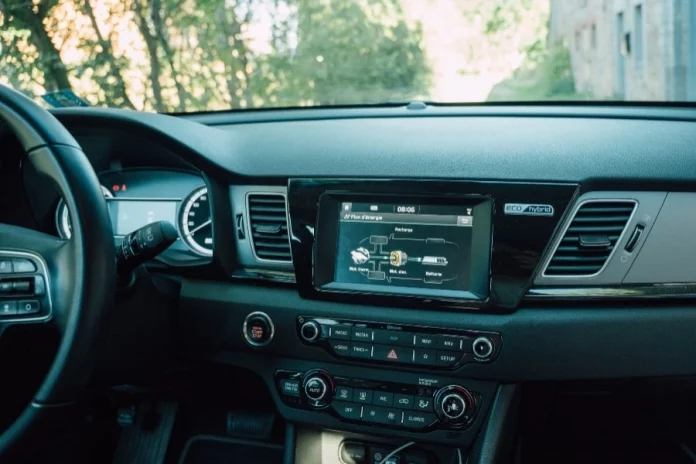
Installing a new car radio is a fantastic way to spice up your driving life. An MP3-compatible stereo allows you to listen to new music while also boosting the sound quality of your car’s audio system.
However, it would be best to research your car type and the appropriate stereo before starting.
Although time-consuming, wiring a car stereo from scratch is simple. Buy necessary tools such as pliers, screwdrivers, sandpaper or a file, electrical tape, sharp knives, wire cutters, and strippers.
Follow the steps below to get started.
Step 1: Buy A New Stereo Harness
Stereo harnesses work like adaptors. Although your new stereo will come with a diagram describing each wire and where you should attach them, a stereo adapter can make the wiring much more effortless.
You can use specialized stereo adaptors to bypass built-in amplifiers, increasing the wire length. However, you must ensure that the harness is compatible with the car and the stereo to work effectively.
Using the adaptor carefully reduces the chances of error when wiring your car stereo.
You can order stereo harnesses online or buy them from car parts and electronics stores.
Step 2: Check And Connect Any Loose Wiring
If you’re not using a wiring harness clip adaptor, you’ll need to determine which wires come from the car and which ones come from the stereo.
Although you’ll have to cut the wires on the back of the car’s harness clip if you don’t have an adaptor, be careful at this stage. Carefully connect the cables to the corresponding wires on the stereo to avoid confusion.
To help you identify each wire, look up your car repair manual or a wiring diagram for your car online. The ground wire for most stereos and its corresponding cable from the vehicle are usually black.
Use the diagram to match each wire to its counterpart on the vehicle.
The antenna wire is thicker than other wires and has a metallic head. You can connect the antenna wires before installing the stereo.
Step 3: Connect The Output Converter
Some vehicles require an output converter to function effectively with some car components.
Make sure you get an output converter specific to your vehicle’s year, make, and model. You can consult your owner’s manual if you’re unsure if your car has external amplifiers.
Step 4: Secure All Wiring Connections
After you’ve connected all the stereo wires to their counterpart car wires, you’ll need to secure those connections. There are several methods for permanently joining the cables of a stereo to the car.
Remember to wrap all exposed wire connections in electric tape or heat-shrink wrap to ensure no bare wire metal is visible.
Step 5: Perform A Test Run
After you’ve secured all wiring connections, test the stereo by plugging it into a power source. Unplug the stereo device once you’ve double-checked if the power and the stereo speakers are working.
Step 6: Fix The New Car Stereo Into The Bracket
Now the wiring is complete, and the car stereo functions well. Afterward, install the new stereo in the bracket. You should use the screws that came with your car stereo to fix it into the frame.
Step 7: Finish The Setup And Have Fun
After you’ve fastened the new car stereo in the bracket, all you have to do now is reconnect the wiring harness and plug the stereo into a power source in the unit.
Finally, you now have a car stereo. Enjoy the new vibes of music from your stereo.
What Wire Powers The Car Stereo System?
Two or three wires power a vehicle stereo system, depending on your car type. The yellow 12V constant wire keeps the stereo memory alive while also powering the clock, presets, and other devices.
The yellow cable is always hot, whether the car is on or off because it continuously retains a 12volts.
The red 12V accessory wire comes right after the yellow 12V cable. This red wire labeled ACC helps to turn on the car stereo. However, this red 12V accessory wire only works when you turn on the ignition or the vehicle is running.
The third wire is orange with white-striped stripes cable. Although this wire is not in every car, it functions as a power source for the headlights and dash lighting. In addition, the orange wire controls the bright or dullness of these car lights.
Which Wires Control The Car Stereo Speakers?
The car stereo speakers come in four different wire colors. Each wire may be solid or striped. For instance, the grey wire with black stripes is the negative cable for the right front speaker, whereas the solid grey wire is the positive cable.
The white cables connect to the left front speaker. The purple wires connect to the right for the rear speakers while the green wires to the left rear.
What Is The 12V Accessory Wire On A Car Stereo?
One of the three power cables used by a car radio is the 12V accessory wire. It’s red in color and aids in turning on the car stereo. However, your ignition key must be in the accessory position for this wire to turn on the stereo.
Therefore, the 12V accessory wire becomes activated when you switch on the ignition. Activation of this wire directly turns on the stereo.
Thus, the accessory wire loses power when you remove the key from the ignition. The cable shuts down, enters low power mode, and goes off the car stereo. Therefore, the 12V wire must remain connected to power your car stereo.
What Are The Options To Join The Wires Of A Car Stereo?
You’ll need to connect bare wire while wiring your car stereo from scratch. Please don’t just tape the wires together; the tape will eventually dry out and break off, exposing the wires and damaging your car stereo.
Here are several options for making secure, long-lasting connections:
Soldering: ensures optimal current transfer by forming a durable contact. To insulate the soldered connection, we strongly advise you to use heat-shrink tubing and a heat gun.
Most professionals prefer this method because it provides the most secure and conductive wiring connection.
Crimping: is a quick and easy process. If you’re going to crimp the wires together, make sure you’re using the right size crimp connection. Most in-dash stereo cables are 18 gauge, but some have thicker gauge power and ground wires.
Crimp connectors are of different shapes and sizes, including bullet connectors, butt connectors, and crimp caps. The main disadvantage is that they might come loose if the caps aren’t crimped tightly enough.
Can I Run A Car Stereo Directly Off A Car Battery?
It is unnecessary to use a car battery before your car stereo can function. All you need is a power supply and simple tools. You’ll need a 12-volt battery, similar to those used in car electrical systems.
By following simple few steps, you’ll have power the car stereo battery in no time.
How Do I Run A Car Stereo Directly Off A Car Battery?
Step 1: Remove 1/2 inch of insulation from the red and yellow wires on the wiring harness of your car stereo. These are the switched and constant power cables.
Step 2: Twist the yellow and red wires together and insert them into an alligator clip. Using a crimp tool, attach the cables to the clasp.
Step 3: Trim 1/2 inch of insulation from the black wire in the wiring harness of your car stereo. This black wire is the ground, or negative, cable.
Step 4: Fasten an alligator clip to the bare end of the black wire.
Step 5: Connect the stereo to the battery by connecting the alligator clip’s positive wires to the battery’s positive terminal. Afterward, attach the negative wire to the battery’s negative terminal. Finally, you can turn on your car stereo.
Can I Power A Car Stereo At Home?
The short answer is yes. You can connect a car stereo to a 120V or even 220V house socket with the proper power source. However, you cannot secure a stereo with a low voltage of DC (direct current) to an outlet.
You’ll need a power supply that can safely convert the high AC voltage outlet at home to a lower DC voltage that a car stereo can use.
Home AC outlets in the United States provide roughly 120volts AC (alternating current). Therefore, connecting a DC device to AC power is very dangerous and unsafe. One of the dangers is an explosion or fire outbreak.
Conclusion
The sight of wire bundles can be intimidating, especially if this is your first installation and you don’t know what to do with the cables.
However, if you’re careful enough to connect each wire one at a time, the task won’t seem so difficult. Although your new stereo will come with a diagram describing each wire and where you should attach them, a stereo adapter can make the wiring easier.
Follow the steps above critically, and you’ll have your new car stereo wired and ready to rock in no time.

