Home Blog Page 35

The PDF File Viewer Tool: Preview Not Responding

0

Apple developed many features for MacBook users. One of the exciting features it created is the Preview app. A preview is a tool used by MacBook users to open and view images files and PDFS. There are a lot of things you can do with preview, including rotating texts.

It can be frustrating when you want to view your PDFs, and the preview refuses to respond. What do you do when Preview does not open on your MacBook? In some cases, the preview can respond but fail to open PDFs and even select texts for copying and pasting from PDFs. Moreover, others may not work when combining, searching, marking up, and reordering pages.

The good thing is that there are solutions to all the above problems. You can fix those problems and get your preview to work perfectly on your MacBook again. Here is everything you need to know about fixing your preview on your MacBook.

Preview Not Responding

Have you ever been using your Preview, and then it stops working? It might happen due to various reasons. It can be malware, or something is wrong with your preview. Despite what reason it might be, you need to find a solution to it. An error can also occur, and your preview becomes unresponsive. When this happens, a follow-up alert will pop up reading the application ‘’preview app’’ is not open anymore.

Situations Where Preview App May Disturb You When Using It

The preview app is a vital tool to have in your MacBook since it will help you open and view PDFs. However, there are times that the app may have problems. Problems might occur in different situations, including:

  • Preview not responding on your MacBook
  • Preview not opening PDFs on Mac
  • Preview not selecting texts for copying and pasting
  • Preview not working when combining, searching, marking up, and reordering

Preview Not Responding On Your Macbook

It happens when you cannot open your preview on your MacBook, making you get stuck. You will be unable to view and open PDF files.  An error message will pop up on your screen to notify you that the preview app cannot open. The following are some of the ways you can solve this problem.

Force Quit Preview

One of the things you can do when your preview is not responding is to force quit the preview. However, this method does not work all the time, but you can try it. There are two ways you can force quit preview, and they include using Force Quit Window and using Activity Monitor.

Using Force Quit Window

To force quit your preview using this method, you will first open the Force Quit window by pressing the command+option+escape keys. One the Force Quit Window, select preview and click force quit, and reboot your MacBook.

Using Activity Monitor

You will first open the Activity Monitor application by going to the finder, selecting applications, and selecting utilities. On the Activity Monitor application, you will select the CPU tab and click the ‘’process name.’’ In the processes list, you find and choose preview. Click on the stop sign button, and select force quit. After you force quit, you will reboot your MacBook.

Update Or Reinstall Your MacOS

Bugs on your MacBook can also make your preview app not respond. Therefore to get rid of the bugs, you can update or reinstall your MacBook. You should update your MacBook to the latest macOS version. If you already have the latest macOS version and still have the same preview problem, you should try and reinstall your macOS.

How To Update And Reinstall Your MacOS

Updating your MacOS is a simple task. You first need to connect your MacBook to an internet connection, go to system preferences, and select software updates. You will check for any available updates. When you find the updates ensure that you download and install all of them.

Before you reinstall your macOS, ensure that you first back up your data using Time Machine. To reinstall your MacOS, you will first shut down your MacBook and wait for a few seconds for it to power off completely. You will then press the power button briefly and immediately hold command+R.

When you do this, a recovery mode screen will appear, and you will see the option of reinstalling your MacOS. Click on that option and follow the on-screen prompts to finish your reinstallation process.

Removing Your Preview Preferences

Preview preferences files are files that macOS creates to store your preview app settings. Therefore if your preview app does not respond, you can remove the preview preferences files. Before deleting them, ensure that you first back up your MacBook.

How To Remove The Preview Preferences

You will first go to the menu bar and select the go to folder option. There, you will type ‘’~/Library/Preferences/com.apple.Preview.plist’’ and click go. Ensure you move the preference to your desktop for safety measures. Once you do that, reboot your MacBook and test the preview again to see if it works.

Preview Not Opening PDFS On Mac

Your preview might open perfectly on your MacBook but have other problems when using it. Have you ever used a preview, and it refuses to open PDF files? The cause might be the macOS itself. When this happens to you, here are some of the methods you can fix it.

Set Preview As A Defaulted PDF Viewer

Sometimes the preview may refuse to open files because it is not the default app for opening your PDF files. Therefore you need to set the preview as your default PDF viewer. Setting your preview as the default app for your PDF viewer is simple.

You will first go to your PDF file and click on it and go to get info. On the ‘’Open with’’ option, you will select preview. And then change all to ensure you set preview as the default PDF reader. Once you have chosen preview, open your PDF with preview.

Restart Mac

Another method you can use to find a solution to your preview not opening PDF files is restarting your MacBook. Restarting your MacBook is the simplest and the best way to troubleshoot when working on your MacBook. Therefore when you restart your MacBook, your preview should be okay again.

The first thing you should do is to save your work. There are two ways you can restart your MacBook. You can go to the Apple icon and select restart. Another way to do it is by pressing and holding your power button to shut down and press the button again to restart.

Reset Permission

If your preview still has problems opening your PDF files, you can try resetting permissions. When you want to reset permission, the first thing to do is click the Apple icon and go to the folder. One the folder input users and then click go, and it will take you to your home folder.

Click on your home folder and select get info. You will then click on the lock icon, put your password, click on the setting icon, and select ‘’ apply to closed items.’’  You will then go to finder and click on applications open terminal.

On the application open terminal, you will input ‘’diskutil resetuserpermissions / ‘ id – u ‘ ‘’ and press the enter button.  You would have completed the reset permission process. Once you finish, restart your MacBook and open your PDF file again with your preview.

Preview Not Selecting Texts For Copying And Pasting From PDF

Some MacBook users have complained that their preview app cannot select PDF texts for copying and pasting. If you are among those users, here are some things you should try to fix that problem.

  • Ensure that you can and protect your PDF file.
  • Convert preview PDF to editable formats on your MacBook.
  • Open the PDF file using other PDF readers.

Preview Not Working When Combining, Searching, Marking-Up, And Reordering Pages

If you face this problem with your preview app on your MacBook, here are some solutions you can find to the problem.

  • Reinstall your MacOS.
  • Use a PDF viewer alternative other than the preview app. A good example is the PDF Master.

Why Is Your Preview App Not Responding?

It can be frustrating to open your PDF files, and a pop-up error message appears saying the preview app cannot open. The reason why your preview may not respond can be the presence of bugs on your MacOs. Moreover, it can also be that you have not updated your macOS to the latest macOS version.

How Do You Soft Reboot Your Macbook?

You will go to the menu bar, and press shut down. Before you confirm the shutdown, first uncheck the box ‘’reopen windows when logging back in.’’ click shut down and wait for a few seconds until your MacBook powers off. Once the MacBook is off, briefly press the power button to turn the MacBook on again.

Conclusion

A preview app is an essential tool used to view your PDF files. Some of the MacBook users have complained about the preview app having problems. There are times when your preview app will not respond and hence refuse to open PDF files. Your preview app might respond well but refuse to select text for copying and pasting in other instances.  Luckily all these problems have their solutions.

References

You May Like These Articles As Well:

Why Does My Bluetooth Speaker Keep Beeping? The Bluetooth Technology

Is 200mbps Good For Gaming? Check Out The Response

Check Out These Tips On How To Switch From AMD To Nvidia

Why Does My Charger Get Hot? Understanding Your Electrical Equipment

0

As we make more advancements in technology, humans are getting more mobile devices. This means that there is increased use of chargers and they are becoming more vital to us.

Without your laptop or phone charger, the device would become useless in a matter of hours.

With such vital roles, it is understandable that you would be worried when your charger gets hot, especially after prolonged use. Let us get into the inner workings of your charger to understand this;

Why Does My Charger Get Hot?

You need to understand that the electronics use direct current, but the mains produce alternating current. The charger, therefore, has to convert the electricity, and a lot of energy is wasted in this conversion.

The heat you feel on the charger is a form of lost energy due to the conversion of AC to DC, which is safe for your electronics.

How Does A Charger Work?

To understand why chargers get hot, we need to get a better view of exactly what they do. We know that the charger will change the AC to DC, but there is more to it.

First, the charger converts AC to DC then back to AC before it transmits it in DC form. Inside the charger, there are diodes, capacitors, transistors, and a resistor. In the middle of the charger is a transformer and an Opto-coupler.

The incoming AC goes through a fusible resistor which protects the device from overloading. The current then goes into a bridge rectifier that converts it to DC before moving into the charger.

The next step for the current is an oscillator circuit; it converts the DC back to high-frequency AC using transistors, diodes, and a capacitor. These components make up the converter for the Optocouplers phototransistor.

The current goes into the transformer from the oscillator, which has the primary, secondary and auxiliary windings.

All these are wrapped around one core, and it is used to step down the incoming voltage since it is too much for the devices, especially phones.

The auxiliary winding purpose is to run the oscillator circuit. After the step-down transformer, the current goes to another circuit that consists of a diode and a capacitor. These two will convert the reduced AC to DC, which goes into your phone.

The charger also has an Optocoupler, a device used to transmit current without contact. One side of it is an infrared LED and on the other is a phototransistor. When the LED gets turned on by the current, it turns on the phototransistor.

Looking at all these, you can get an idea of where all the heat comes from. As the current gets stepped down, most of the electrical energy is lost as heat energy which heats the charger.

In addition to this, there is resistance in the components, and that also produces some heat. The chargers are mostly sealed off, so they don’t effectively cool as they work. Extensive use will therefore cause heat buildup that could damage the charger.

How To Make Your Charger Last Longer

Your phone charger is an important asset, and you need it to work correctly at all times. This will allow you to charge your phone in good time, which means you will have better service. You, therefore, need to take good care of it to make sure it lasts.

  • Plug the charger out of the phone or the header correctly. Please don’t hold the cable and yank it out since this will mess with the internal wiring. Instead, hold it by the hard part at the plug and pull it out perpendicularly.
  • You can buy a cable protector along with the charger. These protectors are attached right next to the plugs, the most delicate part of the cable. The protector will prevent it from twisting too much; thus, it won’t break.
  • Don’t twist the cable up. When moving the cable, don’t twist it around other objects like pens or even the phone. This will put a lot of strain on the plugs, and they could get disconnected over time.
  • Don’t put heavy or sharp objects on the cable. These might cut through it or damage it internally. So you will end up with a cable that is not working yet you have no idea why and will have to buy another.
  • Don’t stick anything metal into the charger port. The charger plug has pins that could be damaged when they get pushed. In addition, you could get an electric shock or end up short-circuiting your phone.
  • Get the cables organized. Whether you are at home or moving, you need to keep all the cables organized, so they don’t get tangled up with each other. Loop the cable in circles, then put the heads inside the spiral without bending the plugs.
  • If your charger gets heated up quickly, don’t push it. Several components inside it are sensitive to heat so that they can get damaged. Give it a break after use and disconnect it from the mains if you are not using it.
  • Don’t expose the cable to too much cold. Low temperatures make the wires inside the charger less flexible; thus, a slight bend could cause it to snap and break off.
  • Please don’t pull the cables or drop them into the water, especially the header. The charger takes in 240 volts from the mains socket, and it might get fried if the circuitry is wet. Once the charger gets fried, it’s impossible to repair, and you have to buy a new one.

How Does A Fast Charger Work

There is a decent chance that you don’t give a lot of thought to charging your phone. You plug it in and leave it there; then, you will come back later to see if it is full. What if you forget to charge it overnight and you have to leave the house quickly?

In such a case, you would jump into fast charging. This is a feature in some chargers, and it allows you to charge your phone in a matter of minutes fully. So how come a fast charger can work this much faster than standard chargers?

Most devices take a long time to charge because of the limited amount of power the charger can pass at a time. Standard chargers pass 5 watts or less, making them take a long time to fill the battery.

This design feature serves two purposes; it keeps the manufacturing costs down and safeguards the battery. The small battery in your phone could get fried if a lot of electric currents went into it at once.

In real life, most devices can handle more than 5 watts thanks to internal circuitry that sets a maximum wattage level for them.

The circuitry will also prevent the battery or phone components from getting fried by the current.

A fast charger takes advantage of this internal circuitry. Depending on your device’s capability, they adjust the amperage and voltage to deliver up to 20 watts at a time or higher. This will only work if your device supports the technology.

You must be wondering what technology we are referring to since all that is happening is a charger is pumping power into a battery. There are several factors in play here, but one of the most important ones is heat.

With higher power comes more heat, and heat causes expansion. So if your device does not have enough space for the batter’s expansion, it might end up getting damaged. This is mostly when the power is supplied faster than the battery can handle.

To avoid this problem, most manufacturers for both devices have implemented a handshaking process before the charge.

This makes sure both devices are built to handle high amounts of charge before they start working.

Most devices that support fast charging come with compatible chargers, but you might have to pay a fee for extra ones.

The cable you use should also be better than average since the cheap cables can’t handle the additional current.

Another concern is the heat generated by fast charging. This heat is not suitable for your battery, and it might damage it over time.

This is especially a big deal now that most phones come with sealed-in batteries that are difficult to replace.

Conclusion

Your charger gets heated up as you use it because of energy loss. There is a change from AC to DC, and in the conversions, there is resistance and energy loss in the form of heat energy.

This heat can get too high and damage some of the components, which will ruin the charger.

To stay safe, use the charger appropriately, give it some breaks between uses to give it a chance to cool before using it again.

For the cord, ensure you use and store it well so that it doesn’t break and force you to buy another.

The cables might not be expensive, but replacing them can be tedious for you, so you should avoid them.

You May Like These Articles As Well:

The Laptop Only Charges When Turned Off— Understanding The Laptop

How To Charge Laptop With HDMI

Toshiba Laptop Won’t Turn On; Quick Laptop Fixes

Why Is Roku TV Screen Green : Here Is Why And Quick Fixes

0

That’s from the basic Roku device to the high-end one and excellent quality with interesting, smart features. There is a model for everyone.

However, like all other techs, the Roku devices also run into troubles and bugs. It can be an app compatibility issue, remote, green screen, and many more.

I know how frustrating the problem can be when they pop up. Do not worry; the good news is there is always an easy fix for every issue.

Today we’re going to look into the green screen issue and how to fix it. Let’s get back to answering the question.

Why Is Roku TV Screen Green

The green screen issue has become a thing on Roku TV.  It mostly happens on the application and not the local or live TV channels.

The cause of the issue is a bug in the Roku TV application after the update. But if you do not use the app, the problem might be stemming from your HDMI cables.

How To Fix The Roku Green Screen Problem

You can quickly fix the Roku TV issues with a software update, restart, and factory reset. Here are some of the working tricks that can improve the green screen issue on your Roku TV.

Power Cycle the Roku TV

The power cycling trick is known to fix the green screen issues. It’s an easy and quick trick that you can pull without any trouble. Here are the steps you can follow to actualize this.

Unplug your Roku TV from the power source. Do this for thirty to sixty seconds. Connect it back and power it on.

Go to any streaming app or YouTube to check if the issue is gone. If the trick did not fix the problem, you can do the other quick fixes in this article.

Switch between the App and Live TV

It’s another simple, quick fix that you can try if the power cycle did not work. So how do you do this? If you stream Hulu, Netflix, or YouTube applications on your Roku TV, you can switch to live or local TV (known as feed channel).

Please do it for a few seconds, like thirty to fifty, then return to the application you were streaming from. It should certainly fix the issue.

HDMI Cable

You can also get the green screen issue if you have connected too many cables on your Roku TV. Disconnect any unnecessary wires from the TV.

After doing this, check to see if the issue is gone. If this does not fix the problem, try a different HDMI cable. Alternatively, you can use the HDMI splitter.

Many users say the HDMI splitter does fix the green issue. You can also check your HDMI settings. Accessing the HDMI settings is easy. Here is a guide to the HDMI settings that will save your time.

Go to the settings on your Roku TV and scroll down to the TV inputs option. Open the option and then choose HDMI mode.

Change the mode from either HDMI 2.0 or HDMI 1.4. Choose the model that works for you and goes back and check if this has fixed the issue.

Factory Reset

Factory reset is always the last option for many. It fixes almost all the other Roku TV issues. A factory reset will have your TV in the same state it was when you first bought it.

It wipes all your network preferences and downloads. Losing all the fancy settings you had put on your Roku TV is not something to merry about.

However, the option has worked in many instances. Here is how you can factory reset your Roku TV. You’ll have to access the home screen menu and then go to settings.

Move down to the system and then advanced system settings. Finally, set the factory reset option and confirm. After the reset, check the Roku TV to confirm if the green issue has been fixed.

Restart the Roku

The restart option can help fix the green screen issue. Here are the steps to follow. Using the remote, navigate to the home screen. After this, go to settings and select the restart option. The Roku TV will restart.

Other Common Roku Issues

Remote Control

Roku TV mostly comes with two different remotes. These are the enhanced “point-anywhere” and infrared (IR).

In case of any remote problem, you will first have to confirm the type of remote you have. The “point-anywhere” does have a small button just below the batteries.

It does not have the button then it’s infrared. You can fix the issue by downloading the Roku remote app. It’s the best option when your remote control is damaged beyond repair.

It allows you to operate the Roku device from your smartphone. The application is available in both Google PlayStore and iOS.

Wi-Fi

So how will you know the Roku TV has Wi-Fi issues? There are several ways to know this. Bad video and the audio quality shows that you have Wi-Fi issues.

Slowness in command responses is another red flag. The last and obvious way to know is when you see the “not connected” message on your home screen.

With such issues, it’s best to start by checking your Wi-Fi signal strength. The signal strength can be poor, fair, or strong. For poor signal, you will have to improve it.

You can also relocate your Roku TV and place it near the Wi-Fi source. However, it does not help if the Wi-Fi strength is terrible. But you can try repositioning and find out if it does work.

If the device has an Ethernet port, you can connect it directly to Wi-Fi using the Ethernet cable. It’s the best way to test your Wi-Fi and find out if it has a fault.

If you get the “not connected” message, then you might have entered the wrong Wi-Fi password or are not in the Wi-Fi range.

But if your phone or laptop is connected to the Wi-Fi, then the issue might be the wrong password. Check the network settings of your Roku and try again.

If you get the error code 009, the Roku is connected to the router but can’t access the internet. But if all the other devices such as your phone or tablet are connected and working correctly. Restart your Roku device. Contact your service provider in case this does not work.

Audio

The audio problems include distorted audio, audio dropouts, no audio, and many more. The cause of the audio issues can stem from the hardware, cables, or software.

On cable, it depends on the complexity of the whole setup. But before you try any available solutions, I recommend that you power off the device and unplug it from the power source, then plug it back in.

It sounds silly, but I can assure you it can save you a lot. It fixes many more problems than you can imagine. Therefore it can also improve your sound issue.

Video

The issues with video quality include things such as stuttering, buffering, and degraded detail. These issues are caused mainly by bad network connections.

The first quick fix should be checking your network connections. The Wi-Fi should be very stable.

At the time, the issue might be that the internet plan you are using cannot offer sufficient bandwidth to support the content you are streaming.

The recommended Roku download speed is 3 Mbps for standard content. The HD content needs 9 Mbps, while the 4K HDR needs 25 Mbps.

But if the plan you have offers a suitable bandwidth, you’ll have to check if anyone in your connection is using high bandwidth on other devices. Go to your setting and check if there are unknown devices on your Wi-Fi connections.

HDMI

This is another prevalent Roku problem. The HDMI creates a connection between two devices and allows the transfer of both audio and visuals. However, at times the connection might have issues.

With HDMI issues, you might experience black screens, HDCP errors, and flashing video. The quick fix for this issue is to power down everything, remove the HDMI cable, and reinsert.

Check that the cable is well attached at both ends and restart it. If this does not solve the issue, do not worry. There are many other ways to fix this.

You can replace the HDMI cable and see if this helps. If the HDCP problem persists after this, then the issue might be different. Maybe the HDMI cable cannot support the HDCP level.

Conclusion

The Roku TV, like other devices, is subject to errors and issues. The green screen issue is one of the common Roku TV problems.

It shouldn’t worry you at all because it is fixable. You can try the several fixes that we have mentioned in this article.

The great thing is that they are not technical, therefore easy to pull. If the above fixes do not work, then contact the Roku support team for help. You can get their contact details from the Roku website. They will surely help.

You May Like These Articles As Well:

How Do Routers Forward Packets? Understanding Routers’ Working

Is 60 Mbps Fast Enough For Your Home And Business Needs?

Why Does Steam Always Update: Everything You Need To Know About Steam Updates

How To Connect Matricom Controller To PC: Better Gaming

0

Both Mobile and PC gamers know that certain games are fun and better with a controller. The mouse and keyboard might be precise when it comes to gaming but are surely tiresome.

It’s even worse when using them in places with limited space. However, the gaming controllers do hit differently. They offer the next level of convenience.

With a Bluetooth controller, you can play from any part of the room as long as you have great vision. Again with the controller, you have all the controls at hand.

However, not all Bluetooth controllers have been created equally. Some work specifically with android devices, while others work perfectly with all the devices.

This article will be discussing the Matricom controller. So let’s start by finding out.

How to Control Matricom Controller to PC

Firstly, Go to PC device settings and turn on your Bluetooth. Check that your Matricom controller is on.

On the controller, press mode and x button simultaneously until the controller lights blink. Go back to your Bluetooth setting and scan for new devices. 

The Matricom controller will appear instantly. Click on it to pair. The controller vibrates after successful pairing. 

Matricom Controller

The Matricom controller is surely among the best wireless controllers. It’s perfect for gaming from your couch.

With Matricom, you can play games on your android device or PC. Plus, you can also connect it to a PlayStation. Such a gem!

Talking about PlayStation, I can assure you that it does not significantly differ from the PlayStation standard Sony controllers.  The button and joystick layout are quite similar to that of the PlayStation.

Power

It uses the Micro-USB to charge. It makes it easier to charge because the Micro-USB is so common.

The location of its charging port is similar to that of PS3, PS4, and PS5 controllers. The battery is built-in and has a capacity of 600mAh. A full charge can last up to 2.5 hours which is great.

Sensitivity and Resistance

All the controller buttons, such as the left/right thumbsticks, front/back bumpers, have great sensitivity and resistance.

All you need is to give them the right amount of pressure. They are too mushy or sticky.

Bluetooth Support

The Matricom has a supported Bluetooth connection. Meaning you can play from any part of the room without worrying about pulling wires and so on.

It can connect to a device that’s up to 10 meters away. The Bluetooth connection is so straightforward. You won’t have to worry about downloading setups or so on.

Quality

The small buttons are made of rubber. The rubber offers a nice grip and prevents your fingers from sliding.

The top surface of the controller is also made of rubber, giving your hand a great feel.

With the rubber, you can play for several hours without feeling uncomfortable, plus it’s sweat resistant. The surface of the thumbstick is enough; therefore, your thumb will be very comfortable.

Wide Support

The Matricom controller has LED lights. The LED lights show the mode you are in from right to left: charging light, mouse mode, apple mode, X input mode, android mode.

On the apple mode, you will play the old generation apple games such as Apple IIGS games. The great thing about the Matricom model on Windows 10 is that you won’t have to download and install any drivers.

Pairing Matricom with Android

Pairing the Matricom to an android device is very straightforward. Press the M (button), the home button, and A-button simultaneously.

The red light should blink, and “gamepad” will show on your phone’s Bluetooth devices list. Click on the name to pair, and that’s all.

A plus feature about the Matricom controller is that it allows you to pair your Bluetooth headphones when it’s still connected. With sound and a controller, your gaming experience will certainly be great.

The Mouse Mode

With this model, you can use the controller as a mouse pointer. It works like the normal computer mouse and has all the functions like double, left, and right clicks.

Zooming of the screen is also possible. To enter the mouse mode, press M and A buttons simultaneously.

The Best Bluetooth Gaming Controllers For PC, Android, And More

Xbox One Bluetooth Controller

This controller is all around. Meaning it supports almost all the devices. You can use it to game on your android, PC, laptop, or MacBook.

If you are a gamer and already own an Xbox console and this controller, then you are surely sorted. You can use it on other devices.

The Xbox controller design is legendary, and many other console manufacturers are copying the design. You will notice that almost all the controllers in this list resemble the Xbox.

It’s because the design is tested and true. It feels good in the hands, and the controls are so responsive. The controller uses two AA batteries that can last approximately 40 hours.

However, there is an environmentally friendly option. The Xbox One Play plus charge kit is the option and can last for around 30 hours.

Sony Dual-Sense

The Sony Dual-Sense is another intriguing game controller. It’s a perfect pair for your PlayStation 5.

Its design cues are similar to those of the previous Sony controllers. But this new Sony Dual-Sense looks much like a spaceship.

In the company’s history, it’s the white controller that has come with several changes. It’s just so different.

Most of the previous controllers’ options have always been in the back button right from the box button. But not in the dual sense. It has been specifically designed to match the PlayStation 5.

Another great addition to the Dual-sense is the adaptive trigger setup that lets you feel all the different responses as you game.

It also supports the 3.5mm headphone jack and has a built-in microphone that allows you to chat with your friends.

It has a create button that helps you to share content or go live on various streaming platforms. The controller uses AA batteries and can only charge through USB-C.

Xbox One Core

The Xbox One consoler is the most popular. However, there’s another sheriff in town, “Xbox One Core.” You will get it with the Xbox Series S and X.

The great thing about the Xbox One Core is that you can use it on other platforms too.  With a quick look at the controller, you might not notice its difference from the other mentioned Xbox.

However, the two controllers do have some slight differences that can surely make a huge difference. The D-pad of this model is round and resembles that of the Xbox One Elite controller.

The Xbox One Elite controller is one of the luxurious Xbox controllers available. The control has a better response, plus its triggers and bumpers have been improved.

Microsoft has added a stippled texture on the two parts for better grip. The controller can also retain the 3.5mm headphone jack.

It has the all share button.

Dual Shock 4 PS4 Controller

So, if you have no plan to purchase the PlayStation 5, there’s no need to get the Dual-Sense controller. I would advise that you stick to the Dualshock 4 or get one.

It comes in different colors; you can choose your favorite color. With only one glance at the DualShock 4 and you know it’s a PlayStation controller.

Its look is the same as other PlayStation controllers and is something you are used to.  The Dual Shock has a touch panel, headphone jack, and many more.

It functions on both mobile and PC. However, it will not be a smooth transition for anyone who uses the Xbox controllers. Its design and that of Xbox are completely different.

Matricom G-Pad

The Matricom G-Pad is among the best Bluetooth controllers in the market. You can connect to almost all the devices that allow Bluetooth connections.

The devices can include tablets, Windows 10, PS3, the latest Samsung Galaxy Series, iPhone, and many more.

It has a rechargeable battery, so you won’t be pressured to buy new batteries every time. The controller’s design is similar to that of PlayStation 3 and has a good and comfortable feel.

It has a 16 button design that features the top finger trigger and the normal XYBA gaming buttons. On performance, I can vouch for the Matricom-G. It does not have any connectivity problems or lag.

You should try this game controller. I can assure you that you will love it. In addition to the great features, it is well priced.

Conclusion

Both PC and Mobile gaming are quite popular today. To some, it’s a profession, while to others, it’s just a way of relaxing and passing the time.

Today’s video games come with great graphics and do need great controllers as well. With a perfect controller, you will have a better experience.

Matricom is one of the companies that make great wireless controllers. All your device need is a Bluetooth-enabled device.

Matricom works in almost all devices that support Bluetooth, including PC. In this article, we have given a guide on connecting your Matricom to your PC. I hope it was helpful.

You May Like These Articles As Well:

How To Find Adobe Serial Number On Mac

How Hot Can A GPU Get Before Damage? Understanding The Necessity Of Cooling

MSI Laptop Not Charging; Best Gaming Laptop Fixes

How To Measure PC Fan Size: All You Need To Know

0

The PC fan is any fan inside the computer that is attached to the computer fan. Its main function is active cooling.

The fan does this by drawing in cool from the outside and expelling warm air. It then pushes the cool air across a heat sink to cool a certain computer component.

The commonly used fans in computers are axial and centrifugal. The computer fans are mostly in standard sizes, which are 360mm, 240mm, 140mm, and 120mm (common).

People always want to know the sizes of their PC fans but do not know how to go about it. Measuring a computer fan is quite easy.

In this article, you will find a detailed guide that is so straightforward. Here is a quick answer to the question.

How to Measure PC Fan Size

As mentioned, measuring a PC fan size is quite straightforward. If you have the fan, measure it from edge to edge, and it should be horizontally (across).

Do not measure diagonally. Record the fan measurement in millimeters and not inches.

Additional Information

If you do not have the fan with you, do not worry. There’s a way you can go through with it. In this case, you will have to measure holes that are on the case that the fan mounts.

Like you did on the actual fan, you will have to measure horizontally. The only different thing you’ll do this time is measure from the center of one screw hole to the center of the other.

In addition, the easiest way to tell you PC fan size is by looking at the physical case the fan came in. It always has the dimensions and sizes written on it. But if it’s not a great option for you, then resort to measuring.

Different Fan Sizes

The computer fan sizes are in various sizes. The sizes start from 40 to 360mm. Since day one of PC building, the fans have been among the most important PC components.

Fans are found in the heatsink, graphic cards, and processor or the boxes. The main function of the fan is regulating temperature in our modern computers.

Because of its importance, you will certainly come across several varieties of computer case fan sizes. In this section, we have listed the different sizes of fans available for our modern Personal Computers.

The PC fan case sizes do have two dimensions. These are the diameter and width (thickness).

If you come across a fan dimension as 120mm by 25mm, it means the fan has a diameter of 120mm and a thickness of 25mm. Here are the different sizes of the computer fan case.

80 mm: 3.1 inches

This fan model is conventional and has been in use for over a decade. Today they are still in use but not as common.

Mostly you will find it in certain CPU heatsinks. Some models of graphics cards use it.

The 80mm fan was very noisy when used in big computers. Today it is used in small models like Mini STX, HTPC, and many more.

92mm: 3.6 inches

Advancement in technology called for larger fans. The 92mm model, which was an improvement of the 80mm model, was released.

It does work with less RPM because of its size. However, the fan is still noisy except in certain computer brands.

The 92mm is mostly used in the heatsinks of some graphic cards. Of all the fan models, it’s the least used model except on some specific models.

120mm: 4.7 inches

The 120mm is the most common and standard fan case size. It was an improvement of both 80mm and 90mm.  The 120mm fan model is much more flexible than the old models and can be used in various components. It is also common in high-end computers.

The one thing that makes it a favorite is the fan allows enough airflow in the PC without producing much noise. It’s model-dependent and does rotate at a low RPM.

140mm: 5.5 inches

Today, the 140mm model is the second most popular computer fan case size. This model is certainly larger in size and a better substitute for the 120mm fans.

With this model, the airflow is a bit higher than the 120mm models. But its static pressure is less.

Any high-end fan needs to have a great static pressure or similar to the 120mm model. Manufacturers love the 140mm fans because their performance is close to that of the 120mm model.

They contain few keys up their sleeves, and this is another thing that makes many users love them. Its only limitation is that it is a bit expensive.

The fan is best for cabinet types such as Extended ATX Towers and Full Tower ATX supporting liquid cooling radiators.

180mm: 7 inches

This model is so rare. The manufacturers hardly produce them compatible with the full towers but not the various heatsink inside them.

They have a greater airflow compared to the previous models because of their size.

In general, they are used in computer models that need larger airflow. It, however, rotates at a relatively low RPM and has low static pressure.

Choosing A Computer Fan

The PC manufacturers always look for better fans. That will adequately cool down the various components in the PC.

Therefore many PCs do come with pre-built fans, which will offer you adequate cooling. But if you are reading this, I’m certain you are not impressed by the pre-built fan, or your fan is spoilt.

Do not worry. This section will learn about the important things you need to look into before purchasing a computer fan.

Speed

Speed is the one factor that should be considered when selecting a computer fan. In fans, the speed is measured in terms of RPM, which stands for Revolution per Minute.

It’s the number of times the fan makes a complete rotation in a minute. If the RPA is high, the fan will spin faster. This will certainly make the fan to be louder.

Power Consumption

Always check the power consumption of a fan before confirming the purchase. The power consumption level of a fan is measured in Amps (A).

Converting it into wattages will have you multiply the maximum voltage the fan supports by the number of amps.

Fan Noise

Fan noise can be so irritating. It can make working on your PC unbearable. So it’s something you should be keen on when buying it.

The noise should be at its minimum. Check out the various technical specifications of the fan. You will be able to learn whether it’s quiet or not. Also, check the decibel level, which is denoted as dBA.

Size

It’s the most important factor. You should know your fan size before making a purchase. Or else you risk buying something too big or small.

Check the compatibility first. The standard fan size is 120mm, which is most common in modern computers.

The other sizes available are 200mm, 140mm, 92mm, and 80mm. However, you should note that the larger fans spin slower than the smaller fans while still offering the same amount of air to the PC. Mostly this lowers the fan noise level.

Three-Pin or Four-Pin

The three-pin fans do have three wires. For ground, power, and tach (passes information to the motherboard or software).

The three-pin fans are the most popular. The four-pin fans have a fourth and additional pin which facilitates PWM (Pulse Width Modulation) control.

It’s a type of control that allows the fan software and motherboard to adjust your fan speed.

RGB

The RGB fans are also referred to as LED fans. These types of fans always come with single or multiple colors that light in them.

The good thing about these fans is that they improve the visual appeal of your case.

Best PC Fan

The PC has many components that are not as important as the fan but quite expensive. However, the low price of the fan should not fool you.

It’s among the most important components of the PC. So, it would be best if you were keen when selecting the $20 fan. In case of any mistake, then your PC peak performance will be affected.

It will overheat and crash often. You might want to replace a spoilt fan, or maybe you want to reduce the noise level or improve airflow.

This section gives a buying guide that will help you choose your next PC fan case.

The Noctua

It is the number one case fan manufacturer. In this model, they have focused on perfection.

It does not feature the common classic brown and tan color. This model color is two-tone grey that perfectly blends.

Aside from the color, the NF-S12B redux-1200 is still very strong and can surely blow 59.2 cubic feet of air per minute. Plus, the noise level is quite low.

Conclusion

The fan is a component of the computer that is usually overlooked. Plus, many people are not interested in learning the great details about the fan and its dimensions.

There are other things you need to learn to be able to choose the best fan. In this article, we have given you all the useful information about the PC fan.

With all the new knowledge you’ve got from this article, you will be able to make the best decision.

You May Like These Articles As Well:

How Much Does Water Cooling Cost: All You Need To Know

How To Play Two Players On GTA 5: The GTA 5 Review

Why Does Sony Vegas Keep Crashing? Reasons And Solutions

Minecraft Base Ideas: The Best Ideas

0

Minecraft is a very popular video game. It takes part in a three-dimensional world. The players create and destroy different kinds of blocks.

The Minecraft game is in two modes, and both are exciting to play. The two modes are Creative and Survival.

The creative mode is, however, quite simple. The players do not need food to survive, plus they are given all the supplies. In addition, they can break the different kinds of blocks.

The survival mode is quite trickier. You can be smart and keen to make it in this mode. The player has the role of finding their food and materials for building.

In certain parts of the survival mode, the players interact with moving creatures (zombies and creepers) and block like mobs.

All in all, the purpose of the Minecraft game is to explore, survive and build. The game has infinite possibilities when it comes to building.

Minecraft Base Ideas

In Minecraft, there is an endless list of things that one can build. These include things like castles, bridges, statues, houses and fancy nether portals.

You should pick on a building idea that is fun and not too challenging. With such, you won’t give up or get bored.

If the idea is too difficult, you might certainly give up on it within a few hours. The best way to go with a building project is by dividing it into smaller projects.

You should also note that there’s a huge difference between survival and creative mode.

In survival mode, you’ll have to work hard to get all the materials. It will be harder when working on massive projects like building a skyscraper.

In the creative mode, you won’t have lots of struggle. You can build anything you want because the materials are available to you.

1. Castle

Castle

Photo: Planet Minecraft (Gothic Castle)

Building a castle is fun. We all dream of living in a castle one day in our life; Minecraft has made this possible for you.

The materials you need are simple and easy to get, like wood and stones. Castles can be anything from a small fortress to a giant wall city.

The great thing is the castle moat, and the wall offers you protection against the mob. Plus, you can shoot at mobs from the top of your wall using a bow.

2. Modern Skyscraper

Modern Skyscraper

Photo: Clenrock.com

Creating a building that looks modern in Minecraft is quite interesting. It’s also challenging since you have to think carefully about the block types you need.

If you are after something that is both interesting and challenging, then the modern skyscraper is it. But before you start pulling it up, you’ll need permission from those living nearby.

3. Skull Home

Skull Home

Photo: m.imgur.com

The skull home is completely different. Many players do not think of using such a home. Though creepy, it’s a creative creation and good for those who love fantasy.

You can add some mystery by covering it with a jungle biome or lush forest with tons of plant overgrowth. It’ll look like something that has been in existence for more than a hundred years.

4. Ship

Ship

Title: Setting Sail/ Minecraft

Building a ship also needs some next-level creativity. A ship is quite iconic and eye-catching. You can give it some pirate of the Caribbean look and feel.

You have the freedom of selecting the style and color of the ship and sails. The ship will be more incredible if the water looks realistic. You can get this feature by installing the best Minecraft shade.

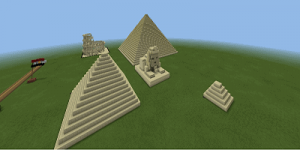
5. Desert Pyramid

Desert Pyramid

Photo: m.imgur.com

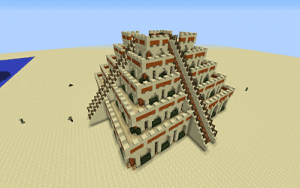
Most players do not love creating the desert pyramid. It’s because the building is big and flat. Therefore the build will need a lot of planning and landscaping to be perfect.

If you are up to the challenge, then you can try it. Regardless, the desert pyramid can help you to survive well in the desert.

You can go for the gorgeous pyramid style that has beautiful details at the top and entrance.  The great thing about the desert pyramid is that you can access it using a decorated highway bridge.

6. Farm

Farm

Photo: Farming with Style/ Minecraft

A farm is an essential build in Minecraft. It provides the players with supplies and food. There are several farm ideas, and the one you choose depends on you.

The best Minecraft farm idea is making a glass greenhouse. It uses natural light and protects the plants from mobs and animals. Add some lighting to it to keep mobs away during the night.

7. Cathedral

Cathedral

Photo: Planet Minecraft (English Gothic Cathedral)

The cathedral can be more luxurious and grand than the castle. With the cathedral, you are at liberty to use several patterns, blocks and designs.

It’s because it’s a huge block that needs splendid architectural knowledge. However, building a cathedral is not an easy task. It would be best if you surely put in some extra effort into it.

8. Survivalist Underground Base

Survivalist Underground Base

Photo: Pinterest

Other buildings like stone castles and sky-rise are being overused. The underground base is a great build that you can certainly try.

It’s a contemporary bunker-like shelter that does contain all the elements of a normal house. It has a furnace, bedroom, storage area, and kitchen.

9. Gardens

Gardens

Photo: Bib and Tuck

The gardens are a great addition to almost everything. You can build them in town or in front of your home. So, when you are creating the garden, try using benches, gravel pathways, water and trees.

Use the bone meal on the grass to grow flowers or naturally get them in the Minecraft world. They’ll make your garden look and feel beautiful.

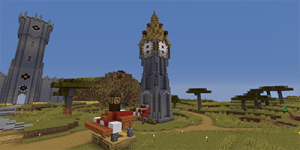
10. Clock Tower

Clock Tower

Photo: Reddit

The clock tower is another beauty that you can create in Minecraft. The great thing about it is you can make it according to any style that you love.

No one can stop you. Look for the perfect spot to position it. You can own a cathedral, skyscraper and finish things with the clock tower.

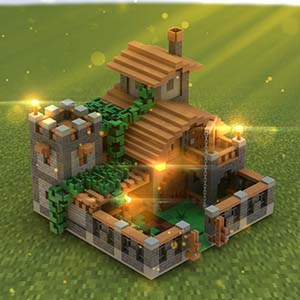
11. Mini-Fortress

Mini-Fortress

Photo: Rebrickable

The fortress is quite simple to build. The design is extremely three-dimensional. It’s modern and made using glass, oak and cobblestone.

You then make a wall with a large gate around the modernist structure. The building is, however, less spacious. But this is a great thing because it makes it easier to defend.

12. Modern City

Modern City

Photo: Arch Daily

A modern city contains lots of things and structures. They include parks, paved roads, sidewalks, skyscrapers and many more. It also has several repetitive buildings.

The modern city is a huge project that requires much time. But I wouldn’t vouch for the modern city in survival mode.

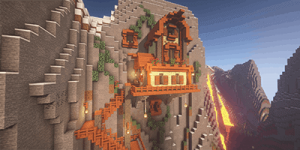
13. Mountain House

Mountain House

Photo: Reddit

The mountain is one of my favorite places to build a home. The mountain offers you a great view of the land beneath it.

Plus, you can see the enemies approaching. The high ground also offers you some safety. There are several ways in which you can build the mountain.

The building styles are several; choose between modern and traditional or a mixture of both.

14. Famous Landmark

Famous Landmark

Photo: Minecraft Education Edition

There are many famous landmarks in the world. If you do not know any landmarks, you can check it out on google.

Look for a photo of a famous landmark and use it as a reference for building something special in Minecraft. For example, there is the statue of liberty and the Eiffel tower.

15. Museum

Museum

Photo: PCGamesN

With the museum, you can showcase all the things you have collected in your Minecraft journey.

In the real world, the grand museums, just like cathedrals and castles, do attract tourists. Building an epic museum can surely bring attention to your Minecraft server.

How To Build Faster In Minecraft

The Minecraft world has many beautiful blocks. There are more than hundreds of items and blocks in Minecraft.

The blocks have unique textures and colors, and you can create almost anything you need with them.

I can say the game was specifically built for players with creativity. It’s for those who can create beautiful things using their imaginations.

In survival Minecraft, a player has to build a base that will protect them and their valuables.

The building is a fun activity but can as well be time taking and very tedious. So here are some of the things you can do to make building easier in Minecraft.

World Edit

The world edit is one of the useful and powerful Minecraft mods. The mega builders mostly use it when building massive bases.

With a few commands, you can copy-paste a building or other things like tree designs.

It is also used by players who want to create massive cities in Minecraft. With the world editor, you can surely copy and paste the small buildings and many more.

Blue Prints

I’m certain you know the rules of building in Minecraft.  You have to be careful with the tiniest of details, more so when doing repetitive builds.

The blueprints can save you from this headache. Use the mods to acquire the blueprints. Do not worry; it’s not cheating but a great tool for survival.

Many players in the survival Minecraft use blueprints to build copies of structures.  The great thing about blueprints is that you can certainly create blueprints of the building in a downloaded world. You can then build them in the survival world.

Keep the blocks ready.

It’s common for players to start building and stop midway because they are out of resources. The players have to look for resources and continue building later.

It can mess with your plan and make the building process boring. Therefore before you begin the building journey, make a list of all the items you’ll need.

Then collect the items. These types of planning will help you to be more efficient in Minecraft games.

Light the neighboring areas

The creepers can slow down your building. They do not care whether you did create the building in a few minutes or some hours.

The best and easy way of securing your building is by properly lighting all the nearby areas. The hostile mobs cannot come to areas that have lights above level seven.

Why Minecraft Is Among The Best Selling Video Games Of All Times

The Versatility

You can choose Minecraft to be anything you need. There is the hardcore part of Minecraft known as the Survival mode.

Here you will struggle in any steps that you make. But also there is the creative mode that allows you to create anything you need, from the majestic castles to cities.

The game was meant for everyone. Let’s take a look at the things that make Minecraft one of the bestselling.

The Exploration

The Minecraft game is all about exploration. It has several landscapes and biomes that are fun to explore.

In this game, you will always make discoveries in the never unending world. Some of the best things in Minecraft are discovering a shipwreck and diamonds. There are several other great discoveries.

Conclusion

Minecraft is a fun and challenging game. In the Minecraft game, you create, explore and survive.

This article has a list of fifteen ideas that will surely lighten your next Minecraft base. The ideas are so perfect. They range from building a farm to a museum.

The game is much fun when you certainly have great places to hang out with your friends. In addition to being great, I can assure you the ideas are a blast to build.

You May Like These Articles As Well:

How To Connect Matricom Controller To PC: Better Gaming

How To Make Steam Games Open On A Second Monitor: The Gaming World

The Laptop Makes A Rattling Noise When Tilted. All You Need To Know

How Much Does Water Cooling Cost: All You Need To Know

0

All computers, from the most powerful gaming PCs to the small home PC, generate heat during operations.

Excessive heat can destroy the essential internal components of your PC. That’s if you are not careful enough.

The computers do come with prebuilt cooling systems like the fan. However, due to rigorous work like gaming computers, the prebuilt coolers might not be that efficient.

This might force you to invest in other cooling options. There are several cooling solutions, such as air cooling and liquid cooling. The liquid cooling system is efficient but quite pricy. Let’s find out.

How Much Does Water Cooling Cost

Water cooling is known to be high cost. The amount is much higher when you choose to make a custom setup. How Much Does It Cost, a trusted source on pricing, helps us give you a better estimate of how much you’ll spend on water cooling.

The traditional water coolers prices range from $50 t0 $100. Creating a custom one is even more expensive. The price can go to a high of $360 which is crazy.

But you should know that the quality of the material you use in building the water cooler matters.

Do not go for the cheap parts to save money. This might hit back very hard when your pricey PC components are destroyed because of overheating.

Water Cooling

Liquid cooling comes with several benefits. These include things such as better thermal performance, more excellent aesthetics, and many more.

In this part, we will extensively look at the pros and cons of the cooling water system. The information will undoubtedly equip you with excellent knowledge about this cooling system.

Pros

If you can perfectly shift from the air to liquid cooling them, you are a pro. It shows how well you understand your computer life. Here are some of the great things about the liquid cooling system.

The liquid cooling system allows you to cool specific components of your computer. It does this so well in a way that the traditional fan could not have done.

The cooling water system is quieter than the case fans. It will certainly help you lower the computer sound output.

You do not need the bigger and expensive water cooling system to get such a benefit. You can use the self-contained water cooling loop, which is cheaper.

Another great thing is space. The huge fan/heat sink performs well but takes up a lot of space inside your case.

On the contrary, liquid cooling needs less space, plus it’s a lot niftier to boot. You can also use colorful liquids in the tubes for aesthetic reasons.

Cons

The greatest con of the water-cooling system is its high cost. The cost gets worse if you intend to build a custom setup.

The high cost is because the materials used in making the water-cooling system are of excellent quality.

Planning and purchasing the parts is also tiresome. You will take much time to generate the parts you need to build an efficient water cooling system.

The water block you pick should fit the socket of your PC. The fitting should make the block and tubing size. You’ll also have to source for a radiator, reservoir, radiator fan, and coolant.

You should also make space for the setup. The radiator and reservoirs will need the fan slots inside the case.

The loop layout should be well planned so that water can flow well in the system. In other words, the water-cooling loop is useless if it cannot get the fluid around the PC.

The installation is another tricky thing to do. If you have never done it before, I can assure you it’ll be pretty stressful.

It’s also troublesome for those who have done the installation before. You need to have patience and be ready to work for a few hours.

The most stressful part is connecting the fittings and tubing safely and securely. The construction of the liquid cooling system should be done from outside of your PC and test it to ensure it is excellent before installing.

The liquid cooling system should not have any lick. This may cause shocks and destroy some of the components.

The bad thing is that manufacturers won’t replace components that have been flooded for free. I guess you understand the warranty rule. So you’ll have to foot the bills by yourself.

Types Of Water Cooling

All in One (AIO)

The cooling system is easy to get and comes with all the components you need. The features include a pump, block, radiator, and many more.

The “All in One” do have a prebuilt mounting mechanism. It does support both Intel and AMD processors, and this makes it easy to install.

The best AIO models in the market are Corsair’s H150i and the Cooler Master’s ML360R. The cooling performance of these models is excellent.

These coolers have an inbuilt pump that connects the radiator using pipes. The radiators have fans that increase the cooling process.

The AIOs do add on aesthetics. The ones that look better are those that have RGB lighting.

In addition to great looks, the AIOs are easy to install. So you will have a great experience with the water-cooling system.

The bad thing about the AIOs is the possibility of leaks. Leaks can cause severe problems to the parts of the computer. Plus its price is quite high.

Custom Water Cooling Loops

Custom water cooling is the peak of CPU cooling. The components in the custom water cooling are almost similar to those of an AIO. The major additions are the fittings, custom tubing, water block, and a reservoir.

Components Of The Custom Water Cooling

Fittings

They are attachments that link your tubing line to the radiator, reservoir, and water block.

Water block

The water block attaches to the processor directly. The water inside it actively cools the processor.

Radiator

The primary function of the radiator is to cool down the liquid in the system. It does this with the help of the fans.

The radiator fins do absorb heat from the coolant. The fans that are attached to the radiator help to dissipate the hit from the radiator fins.

Reservoir

It’s an extra component in the custom water cooling system. It allows the storage of additional water, which increases the cooling performance.

The reservoir is the primary reason why custom water cooling is more efficient and effective than the AIOs.

Tubing

It is the custom loop used in the custom water cooling system. It allows water to flow freely across the cooling system.

The hard-line water tubing gives a cleaner look, while the soft tubing is much easier to install.

Pump

The pump helps the system to push water to all parts efficiently. That’s way up to the radiator. It quickens the process of heat dissipation.

What Is The Self Contained Liquid Coolers

The liquid cooler is quite technical, and setting it up can be pretty challenging. But worry no more.

There is another excellent solution, and that is the self-contained liquid cooler. It retails at around $60 and is entirely sealed and preassembled.

It offers the same benefits as a simple water cooling system. You won’t have the trouble of dealing with several messy components.

The only thing you need to do is attach a radiator/fan and a water block to your CPU. After this, everything will be good to go.

Self-contained kits like NZXT’s and Corsair’s Hydro H-Series do not offer you the chance to do any customizations.  But again, you won’t have the trouble of assembling each part by yourself.

The possibility of leakage is very minimal. To avoid such an issue, you’ll have to be keen when dealing with the pipes.

Avoid twisting the tubes at a weird or sharp angle.  Installing it might be a bit tricky but not as problematic as installing the aftermarket cooler.  If you need a liquid cooler that will only cool your processor, it is the best option.

Is Liquid Cooling Good For CPU

It’s only great to use liquid cooling on high-end desktop processors. The AMD and Intel processors tend to run at high speeds.

Therefore using liquid cooling on CPUs with these processors makes sense. You can also use it as an aesthetic luxury in budget PCs.

Note that you can get some specific liquid cooling systems are a great price. First, you will have to identify your needs. For high-end gaming PCs, you’ll undoubtedly need something great.

Conclusion

The liquid coolers are a perfect cooling solution in terms of raw performance. However, they are pretty expensive.

But if you are a fanatic and have money to spend, you can go for it. Remember, it also needs extra hard work to get the part and assemble them. But if you need one that won’t stretch, you go for the AIOs.

But when you consider other factors such as durability, price, and maintenance, you can go for decent coolers like the all-in-one.

Another thing you need to look into when choosing a cooler is the type of build that is right for your CPU.  If it has a small case, go for the smaller AIOs, and if it has a larger case, you can go for larger liquid coolers.

You May Like These Articles As Well:

Why Is Roku TV Screen Green : Here Is Why And Quick Fixes

How To Connect Matricom Controller To PC: Better Gaming

How To Measure PC Fan Size: All You Need To Know

Is 200mbps Good For Gaming? Check Out The Response

0

There is a lot we can say about gaming, especially when playing online. The fun, the adrenaline, and how unpredictable things can be. However, there are certain elements that give you an advantage when gaming online, and that includes your internet speed.

When ready to game, the last thing you want is a lagging or slow internet connection. Our internet connection speed plays a vital role in defining our gaming experiences. Slow internet speed may lead to undeserved losses at worst, and it prevents us from enjoying what should be fun and interesting.

While 200mbps may be more than enough for a lot of things you do online, you may be wondering if it is enough to support an amazing gaming experience.

Is 200mbps fast enough for online gaming

The 200mbps speed range is one of the most common entry-level internet speed tiers most internet service providers offer. While it is quite fast, saying it is fast enough wouldn’t be true. Instead, it is considered as the average gaming speed in urban and suburban areas.

Generally, we caution relying on just 200 Mbps for gaming because, in most cases, chances are it won’t be just you connected to the network.

Let’s assume you live in a house of 2 to 4 persons, and you own several devices that are connected to the network. In reality, you can see that your gaming console won’t get up to 200mbps.

If you’re struggling with your gaming speed, look at the devices connected to your Wi-Fi when you start gaming and see if any device can be disconnected until you’re done playing.

If you care to know more about the subject matter, keep reading!

What Is MBPS?

MBPS is an acronym for megabytes per second. It is the SI unit for measuring your internet bandwidth. Bandwidth is the speed at which you download on any internet connection. Therefore, the higher your Mbps, the faster your download rate.

When discussing internet speed for gaming, we don’t just consider the download rate; we also need to factor in the latency or ping rate. The latency is just as important as the download speed.

Some may say the latency is more important because it determines if the game lags when you’re playing. When you’re playing an online game, you are constantly sending requests to the server; the time it takes the server to respond to your action request is what we call latency.

When you have a low ping rate, you will struggle to compete with other players who have faster ping rates.

The Effect of The Mbps On The Game

There are two main elements of a network that can influence your gaming experience. They are the frame rates per second (FPS) and the Latency or ping time.

The FPS is a major determinant of how smooth gaming will be on your PC or phone. The frame rate of a computer is majorly determined by its hardware specs.

Latency, on the other hand, is determined by a network. Like we explained earlier, the latency is the time interval it takes for the gaming server to process a request. For example, we move our joysticks. Latency is how long it takes for our actions to influence what we see on the screen. The lower the ping rate, the better our gaming experience.

A slow internet connection means higher latency, so you spend more time waiting for your previous instructions to take effect, which not only damages the gaming experience but it can also cause poor performance.

What Is The Minimum Internet Speed Needed For Online Gaming?

While 200mbps may not be the fastest internet speed that gamers use, it is enough for most of your gaming needs. In reality, most games can still run with as little as 3mbps.

It is important, however, that you understand that the higher your internet speed, the better your gaming experience. Using 3mbps won’t give you very good gameplay.

Internet Speed Test

If you don’t think you’re getting the right speed your provider said you would; there are ways to verify how fast your internet connection is. You can measure your internet speed and network stability on www.speedtest.net. It analyzes your network, so you will be able to tell if your connection has the right speed for gaming, video calls, online streaming, and more.

The site is so comprehensive that it also provides users with a detailed analysis of your country’s internet speed ranks on the speed test Global Index. That way, users can see if 200mbps is good enough to compete with other gamers from other countries or within your own country.

How Can I Get Faster Internet Speed?

Slow internet speed is usually a result of one or a combination of many factors. These so-called factors result in data packet loss which causes high latency. Having confirmed your internet speed, the next thing that comes to mind is figuring out how to improve your connectivity speed.

Here are some suggestions you should try if you want to give your internet speed a performance boost.

Switch from Wi-Fi to ethernet connectivity:

If you experience frequent lags while playing multiplayer games on your PC via a Wi-Fi network, you should consider using an Ethernet cable instead. Ethernet cables significantly increase your connectivity speed.

Unlike Wi-Fi, Ethernet cables ensure that all data packet transmissions are directly delivered to your gaming console. These cables evade connectivity barriers like walls and other physical obstacles that slow down your internet connection.

Switching from Wi-Fi signals to Ethernet also disconnects any other device you do not want connecting to your network. With fewer devices connected at the same time, your gaming console has more Mbps.

Finally, Ethernet connection also reduces the download times significantly.

Switch to a faster router:

As technology improves, it is important that you stay updated on the latest trends. In some cases, it is possible that your network has been upgraded, but your mode or router is too old to accommodate the upgrade making it difficult to handle faster transfer speeds.

Simply put, if you want to enjoy a 200mbps range of internet connectivity, you need a gigabit router, so if you’re experiencing slower speeds and persistent lags while gaming, you should consider changing your century-old router.

More modern routers offer a significant boost in your gaming network speed.

Modify DNS to reduce latency:

One of the most common causes of lags, including slow connection speed is having your gaming server in far-off regions. When your gaming server is on the opposite side of the world, it takes longer for your requests to travel to and from the server. As a result, you will experience higher latency.

If this is the case, then you can fix this issue by modifying your PC’s DNS settings to match the gaming server location. This trick is effective in boosting network speed by reducing latency.

Use a game accelerator:

Game accelerators connect your PC to the gaming server nearest to you. These accelerators significantly boost your network connectivity by bypassing blocked and jammed networks. This ensures that your connectivity is fast enough for a stable gaming experience.

Use satellite internet:

Satellite internet is another way to get faster internet speed for gaming. To do this, you will need to liaise with satellite internet providers within your locality. Because of its reliability, more and more users are turning to space for high-speed internet connectivity.

Consider fiber optic internet: 

Fiber optic internet is highly efficient for your gaming needs. Its fast connectivity, regardless of how far you are from the gaming server, makes it one of the best internet connectivity options available to gammers.

Fiber optic connections deliver unmatched speed for the best gaming experience. It is particularly used by professional gamers and for HD video streaming.

Fiber optic internet providers have different internet packages, data plans, and internet deals to match every budget.

Conclusion

Is 200mbps good for gaming? That was the question this post was created to address. After all that has been said, the bottom line is 200mbps is not bad for gaming.

But there are many factors that can impact the latency of gameplay on your network. In instances where there are many devices connected to the network or Wi-Fi signals have to pass through several obstacles, you will realize that 200mbps isn’t enough.

However, with no other devices connected to the network and low latency, 200mbps is good enough to handle your online gaming needs.

You May Like These Articles As Well:

Free Instructions On How To Make A Laptop Rug Hooking Frame: Home Made Creations

Laptop Keeps Charging On And Off; Laptop Power Supply Fixes

Why Does My FPS Drop When I Unplug My Laptop? All You Need To Know About FPS

Check Out These Tips On How To Switch From AMD To Nvidia

0

The GPU is the component that renders graphics on the computer. AMD and Nvidia are the world’s current top GPU manufacturers. They have been in fierce competition with each other for decades.

If your computer’s usage is basic, you may not be keen on your PC’s brand of GPU. For gamers, the AMD vs. Nvidia superiority debate remains an endless one.

Certain factors seem to put Nvidia ahead of the competition, and many AMD users have considered switching to Nvidia.

This article explains how you can change your computer’s GPU from AMD to Nvidia.

How To Switch From AMD To Nvidia

Uninstall everything about AMD: 

To begin, uninstall the AMD drivers from your computer. Uninstalling AMD drivers before installing another graphics driver will help avoid file conflicts that can cause new driver installation to fail.

  • To begin, go to the Control Panel > Programs and Features.
  • The system will display the complete list of installed programs and software. Click on AMD Software, then Uninstall.
  • The system will prompt you to confirm the un-installation process – getting rid of the software components and drivers.
  • Restart your computer to complete the process.

Remove AMD graphics card from your PC:

You can remove the graphics card by following the instructions below.

  • Turn off the computer and other connected devices.
  • Wait for twenty seconds before you detach all cords from the computer’s rear, such as audio/video cords and power cords, to avoid potential damage to the computer.
  • Remove the case cover. You can do this in several ways depending on your computer’s build. However, it is best to consult your manual.
  • Detach all the cables connected to the GPU, including dedicated power connections, where applicable.
  • The graphics card will be visible from the case mounting bracket. Depending on the computer build, unscrew or unclip the graphics card.
  • To release the card from the lever slot, carefully lift the lever on the expansion slot. You can now slide the card out of the slot.

Note: Static electricity can harm your PC. Wear an antistatic wrist band attached to a grounded object to get rid of static electricity before you handle any system parts.

Remember also to store the graphics card in an antistatic bag. Antistatic accessories are available in any local computer store.

Replace with Nvidia graphics card

You can now slide your Nvidia graphics card into the empty slot. Clip or screw the graphics card to the mounting bracket as the case may be.

Reattach all detached cable connections to the GPU. Replace and fasten the lid cover and restart your computer.

Install Nvidia drivers: 

Download graphics drivers from Nvidia’s official website. If you’re not certain which driver to install, Nvidia has created a useful tool to help you find the appropriate driver.

Select Graphics Driver and follow the on-screen instructions.

  • Open the Device Manager
  • Select Display Adapters.
  • Right-click on GPU.
  • From the Context Menu, choose Update driver.
  • Install the suggested driver updates and restart the computer.

So, how do both GPU brands stand up to each other? We will examine the AMD vs. Nvidia war.

About AMD

AMD, short for Advanced Micro Devices, is the world’s second-largest PC microprocessor maker, trailing only behind Intel. AMD began operations as far back as 1969, providing low-cost alternatives to Intel microprocessors.

AMD also produces several other PC components such as integrated circuits (IC) for network devices, flash memory, and program logic devices. The company has reportedly sold over 100 million microprocessors for Windows systems.

Although AMD has been producing processors and CPUs since 1969, it entered the GPU industry in 2006 after acquiring ATI. ATI had been in the GPU business since 1985.

AMD GPUs have trailed competition since the acquisition due to inconsistency. However, AMD has made rapid progress with its new Radeon GPUs. AMD provides several solutions that compete well with Nvidia’s offerings if you’re looking to buy a GPU right now.

About AMD’s GPU – The Radeon

Radeon was originally an ATI brand. From the 1990s to the mid-2000s, ATI was Nvidia’s main competitor in the PC graphics market. AMD purchased ATI and its Radeon brand in 2006.

The Radeon became Nvidia GeForce’s rival, making  the AMD the smaller CPU and GPU industries.

Radeon GPUs are gaming graphics cards designed for the general public. They come in different labels – R3, R5, R9, and RX.

About Nvidia

Nvidia began operations in 1993 to provide high-performance graphics cards. The founders had followed trends that indicated that the next wave of computers would be graphics-based.

They also observed that even though there was a huge market, video games were one of the most computationally difficult problems. Video games became the company’s springboard for reaching vast consumers.

Nvidia is also building a name in sectors other than PC graphics, most notably self-driving cars, and artificial intelligence.

While AMD is also active in the mobile and console sectors, Nvidia has been more daring with its non-graphics ventures, owing to its dominant position in the graphics market.

About Nvidia’s GPU – The GeForce

Nvidia markets its graphics cards under the brand name GeForce. Unlike AMD, there isn’t much of a backstory to the brand name here.

GT, GTX, and RTX are the different models for the GeForce GPUs.

AMD Vs. Nvidia 

If you want to design a PC for gaming, you’ll have to choose between the two most popular GPU makers. Here, we take a side-by-side look at both GPU brands regarding power, performance, features, software, and pricing to help potential buyers make informed choices.

Power and efficiency: Graphics cards now consume more power than ever before. Top models require between 110 – 270 Watts of power.

Under full load, a powerful graphics card uses as much power as the rest of the system. The GPU plays an important role in determining power use and efficiency.

Nvidia had the upper hand in power and efficiency until AMD released the Navi, providing fierce competition. Big Navi has even made efficiency much better, improving performance by 50%.

Nvidia’s Ampere, however, remains largely fast and powerful, although sacrificing some efficiency consequently.

Both brands continue to divide opinion in terms of power and efficiency. Many experts and enthusiasts currently consider them to be on the same level, and a few still believe Nvidia remains the clear winner.

Budget and performance: AMD’s lower-cost GPUs usually always surpassed Nvidia’s offerings at the same price point. When comparing the latest budget offers from both firms, though, Nvidia comes ahead marginally. Ironically, some of AMD’s older Polaris-based RX 500 cards are still the best buys if you’re on a budget, as they provide excellent value.

The Navi, however, underperformed with the RX 5500 XT. The RX 5500 XT’s 4 GB and 8 GB variants which cost $1699 and $199 respectively, were on par with Nvidia’s GTX 1650 Super ($159).

They could only come close to the GTX 1660 Super ($229), making it an undesirable card for consumers searching for the best value within this price range.

However, since Nvidia has yet to release the latest RTX 3000 and RX 6000 budget models, now is not the best time to create a budget gaming PC, especially if you want it to still be relevant in the future.

Gaming: Nvidia and AMD have been the only discrete GPU manufacturers left in the PC gaming market since the merger of ATI and AMD. AMD’s position in the CPU business is similar to Intel’s: they have a significantly smaller market share.

In terms of gaming, both firms have had significant roles in the console wars. The Xbox 360 and Nintendo Wii both have AMD graphics cards, while the PlayStation 3 has a modified Nvidia graphics card.

AMD has made unique APU/SoCs for both the PS4 and Xbox One in the current generation of consoles, while Nvidia has converted its SHIELD technology for use with the Nintendo Switch.

Software: Nvidia used to have a substantial lead in terms of overall software offerings. AMD always provides a matching feature for any Nvidia function.

There are still games with graphical effects exclusive to one of the two manufacturers. Nonetheless, these games have become considerably fewer over time due to poor public perception and perceived anti-competitive activity.

AMD And Nvidia: Is There A Winner?

Nvidia is the industry leader in graphics cards, with superior high-end graphics cards for enthusiasts and gamers. At present, the RTX 3090 is unbeatable, and even the earlier RTX Titan pales in comparison.

While AMD’s RX series delivers exceptional performance, they only compete with Nvidia’s mid-range models.

When it comes to value, AMD outperforms the competition by offering various options to suit a variety of low-end budgets. Many people want value for money. With the RX 580 and 570’s lower prices, you can build a great machine at a lesser cost.

There will always be a rivalry between AMD and Nvidia. AMD may be the underdog, but you should consider their products if they offer unbeatable solutions in your price range.

Conclusion

The GPU is the component that renders graphics on our computer. The superiority debate among users of top GPU makers – AMD and Nvidia – remains an endless affair. Many people still give the nod to Nvidia.

AMD users who want to switch their graphics cards to Nvidia can do so in a few simple steps. First, uninstall the AMD drivers on your computer. Next, replace the AMD graphics card in your computer with Nvidia and install Nvidia drivers.

You May Like These Articles As Well:

Do You Need A Firestick For Each TV? Turning Your Standard TV Into A Smart TV

How To Tell If A Wi-Fi Card Is Bad: All You Need To Know About A Defective Wi-Fi Card

What Is A Class 2 Power Supply? Understanding Power Supply

MSI Laptop Not Charging; Best Gaming Laptop Fixes

0

MSI is the most prolific gaming laptop manufacturer on the planet, and they have never been anything short of amazing.

If you want to have the best gaming experience with a laptop, you should probably look into MSI models.

Gaming takes up a lot of power. You, therefore, need to have a battery that can provide these high power levels for a decent time frame to have fun.

Your laptop not charging could be a significant disadvantage, and here is how you can go about it;

MSI Laptop Not Charging

An MSI laptop could develop battery charging problems, and you need to fix it as fast as possible to make sure your games run perfectly and for long. The laptop could fail to charge even when the power adapter is connected.

This could be because of a change in system settings or a damaged battery. If the laptop is new, the problem is most likely related to the settings, and your battery is still okay.

The battery mostly charges to 60% then stops charging, and it could be stressful to you, but you shouldn’t worry about it. It is not a problem; it is a pre-installed feature to help your battery last longer.

Let’s get into how you can fix this problem;

  • Go to the dragon center on your MSI laptop and select the tools option.
  • Under the tools option, you will see several battery options you can shift between. By default, the option for best for the battery is selected, which is the cause of your problems. This is a feature by MSI to make the battery more durable.
  • You can choose the balanced option, and your battery will charge up to 80%, then stop charging. Selecting the “best for mobility” option will allow the battery to charge to the total capacity.
  • You can shift between the plans depending on where you are and the access to a power source. If your charger is almost always plugged in, you should choose the best battery setting to keep the battery in good shape at all times.
  • If you have already selected the “best for mobility” plan and your laptop isn’t charging, you should go to the battery calibration option. MSI recommends that you calibrate your battery every three months for the best life. If your battery does not charge after calibration, it is probably damaged or expired. You can take it to a technician to get a professional opinion before you buy another battery. MSI produces high-quality products; thus, it is rare for the battery to be the problem.

How Good Is The MSI Battery?

Having a good battery in a gaming laptop can be a significant advantage since it will allow you to enjoy your games in remote places, even without power outlets.

Since MSI is a big brand and you might be considering it, you need to know how good their batteries are.

A new MSI battery can hold power for up to 5 hours, depending on the intensity of use. This is a reasonable timeline that can allow you to play a game and enjoy it before you have to look for a power outlet.

The battery will work well for about four years, depending on your maintenance. Generally, the battery is reliable, and it will hold power for a decent number of years. Even with the high power demands of a gaming laptop, you will have a long lifespan.

It is important to note that a laptop battery works depending on how you care for it. The battery will work well when it is new and even as it gets used for long.

The rate of deterioration differs depending on care; thus, you have to be good with it.

Keep the battery away from excess heat; use the recommended battery settings each time you use the laptop to give your battery a longer lifespan.

MSI Gaming Laptop Review

MSI is one of the biggest names in gaming laptop production, next to ASUS, DELL and other big brands. If you want quality, style and high performance in one package, MSI is the way to go.

They have worked on newer models of their laptops, with each coming more powerful than the other. One of their most powerful laptops is the MSI GE76 10UH gaming laptop, and we will use it as a point of reference.

It has a core i9 processor with storage of 64 GB and 16GB RAM. These specs will allow it to comfortably run any game you could find without overclocking the laptop.

The screen is a 4K with 120HZ, which works amazingly when paired with the NVidia RTX 3080 Graphics.

The design and build quality of MSI laptops feel excellent, and it will be worth your money. The additional components make this laptop a bit heavy, and it weighs a little over 3 kilos which you won’t complain about because of the fantastic service.

They have relatively big screens, which work better for gaming. The GE76 has a 17.3-inch screen which is big enough to accommodate a fantastic gaming experience. You can also get a laptop with a 1080p high refresh screen if you don’t want a 4K monitor.

The laptop comes with a 1080p camera and excellent speakers, making it a good option for talking to another player online.

The keyboard has RGB lighting that illuminates all keys and functions; thus, you can use it in the dark.

The touchpad is 10.5 cm by 6.5 cm, which feels small considering the size of the laptop, but it works well after you get used to it.

You can control the operation of the fan in most MSI laptops which is a good addition for power conservation.

The laptop has settings to give the userspace to get the best environment for gaming. You can change the settings to suit your needs better and keep the processor in the right work-frame. Although they might be expensive, MSI laptops are worth every penny.

How To Choose A Gaming PC

MSI is one of the world’s best gaming laptop manufacturers, but what defines a gaming laptop? If you are a gamer and you want to shift from a console or PC to a laptop, what should you look for in the laptop?

The choice will be suitable and straightforward if you understand all the aspects that make a gaming laptop better than another. Let us get into the topic and give you all the answers you need.

The Screen

This aspect has a significant impact on your gaming experience since a low refresh rate will even fail to run some games.

The screen should have a high resolution to give you an excellent display with all videos and graphics moving streamlined.

The screen size and refresh rate are essential parts. A high refresh rate of about 120Hz will ensure that the games look and run better. You will be able to get the frames faster which will improve your gaming experience.

The Processing Power

This is the most crucial aspect when looking for a gaming laptop. Games require a powerful processor to run them and render all the sound and video graphics correctly.

If your laptop is not powerful enough, it will overheat and get damaged within a short time. The best gaming laptop should have a core i5 or higher processor that can go as high as 4.5 GHz.

A single-thread performance laptop will be more efficient in executing the game; thus, you won’t have the game hanging.

Overall Performance and Features

Some features make a gaming laptop unique, and missing them will ruin your experience. Your laptop should have a dedicated GPU to render the graphics in the games you play.

The fan should also be high performance since gaming takes a toll on the processor, which produces a lot of heat.

Without proper cooling systems, you would end up with an overheated laptop that will develop more issues with time.

Your laptop should also have ample storage space, or it should be compatible with a wide range of external storage options. Games are massive; thus, you need to have them stored someplace you can quickly access.

Conclusion

MSI has been one of the best laptop manufacturers in recent years, and they have the attention of most big-time gamers. They included a feature to prevent the laptop from charging 100%, increasing its lifespan.

You can disable this feature and charge your battery all the way if you need to move the laptop to a place with no power sources. The battery will sustain you for several years if you take good care of it.

When choosing a gaming laptop, make sure you get one with good specs. Get as high processing power and speed as you can, even if it will get expensive. It will be worth the money if you get the gaming laptop that will rock your world.

You May Like These Articles As Well:

Minecraft Base Ideas: The Best Ideas

How Much Does Water Cooling Cost: All You Need To Know

The Laptop Makes A Rattling Noise When Tilted. All You Need To Know